Avatar Controller
The next section is going to load a player Avatar and integrate a character controller to move it.
Add the Avatar Starter Sample Scene Components
The Avatar Starter sample scene has useful prefabs and scripts to create a character controller with a loaded Avatar.
Import the Avatar Starter Sample Scene
From the top menu, select Window > Package Manager window. Then select Packages: In Project on the top left dropdown and also select the Genies Avatar SDK package on the left side menu.
Click the Samples tab and click the Import button next to the Samples Starter Scene sample.
![]()
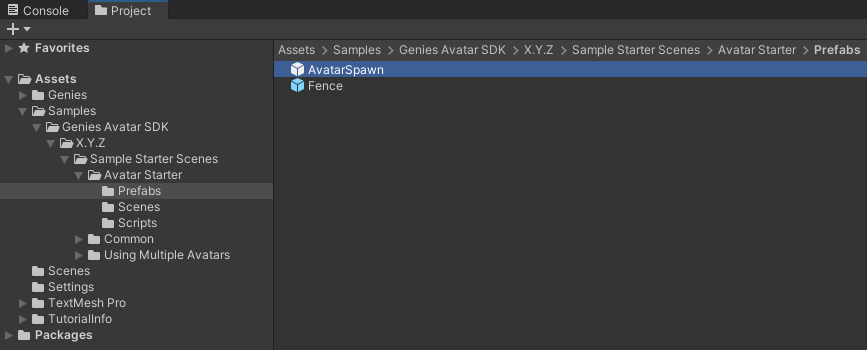
Add the Character Controller Prefab
In the Project window, open the Assets > Samples > Genies Avatar SDK > X.Y.Z > Sample Starter Scene > Avatar Starter > Prefabs folder. Drag the AvatarSpawn prefab into the scene.
This character controller prefab has script components that will control the Avatar by moving and jumping using user input.
Enable Touch Controls
In the Hierarchy, select the AvatarSpawn object. In the Inspector, make sure the Enable Touch Controls property is enabled.

This property allows mobile devices to use UI joystick and buttons for input.
Add the Load My Avatar Script
Create a new empty Game Object named LoadMyAvatar. In the Project window, open the Assets > Samples > Genies Avatar SDK > X.Y.Z > Sample Starter Scene > Avatar Starter > Scripts folder. Drag the LoadMyAvatar script into the LoadMyAvatar component list.
![]()
This script will load the Avatar once the user is logged in. It will also connect the animations and input systems to the character controller prefab scripts.
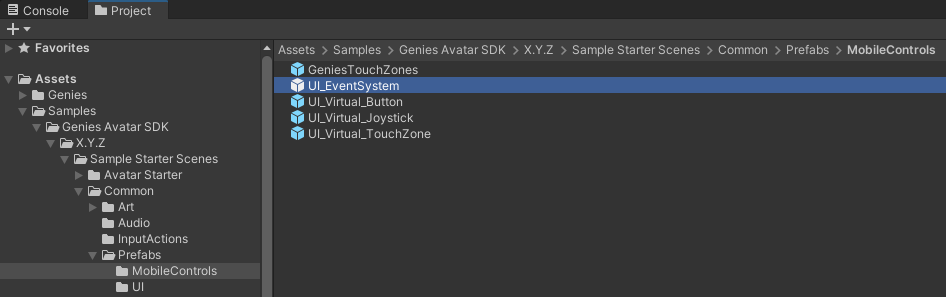
Add the Event System Prefab
In the Project window, open the Assets > Samples > Genies Avatar SDK > X.Y.Z > Sample Starter Scene > Common > Prefabs > MobileControls folder. Drag and drop the UI_EventSystem prefab into the scene.
Delete the Old Event System Prefab
In the previous section, an Event System was added to interact with the Login UI. Delete that Event System because the new one added is modified to work with the Avatar controller scripts.
Add the Touch Controls UI
In the Project window, open the Assets > Samples > Genies Avatar SDK > X.Y.Z > Sample Starter Scene > Common > Prefabs > MobileControls folder. Drag and drop the GeniesTouchZones prefab into the scene.
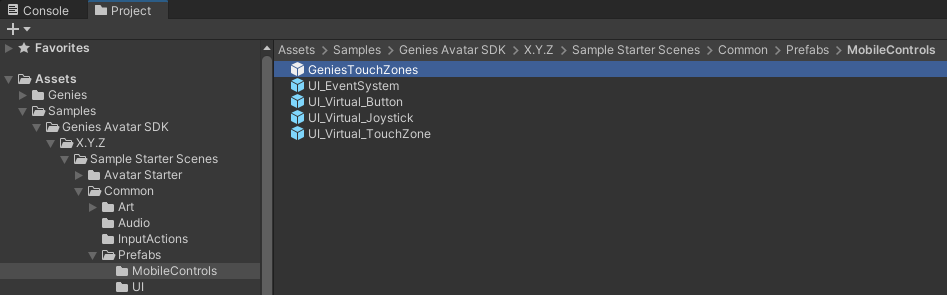
This prefab has the UI for the move joystick, run button, and jump button.
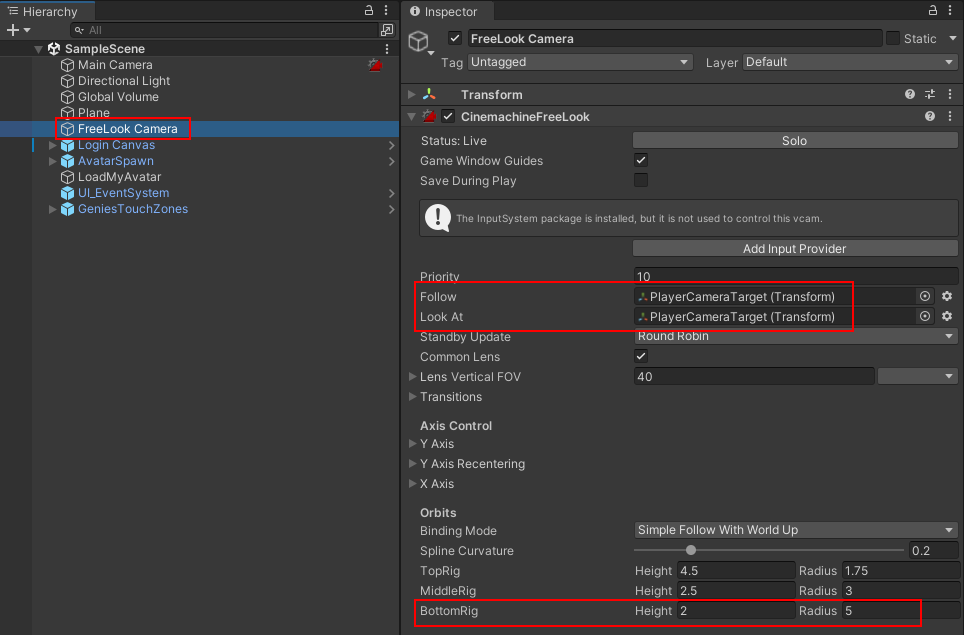
Setup the Camera
The Cinemachine camera needs to be setup to follow the loaded Avatar.
Select the FreeLook Camera object and open the Inspector. Add the PlayerCameraTarget object (which is a child object of the AvatarSpawn prefab) to the Follow and Look At properties. Then set the BottomRig property to Height: 2 and Radius: 5.
Setup the Load My Avatar Component
Find the Avatar Animator
In the Project window, open the Packages > Genies Avatar SDK > Internal > Avatars > Runtime > Assets > CommonAnimations folder. Inside is the GeniesAvatarAnimator asset needed in the next step.
![]()
This folder contains a default animator and animation assets used by the Avatar Starter sample scene to animate the Avatar as it moves and jumps.
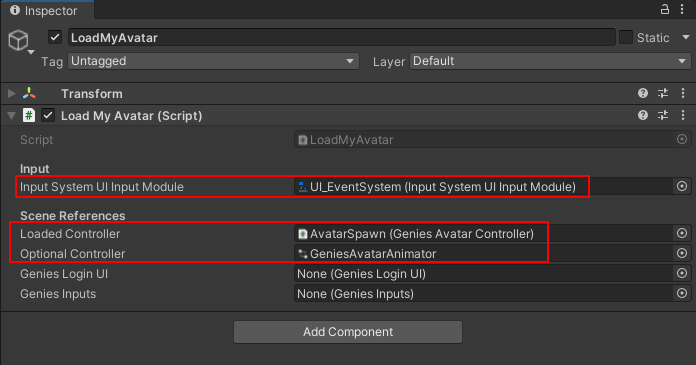
Add the Component Properties
In the Hierarchy window, select the LoadMyAvatar object and open the Inspector window.
Add the following properties to the LoadMyAvatar component:
- Add the UI_EventSystem object to the Input System UI Input Module property.
- Add the AvatarSpawn object to the Loaded Controller property.
- Add the GeniesAvatarAnimator asset to the Optional Controller property.
Test the Character Controller
Enter Play mode. After logging in, the Avatar should spawn and be controllable with the touch controls.
You may need to calibrate the FreeLook Camera properties for more optimal camera movement.