Update the SDK
When updating the Genies Avatar SDK from one version to another, it is important to remove the old package before importing the new package. This will avoid any issues.
How to Update the SDK
These steps will show how to install version 1.3.1 from version 1.0.1 but this can be applied to any version upgrade.
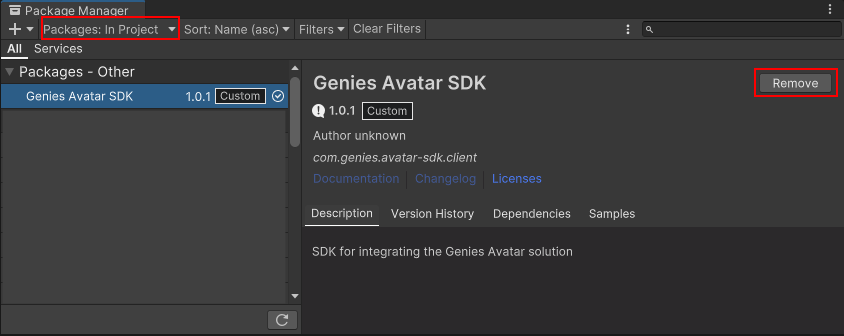
Remove the Package
In the Package Manager window, select the Packages: In Project option in the top left dropdown. Then select the Genies Avatar SDK package in the left menu, and click the Remove button at the top right.
Sometimes removing a package is not possible while Unity is open. In those cases, close Unity and delete the package manually through the file explorer.
Confirm the Removal
A popup window will appear to confirm the removal of the package in development. Press the Yes button.

Ignore the Restart
During the removal process, a popup window will request for Unity to restart because the Active Input Handling has changed. Press the Ignore button.

Restarting the Unity Editor is not required until the new version of the Genies Avatar SDK is successfully installed using the Bootstrap Wizard.
Delete the Samples
In the Project window, delete the Samples folder.

Confirm the Deletion
A popup window will appear to confirm the deletion of the Samples folder. Press the Delete button.

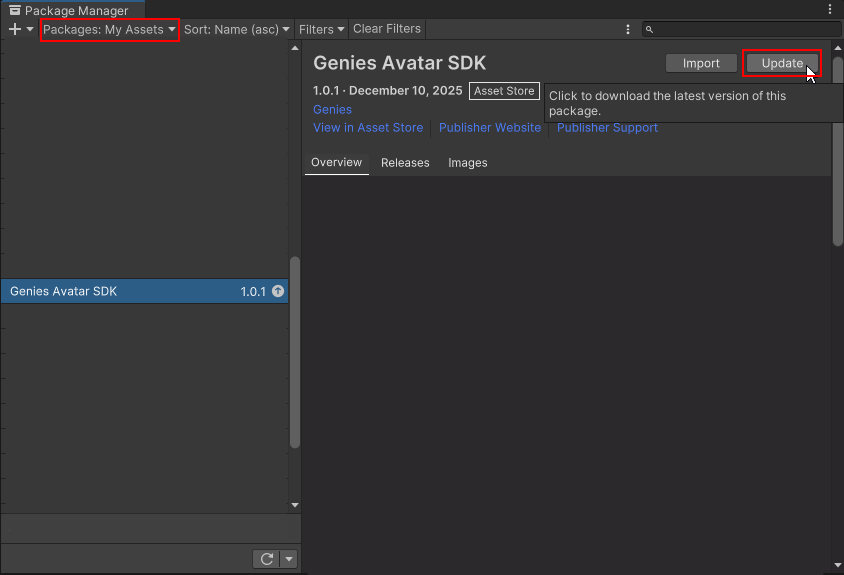
Update the Package
In the Package Manager window, select the Packages: My Assets option in the top left dropdown. Then select the Genies Avatar SDK package in the left menu, and click the Update button at the top right.
The Unity editor may need to be restarted for the update version to display in the Package Manager.
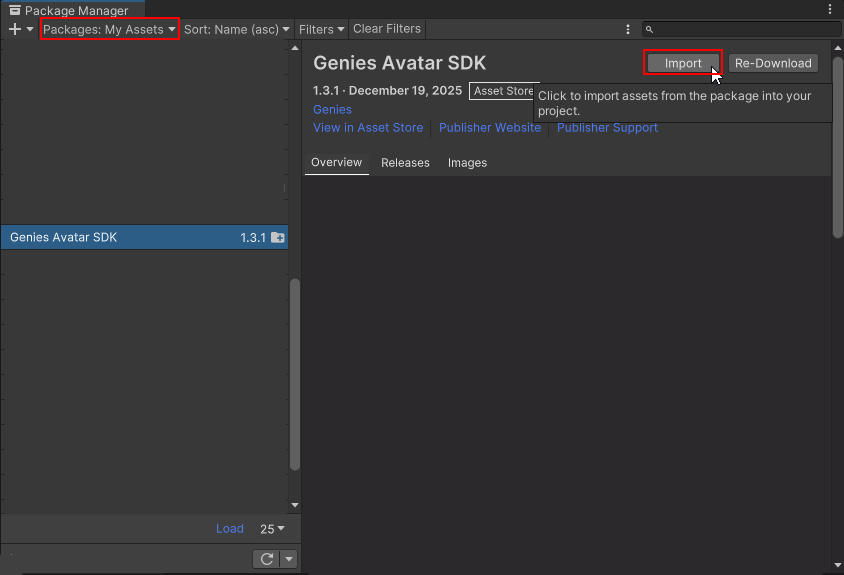
Import the Package
Once the package is updated, click the Import button at the top right.
Follow the Getting Started tutorial for instructions on how to install the latest Avatar SDK package version.