Reward Users with Custom Wearables
This tutorial will show you how you can submit a wearable asset to the Developer Portal and reward it to a user during gameplay.
It will cover these topics:
- Submitting a wearable asset to Developer Portal.
- An overview of the asset review process.
- Gifting the published asset to a player.
(Optional) Create a Wearable Asset
Follow the Wearable Creation Guidelines to create your own wearable asset with a 3d modeling software of your choice.
For this tutorial it is not required to create your own wearable asset. This tutorial will use an asset from the free Genies Clothing Pack as an example.
Download a Wearable Asset
Add the Clothing Pack Package
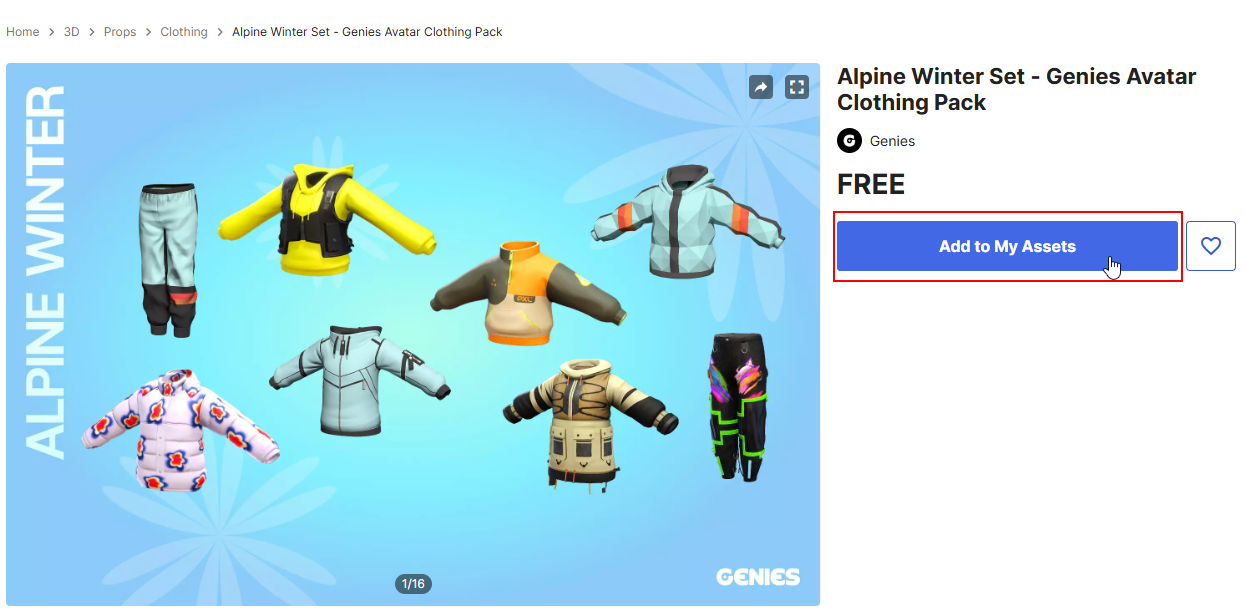
Open the Alpine Winter Set - Genies Avatar Clothing Pack in the Unity Asset Store. Click the Add to My Assets button.
You can also use an asset from these three free Genies Avatar Clothing Packs as well:
Open the Package in Unity
Click the Open in Unity button to open the package's page within the Unity Editor.
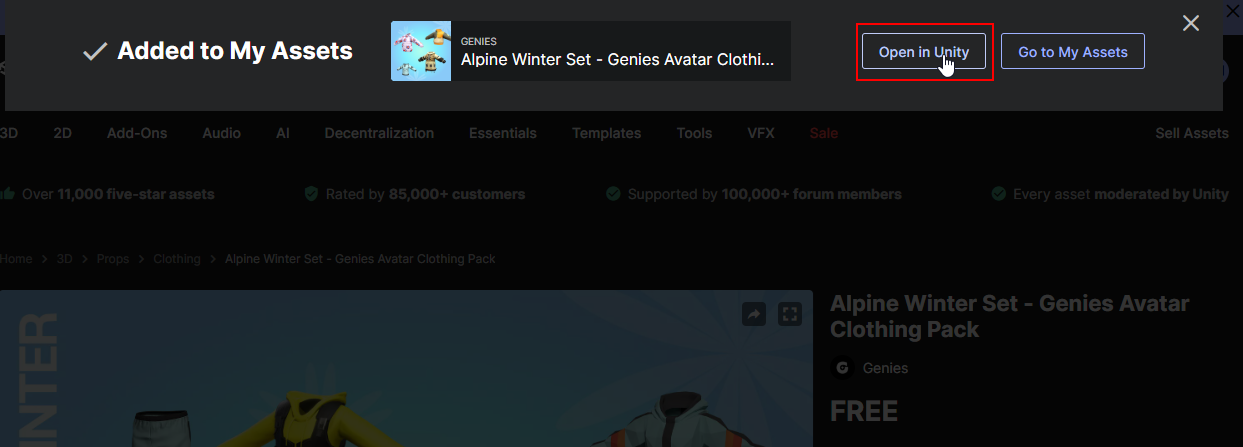
The Unity Editor needs to be opened for this action to work.
Download the Package
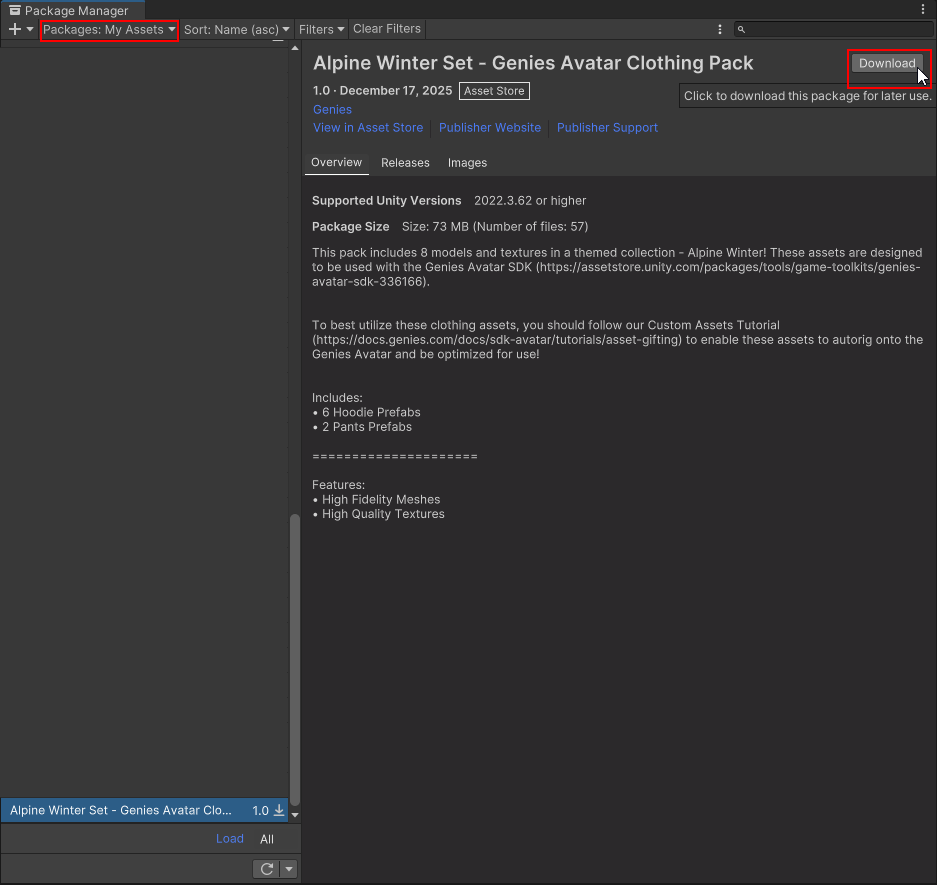
In the Package Manager window, click the Download button at the top right.
Import the Package
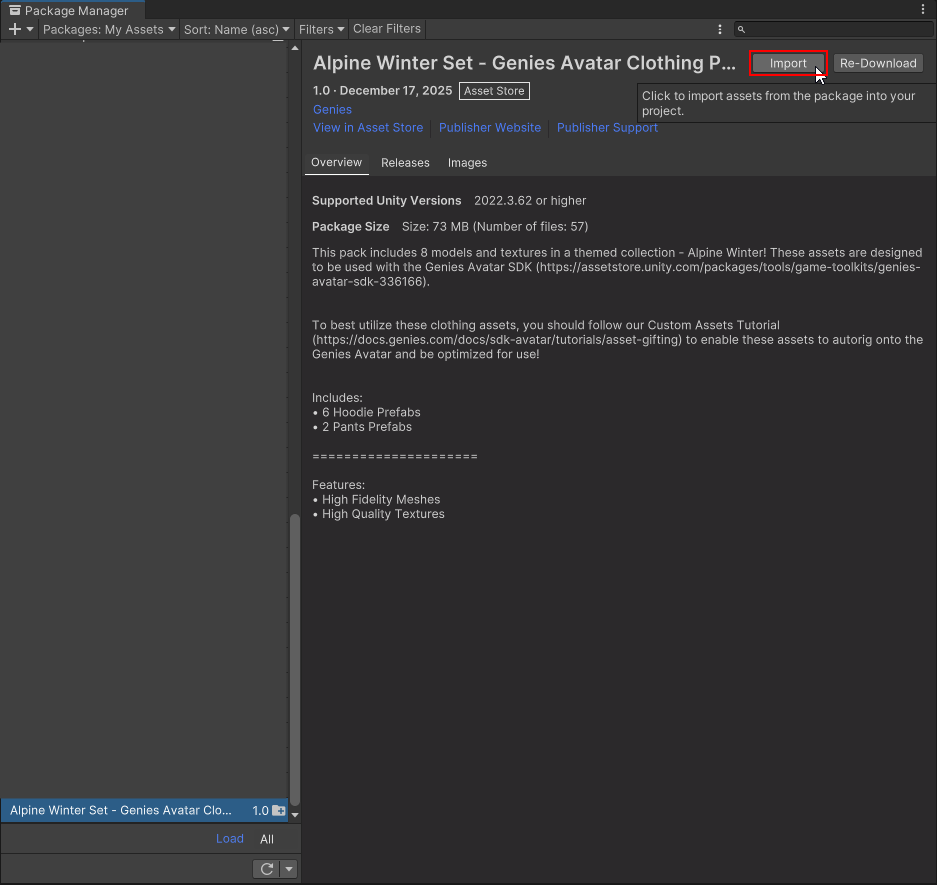
Once downloaded, click the Import button at the top right.
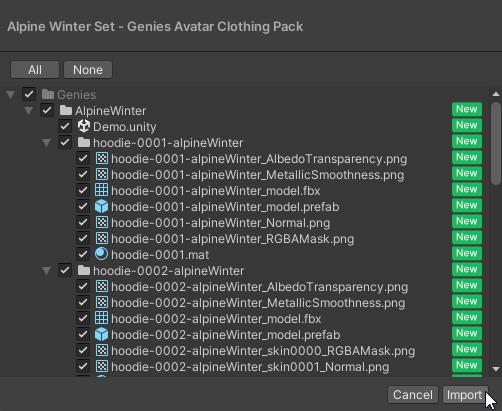
Import All Assets
The import window will appear. Click the All button at the top left and then click the Import button at the bottom right.
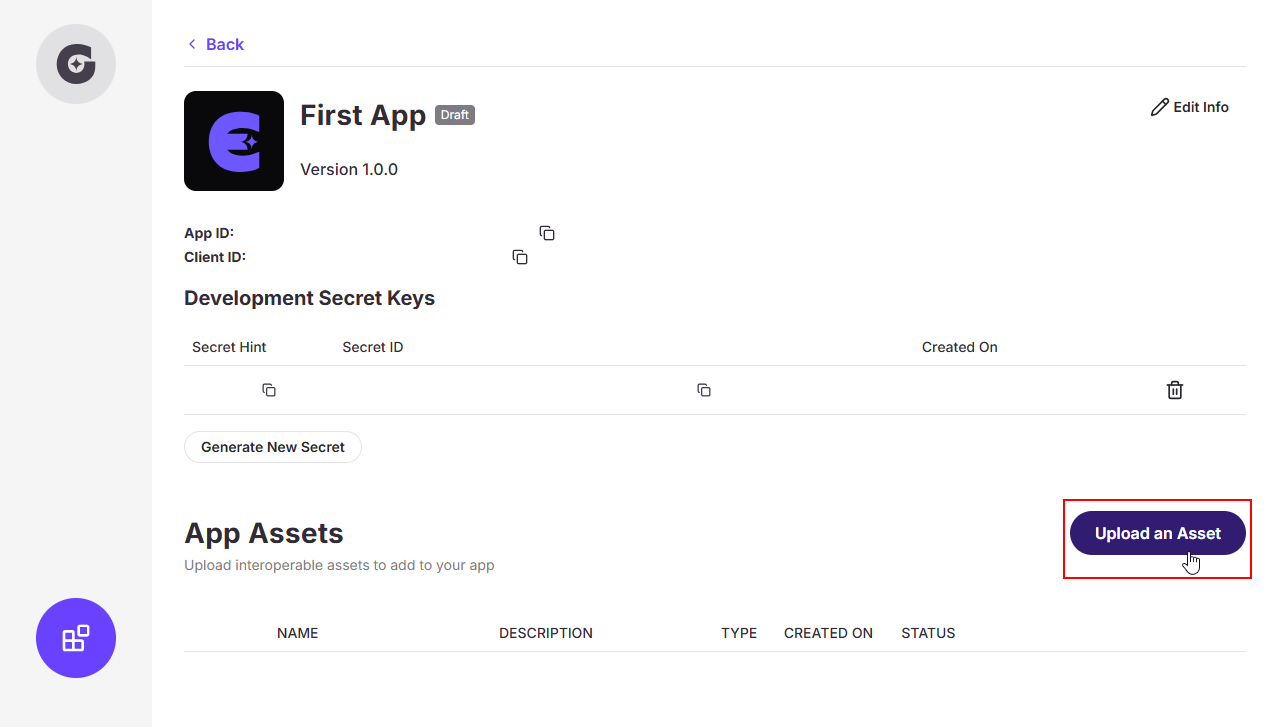
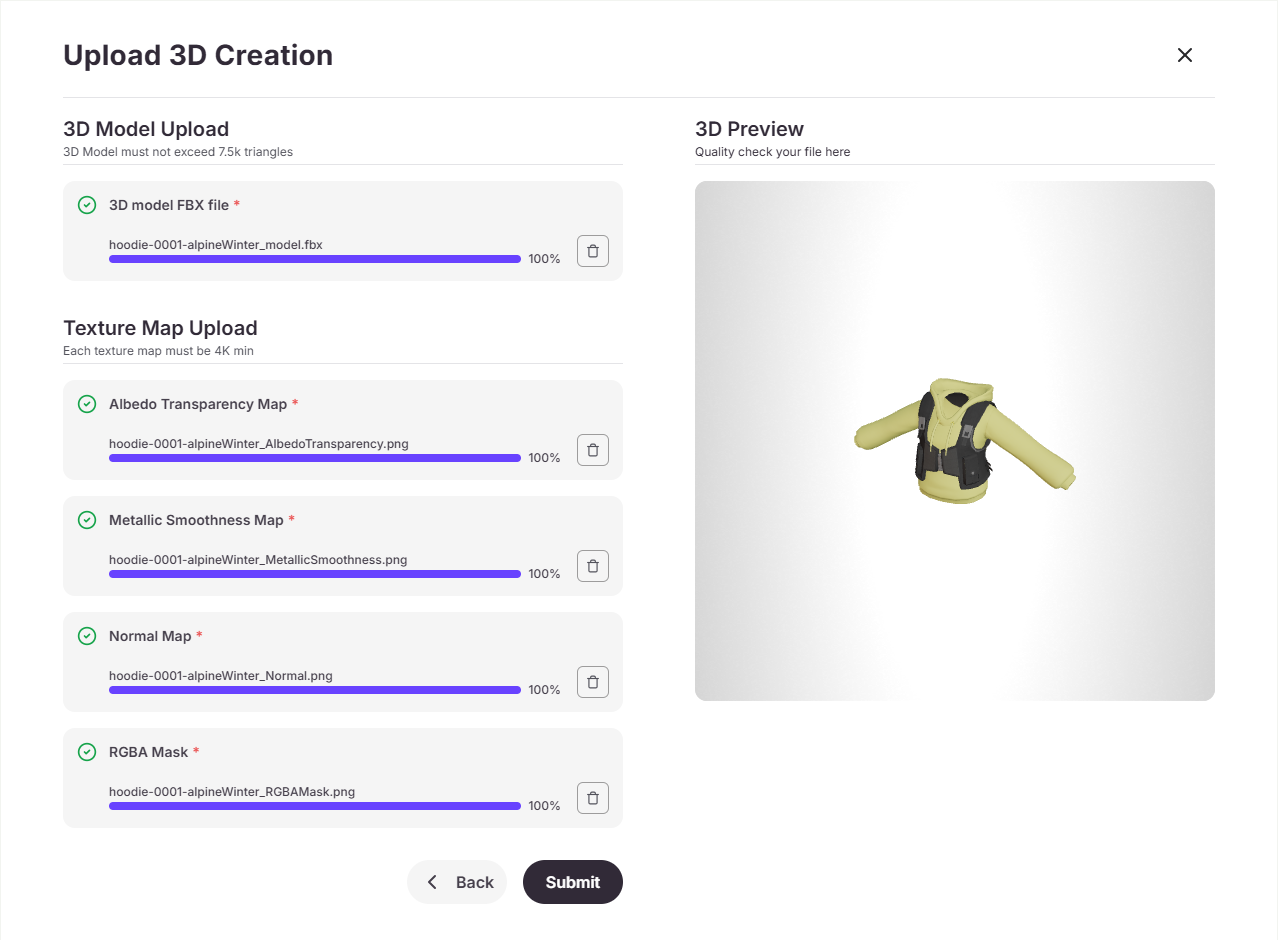
Upload the Wearable Asset
Open Developer Portal
Log into the Developer Portal. Open the Genies app page that is linked to your current Unity project. Press the Upload an Asset button.
Add the Wearable Details
Add in the necessary details for your wearable asset. Click the Next button.
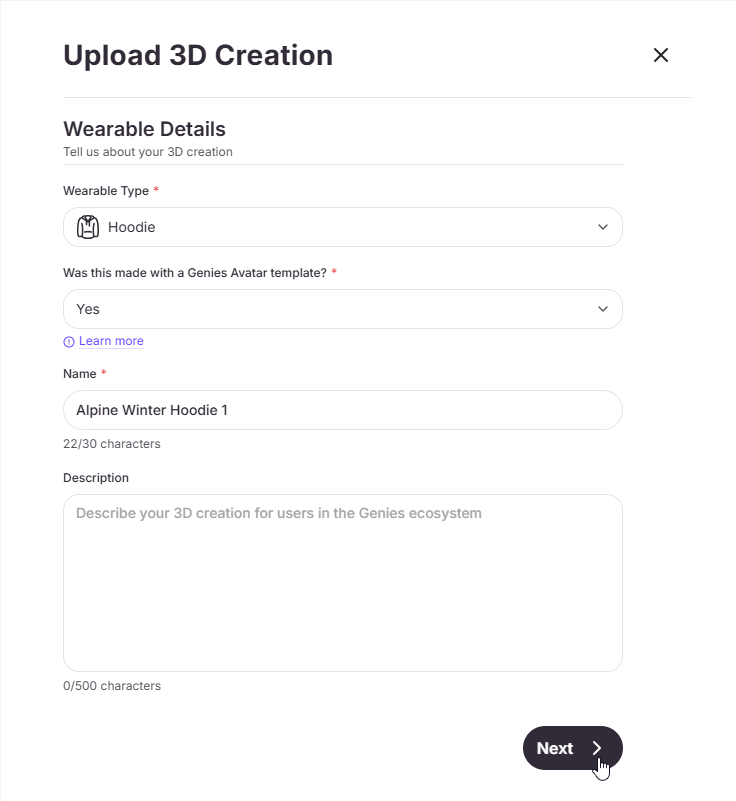
The Wearable Type is important to accurately tag, so that the item appears in the proper inventory slot. The Name cannot be changed once submitted.
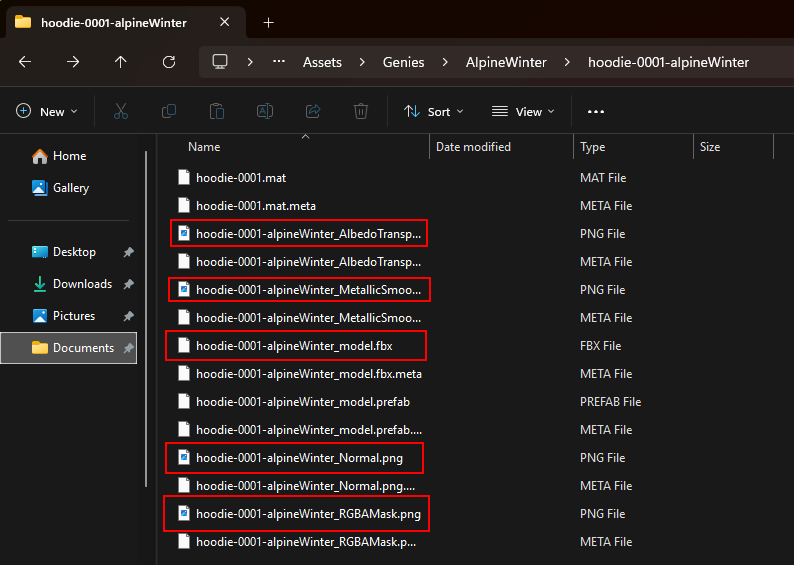
Find the Asset Files
In order to upload a wearable, you will need 5 files.
- The FBX file of the 3D model
- The Albedo Transparency Map
- The Metallic Smoothness Map
- The Normal Map
- The RGBA Mask
Open your file directory to the Unity project root folder. Then open the Assets > Genies > AlpineWinter > hoodie-0001-alpineWinter folder to find all 5 asset files.
Upload the Asset Files
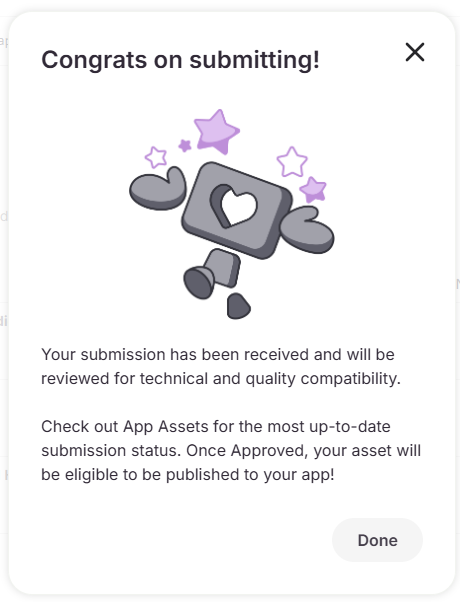
Upload the 5 asset files into the appropriate fields. Once all 5 assets are added, the 3D Preview screen should display the asset. If it looks correct, then click the Submit button.
Wait for Asset Processing
Once you submit your asset, you will need to wait a couple minutes for the asset to process through our pipeline.
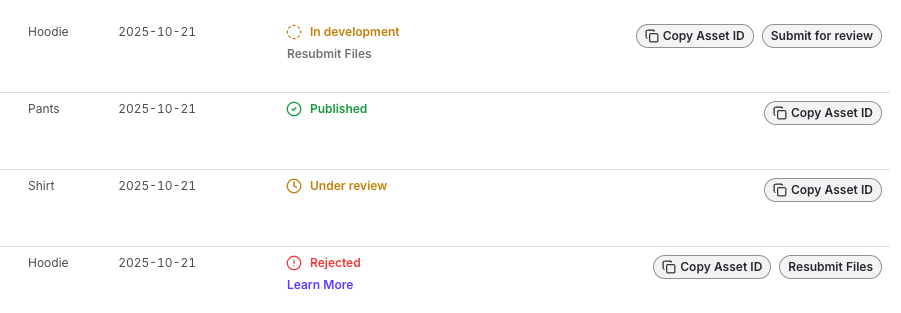
There are several stages the asset goes through as it is being processed:
- Queued: The asset is currently in queue to be processed.
- Processing: The asset is currently being processed in our content pipeline.
- In Development: The asset is ready for you to submit for review.
- Under Review: The asset is currently in our review pipeline. This may take up to 24 hours to manually review.
- Rejected: The asset did not pass our content review. Here, you will also see a note on why your asset was rejected.
- Published: The asset was approved and can now be given to a user. You will need to
Copy Asset IDto use within Unity.
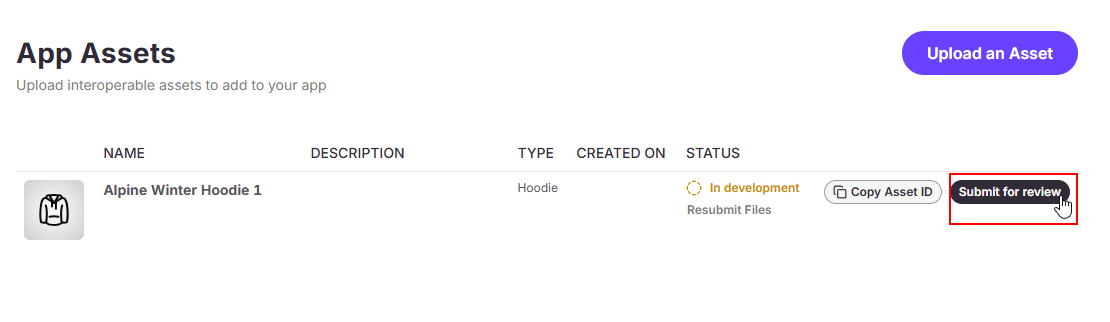
Submit for Review
Once your asset has been processed, click the Submit for review button. This is a manual review by Genies so it may take up to 24 hours to be reviewed.
Reach out to Genies Support page if you have any questions about your upload review.
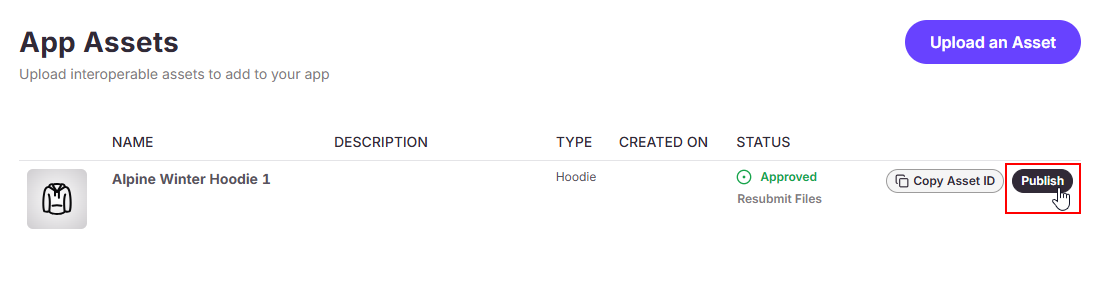
Publish the Asset
Once your asset has been reviewed and you see the Approved status, you can press the Publish button, and your asset will be available to be gifted!
Gift the Asset to Yourself
Download the Sample Scenes
Download the Debug SDK Functions and Creating an Avatar Editor sample scene using the Bootstrap Wizard or Package Manager window.

Follow the Debug SDK Functions or Creating Custom Editor sample scene page if you need help downloading and using the sample scenes.
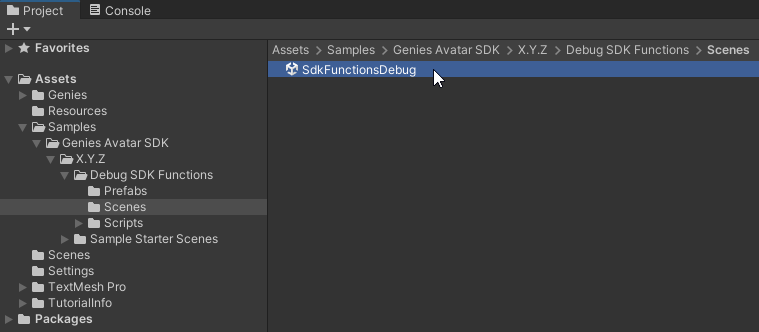
Open the Debug Sdk Samples Scene
In your Project window, open the Assets > Samples > Genies Avatar SDK > X.Y.Z > Debug SDK Functions > Scenes folder. Double-click the SdkFunctionsDebug scene to open it.
Spawn the User Avatar
Play the scene and spawn the user Avatar.
![]()
Add User Avatar to Editor Debugger
Select the AvatarEditorDebugger object which is a child to the Editor_RuntimeSdkFunctions object. Drag and drop the User Genies Avatar into the Avatar To Debug property.
![]()
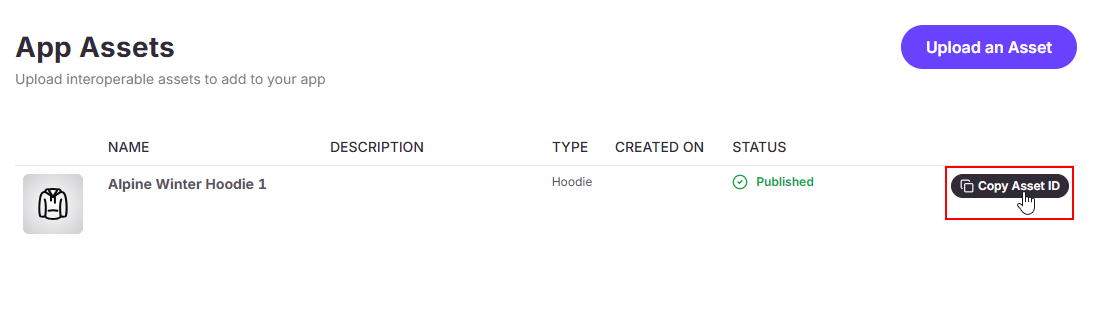
Copy the Asset ID
In the Genies app page, press the Copy Asset ID button.
Paste the Asset ID
In the SDK Editor Debug Wearables component of the AvatarEditorDebugger object, paste the asset ID into the Asset ID to Grant input field.
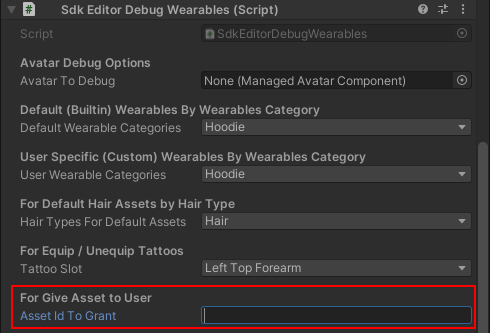
Grant the Asset
Then click the Give Asset to User button.

Anonymous users cannot be granted custom wearables. This is because anonymous users do not have access to Genies servers and adding a custom wearable to a user's inventory requires using Genies servers.
Confirm the Asset is Granted
A dialogue window should appear that confirms the asset has been given to the user.

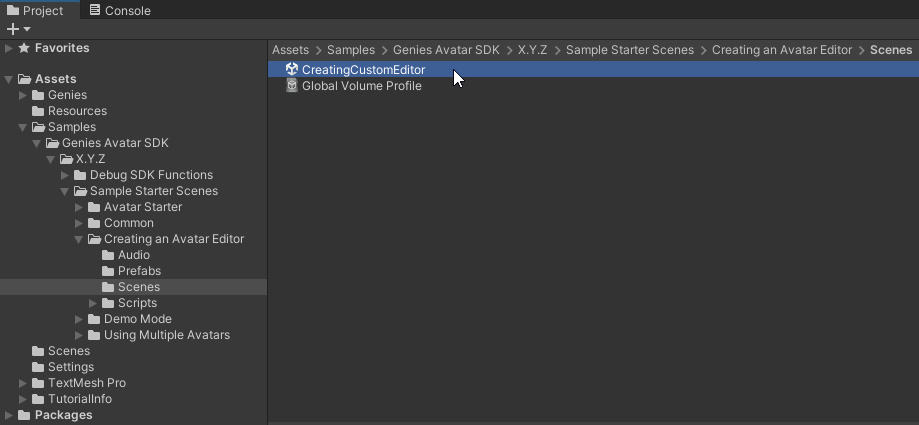
Open the Avatar Editor Sample Scene
In your Project window, open the Assets > Samples > Genies Avatar SDK > X.Y.Z > Sample Starter Scenes > Creating an Avatar Editor > Scenes folder. Double-click the CreatingCustomEditor scene to open it.
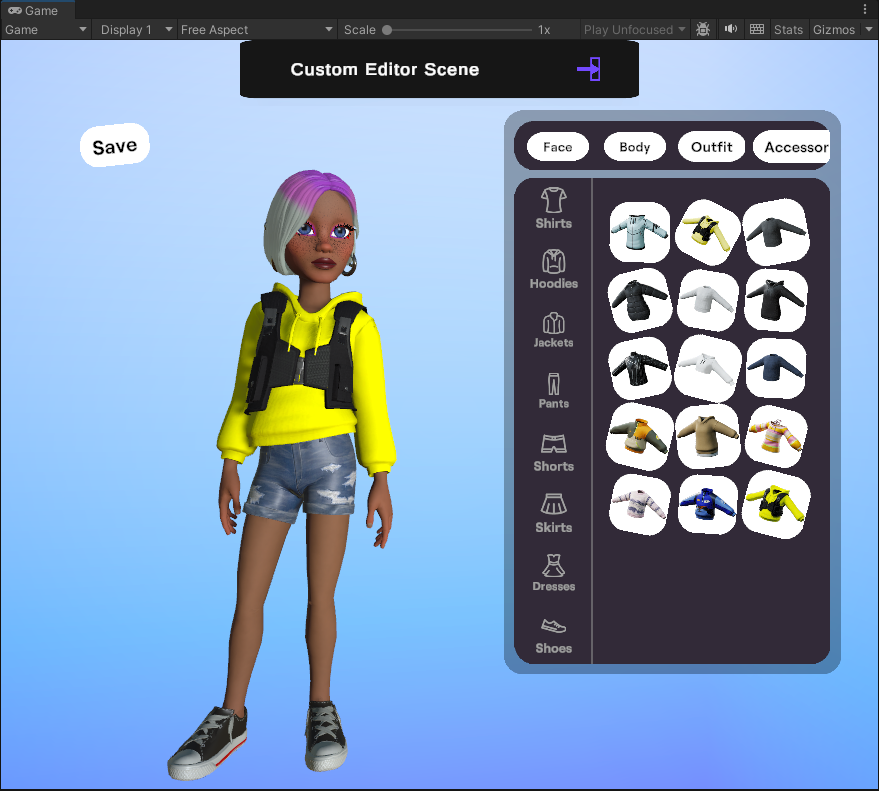
Equip the Custom Wearable
Play the sample scene. Open the Avatar Editor and you should now see the custom wearable and be able to equip it.
Gift the Asset to Users
Copy the Asset ID
In the Genies app page, press the Copy Asset ID button.
Grant the Asset
The API method GiveAssetToUserAsync requires the asset ID string. It will return a results object to determine if it succeeded and a reason if it failed.
// Function definition for gifting an asset
private async GiveAssetToUserAsync(string assetId)
{
    var result = await Genies.Sdk.AvatarSdk.GiveAssetToUserAsync(assetId);
    if(result.succeeded) {
        Debug.Log("Asset has been granted to user!");
    }else{
        Debug.Log("Error: Asset could not be granted. Reason: " + result.failReason);
    }
}

// Function to call in code
GiveAssetToUserAsync("pasteAssetIdHere");
Once the asset is given to a user, they will then see it in their inventory.