Properties
The MegaStylizer shader has many different properties to customize it. The properties are broken up into 10 categories.
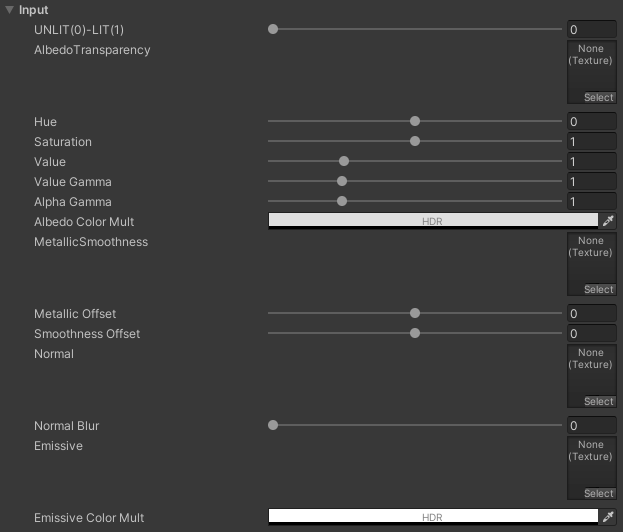
Input
- UNLIT(0) - LIT(1): if you want a look more stylized, stick with 0, or lower values. The closer to 1, the more traditional PBR shader you get (good if you want to match traditional workflows).
- AlbedoTransparency: where we plug our albedo and transparency map, using the URP workflow if we have one.
- Hue, Saturation, Value: traditional simple color correction.
- Value Gamma: albedo contrast without affecting the colors.
- Alpha Gamma: transparency contrast, to grow or shrink a bit the edges.
- Albedo Color Mult: color that gets multiplied by the albedo map. Useful to tint it (ie. night look), brighten or darken it, or do color balance if needed.
- MetallicSmoothness: where we plug our metallic and softness (glossiness) map, using the URP workflow if we have one.
- Metallic Offset: to compensate if the metallic map metalness is off.
- Smoothness Offset: to compensate if the metallic map softness (glossiness) is off.
- Normal: where we plug our normal map if we have one.
- Normal Blur: shitty Gaussian Blur to reduce things like noise in the normal map.
- Emissive: where we plug our emissive map map if we have one.
- Emissive Color Mult: color that gets multiplied by the emissive map. Useful to tint it, brighten or darken it, or do color balance if needed.
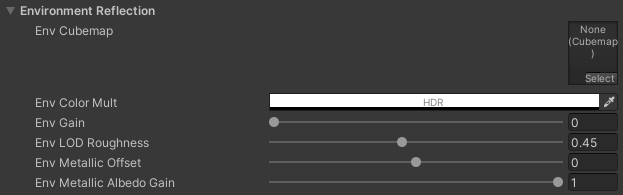
Environmental Reflection
- Env Cubemap: where we plug a cubemap to simulate fake reflections. This can be useful if we want to make an unlit material with some stylized reflections, or if we want to reflect something different to the environment, as the reflections would live inside the material.
- Env Color Mult: color that gets multiplied by the cubemap. Useful to tint it, brighten or darken it, or do color balance if needed.
- Env Gain: value that gets multiplied by the cubemap. 0 means no reflection, 1 means reflection original intensity. Any other value will result in is less or more intensity.
- Env LOD Roughness: if there is no MetallicSmoothness map, you can use this to achieve different roughness by using different cubemap LODs.
- Env Metallic Offset: easy way to adjust how metallic the environment reflection looks.
- Env Metallic Albedo Gain: if set to 0, the reflection will show over black, making it more contrasted (1 = aluminum, 0 = steel).
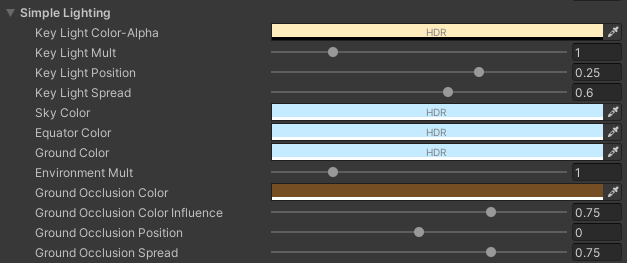
Simple Lighting
- Key Light Color-Alpha: color of the main light. By default, the alpha is set to 0, so the color of the light is taken from the MainLight. If we increase the alpha, we will use a % of this color until reaching 100%, when we will use it entirely.
- Key Light Mult: multiplier of Key Light Color-Alpha, to make the light more or less intense.
- Key Light Position: this property will move the terminator of the light, covering more or less, depending on the value.
- Key Light Spread: how much contrast the terminator has. The more you add the softer the terminator is.
- Sky Color: environment color coming from the top.
- Equator Color: environment color coming from the horizon.
- Ground Color: environment color coming from the bottom.
- Environment Mult: multiplier of Sky, Equator and Ground colors to make the environment more or less intense.
- Ground Occlusion Color: color of the ground occlusion (darker gradient to fake ambient occlusion that shows up when the surface is close to the ground).
- Ground Occlusion Color influence: how much ground occlusion we want.
- Ground Occlusion Position: height of the ground (the ground is always expected to be a plane).
- Ground Occlusion Spread: how contrasted or spread is the ground occlusion gradient.
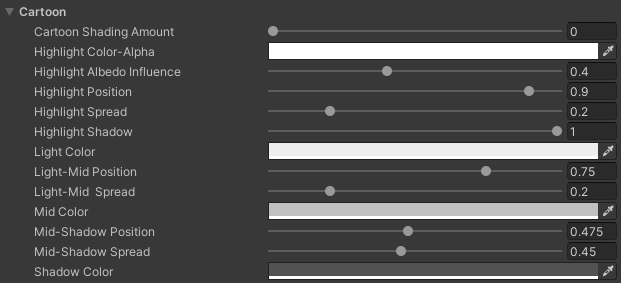
Cartoon
- Cartoon Shading Amount: amount of cartoon cel shading. 0 is none and 1 is 100%. Allows for blending, that can create interesting effects.
- Highlight Color-Alpha: color of the highlight. The alpha fades the highlight. 0 is no visible, and 1 is 100% visible.
- Highlight Albedo Influence: 0 means the highlight color is pure (more stylized), and 1 means that is 100% multiplied by the albedo (making it more realistic).
- Highlight Position: how much surface the highlight covers.
- Highlight Spread: how sharp or soft is the terminator of the highlight. 0 is 100% sharp, and 1 is very soft.
- Highlight Shadow: how much the shadow affects the highlight. Is set to 1 by default to achieve a more realistic light interaction but can be lowered or removed for specific effects.
- Light Color: color of the bright part of the shader (ignoring the highlight).
- Light-Mid Position: placement of the division between light and mid.
- Light-Mid Spread: how sharp or soft is the division between light and mid.
- Mid Color: color of the midtones of the shader.
- Mid-Shadow Position: placement of the division mid and shadow.
- Mid-Shadow Spread: how sharp or soft is the division between mid and shadow.
- Shadow Color: color of the shade part of the shader.
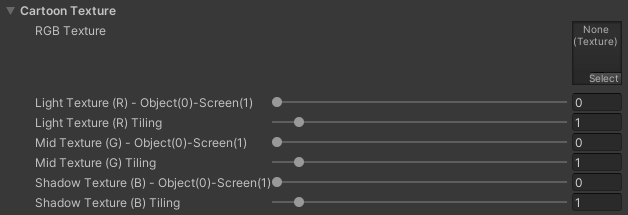
Cartoon Textures
- RGB Texture: RGB texture in which the R channel is a black and white texture that is multiplied by the Light Color, the G channel is a black and white texture that is multiplied by the Mid Color and the B channel is a black and white texture that is multiplied by the Shadow Color. This can be used to create effects like crosshatching.
- Light Texture (R) - Object(0)-Screen(1): value that only accepts 0 or 1 (nothing in-between), and controls if the R channel texture is applied following the object’s UVs (0) or the screen space (1).
- Light Texture (R) Tiling: repetition of the R channel texture. The higher the number the more times it will tile.
- Mid Texture (G) - Object(0)-Screen(1): value that only accepts 0 or 1 (nothing in-between), and controls if the G channel texture is applied following the object’s UVs (0) or the screen space (1).
- Mid Texture (G) Tiling: repetition of the G channel texture. The higher the number the more times it will tile.
- Shadow Texture (B) - Object(0)-Screen(1): value that only accepts 0 or 1 (nothing in-between), and controls if the B channel texture is applied following the object’s UVs (0) or the screen space (1).
- Shadow Texture (B) Tiling: repetition of the B channel texture. The higher the number the more times it will tile.
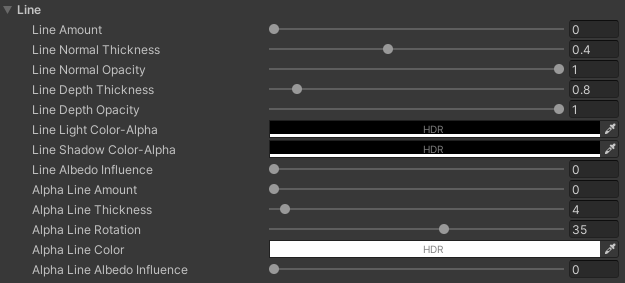
Line
- Line Amount: opacity of the line (cartoon line). 0 is no visible at all, and 1 is 100% opaque.
- Line Normal Thickness: width of the line generated from the normal buffer.
- Line Normal Opacity: opacity of the line generated from the normal buffer.
- Line Depth Thickness: width of the line generated from the depth buffer.
- Line Depth Opacity: opacity of the line generated from the depth buffer.
- Line Light Color-Alpha: color of the line where hit by the Main Light. The alpha controls its opacity.
- Line Shadow Color-Alpha: color of the line where hidden from the Main Light. The alpha controls its opacity.
- Line Albedo Influence: controls if the line retains its original color (0) or if it’s multiplied by the albedo (1).
- Alpha Line Amount: opacity of the alpha line (2D directional cartoon line). 0 is no visible at all, and 1 is 100% opaque.
- Alpha Line Thickness: width of the alpha line.
- Alpha Line Rotation: as the alpha line is directional, angle of that direction.
- Alpha Line Color: color of the alpha line.
- Alpha Line Albedo Influence: controls if the alpha line retains its original color (0) or if it’s multiplied by the albedo (1).
Line Texture
- Line Texture: texture map that defines the opacity appearance of line. Useful to create effects like the line was drawn with a pencil.
- Line Texture Brightness: controls the overall brightness of the line texture.
- Line Texture Contrast: adjusts the contrast level of the line texture.
- Line Texture Tiling: specifies the tiling of the line texture.
- Line Texture - Object(0)-Screen(1): value that only accepts 0 or 1 (nothing in-between), and controls if the line texture is applied following the object’s UVs (0) or the screen space (1).

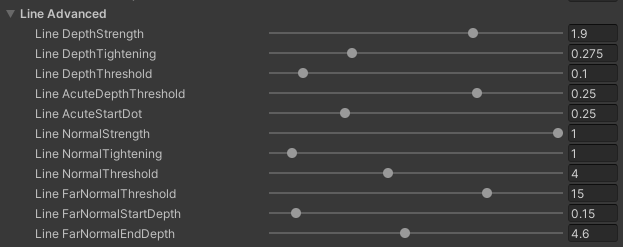
Line Advanced
These parameters are setup in a way that don’t need to be changed.
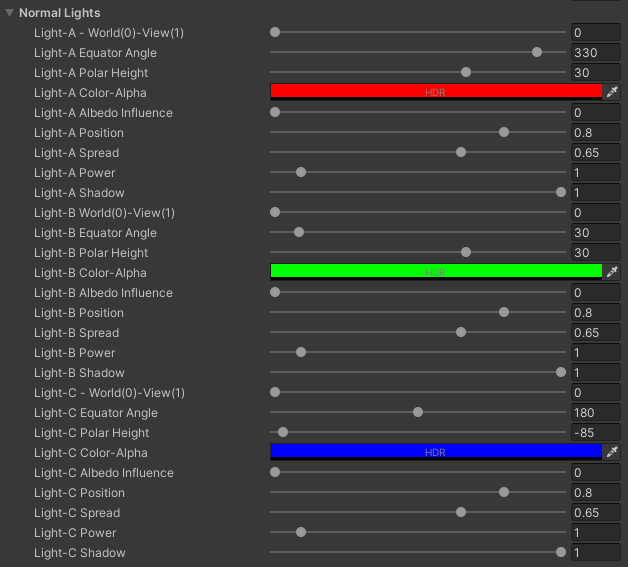
Normal Lights
- Light-A - World(0)-View(1): chooses between World coordinates (0) and View coordinates (1) for the light direction. World coordinate would be the equivalent to a light that is places in the scene and doesn’t move. View coordinates would be the equivalent to a light that is parented to the camera and moves when the camera move, ideal for rim lights.
- Light-A Equator Angle: angle of rotation of the normal light horizontally. You can use it to make the light come from the front, sides, back, etc.
- Light-A Polar Height: angle of rotation of the normal light vertically. You can use it to make the light come from the front, top, down, etc.
- Light-A Color-Alpha: color of the light, and intensity of the light. Alpha to 0 means the light won’t be visible, alpha to 1 means the light is fully visible.
- Light-A Albedo Influence: determines if the color of the light is added as a flat color (more stylized), or if it is multiplied by the albedo (more realistic).
- Light-A Position: position of the light terminator over the surface. The higher the value the more the light will cover the object.
- Light-A Spread: how hard or smooth is the light terminator.
- Light-A Power: gamma of the coverage of the light. We can use it to harden or soften the look of the lighting.
- Light-A Shadow: this controls if shadows will affect this normal light. By default, the shadows do affect the light. IMPORTANT: these shadows are not the ones casted by the normal light, but the Main Light.
- Lights B and C are basically 2 more normal lights offering the same properties as Light A.
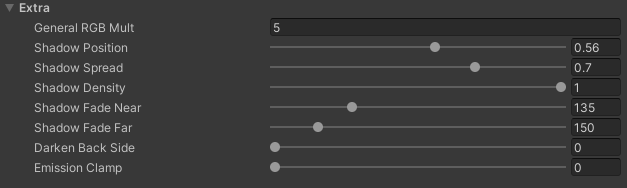
Extra
- Shadow Position: kind of moves the shadow over the surface, but it’s easy to break it if you choose a value other than the default one.
- Shadow Spread: makes the shadow harder or softer. The default value is optimal.
- Shadow Density: opacity of the shadow. 1 means the shadows is as visible as it can get, and 0 means no shadow.
- Shadow Fade Near: MegaStylizer supports shadows and cascading, but something it doesn’t support is the “Last Border” setting that fades away the shadow when the objects are too far. This value is the distance at when the shadow will start to fade.
- Shadow Fade Far: and this is the value where the shadow is fully invisible (Cnt’ed from the previous property).
- Darken Back Side: value to darken the back side of a double-sided material. Usually, the same values are used on the back side, so this allows us to have a darker version inside if needed (ie. the interior of a jacket).
- Emission Clamp: if the material causes issues with the antialiasing, or bloom, you can use Emission Clamp to clamp the final result.