Quickstart
Create a New Project
The first step to get started with the Experience SDK is to create a new Unity project.
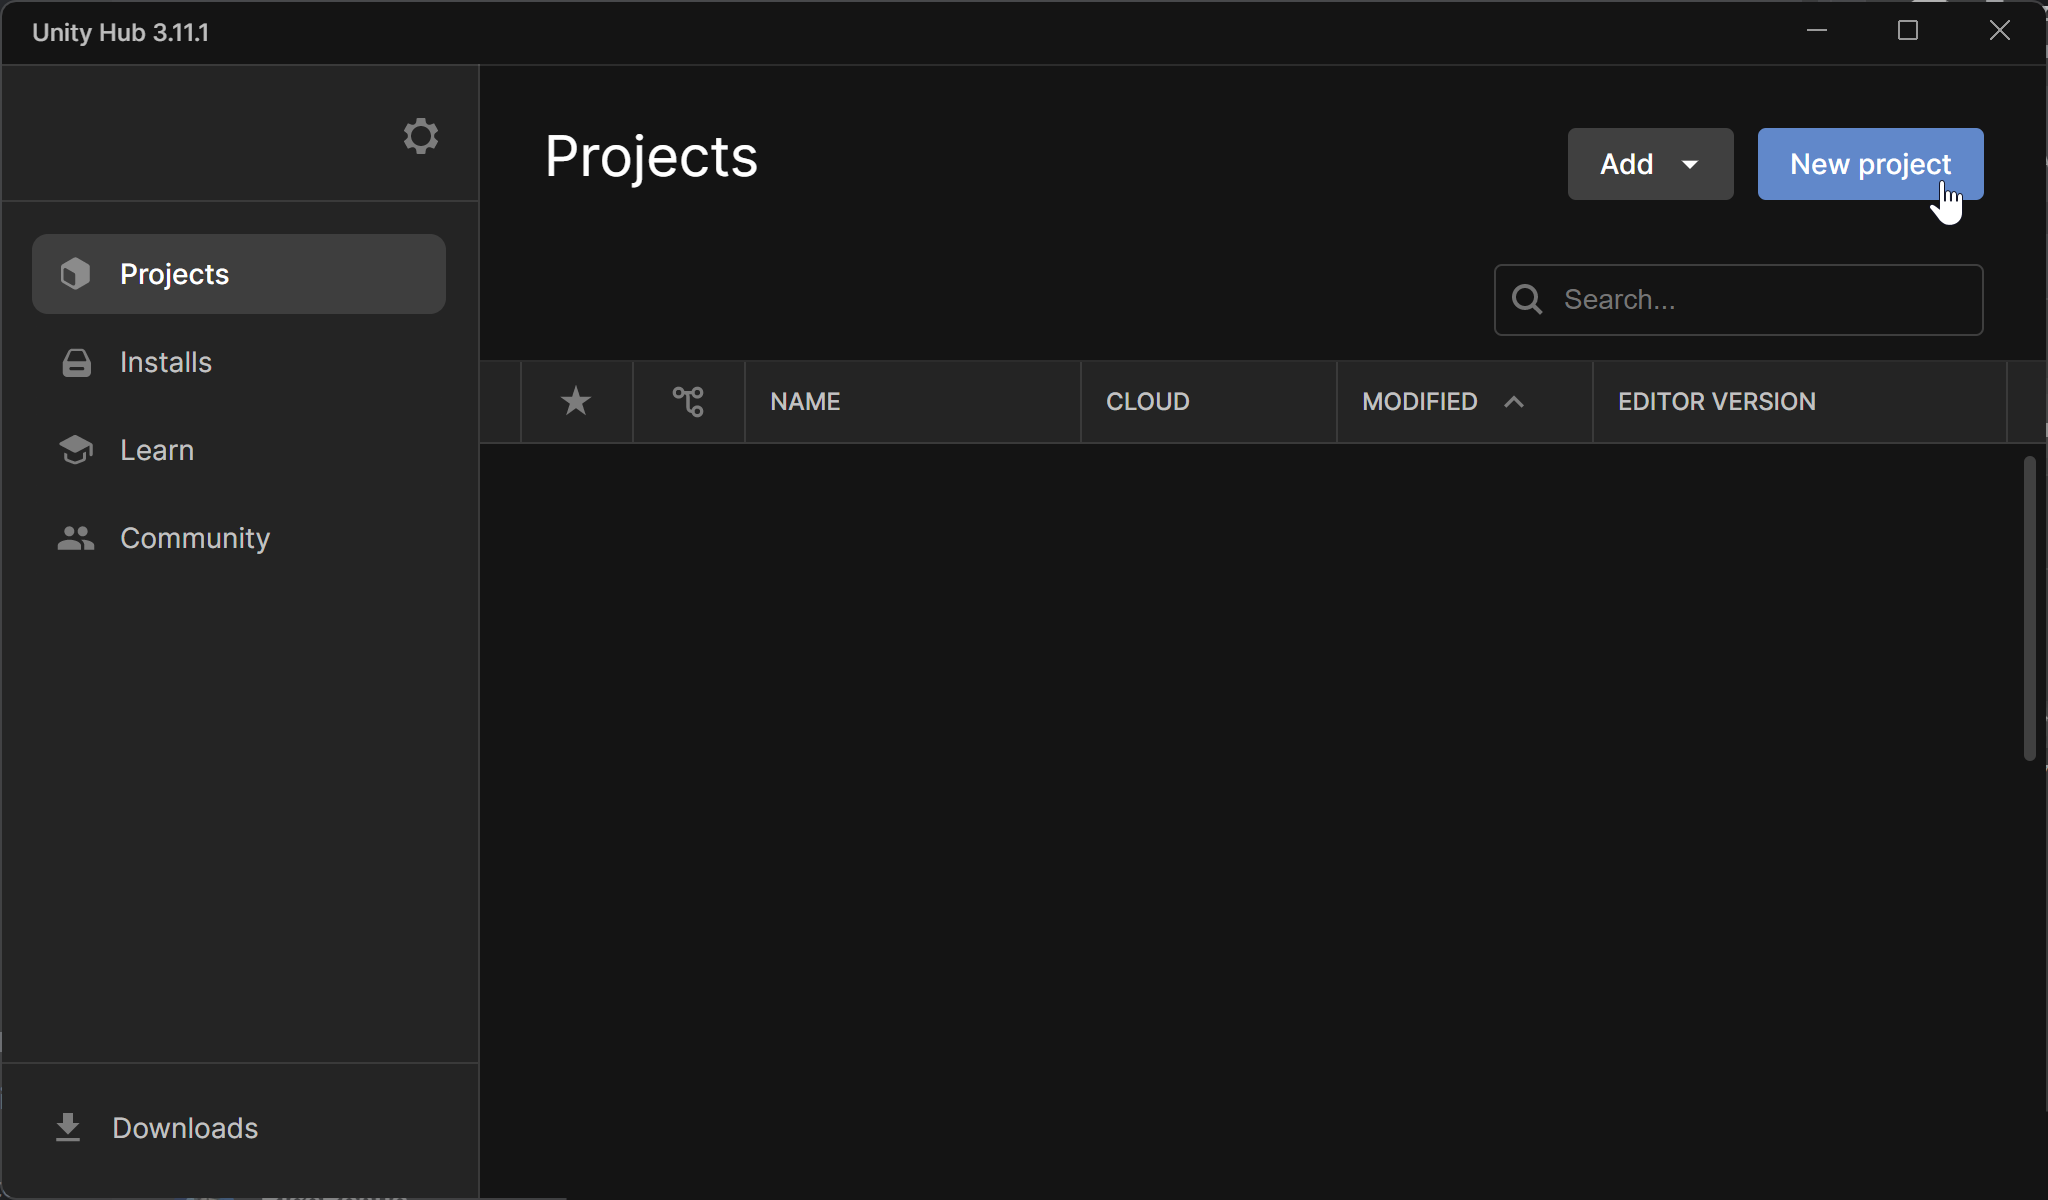
Open Unity Hub
Open the Unity Hub app and click the blue button New project at the top right.
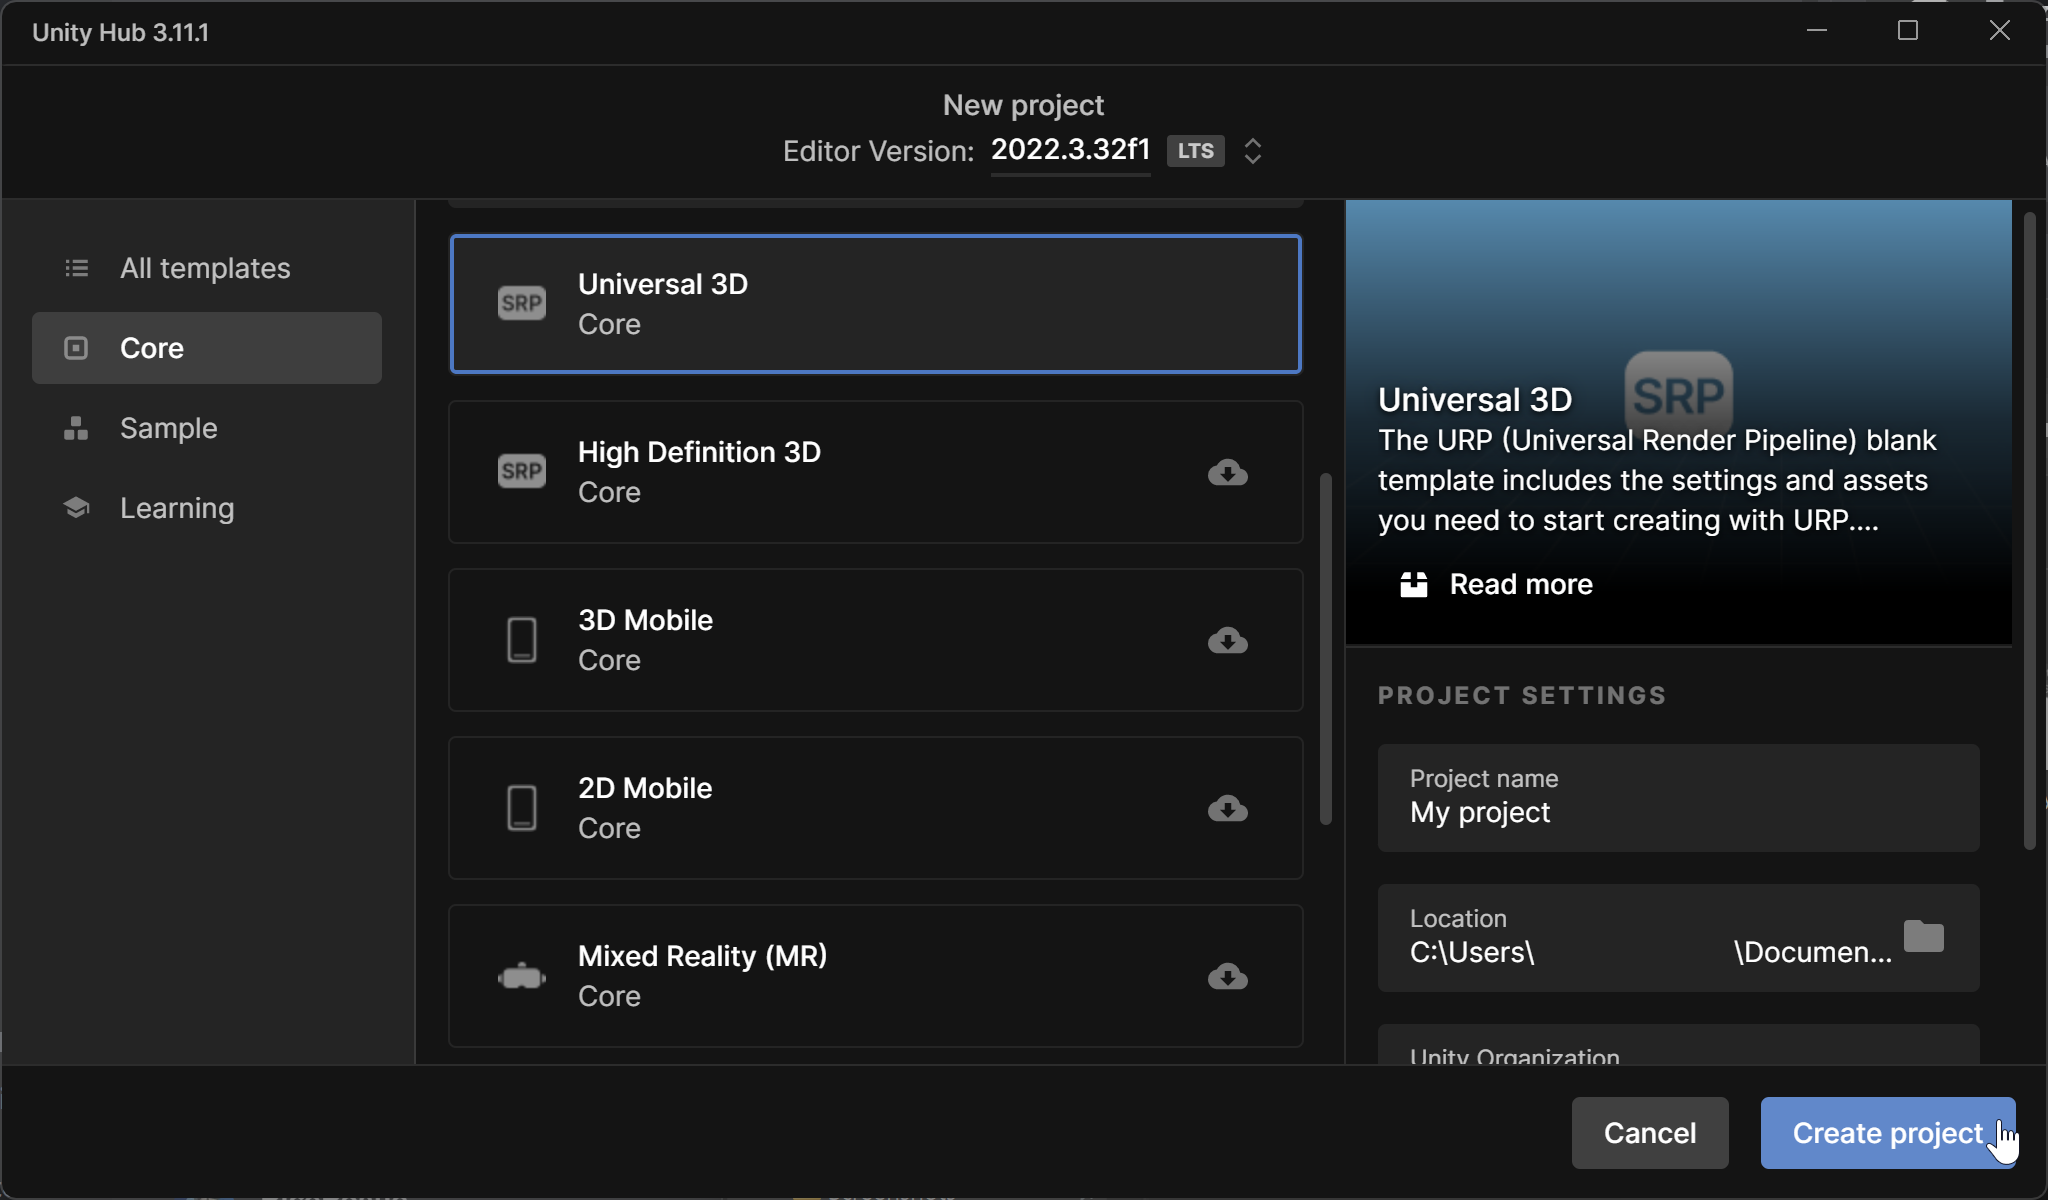
Create a Template Project
Select the Universal 3D Core template option. You may need to click a Download template button if its your first time using this template. Then click the blue button Create project at the bottom right.
Install the SDK Packages
Once the new Unity project has loaded, it is time to install the Genies SDK packages.
Add the Genies Registry
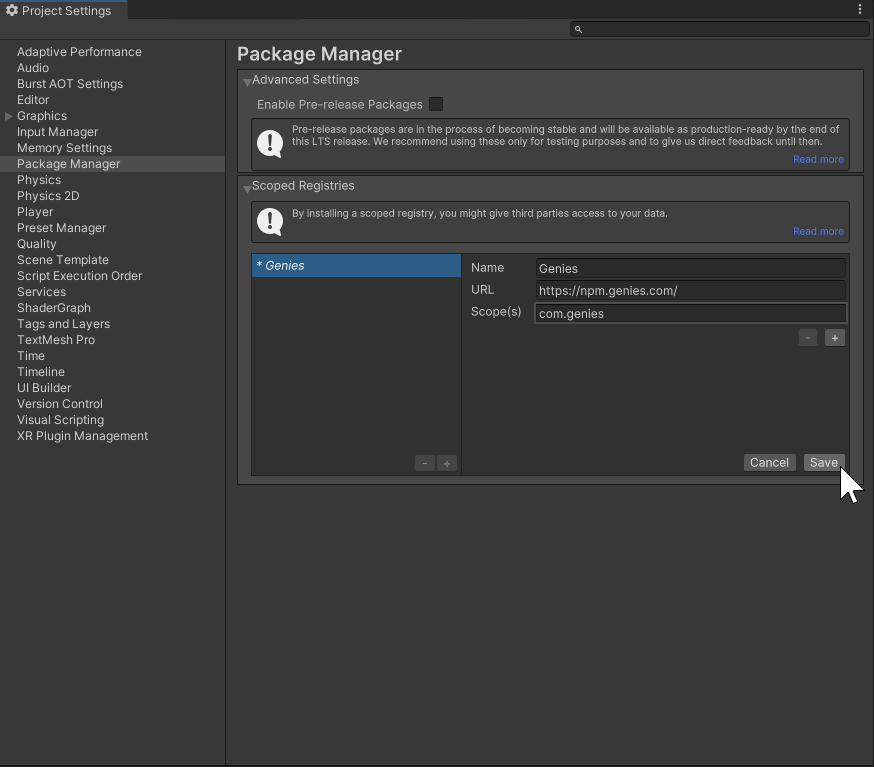
Open the Project Settings window by pressing the top dropdown menu option Edit > Project Settings. Select the Package Manager section in the left menu.
Then add the following Scoped Registry entry:
- Name:
Genies - URL:
https://npm.genies.com - Scope(s):
com.genies
Then click the Save button. This will add the Genies SDK packages into your registries.
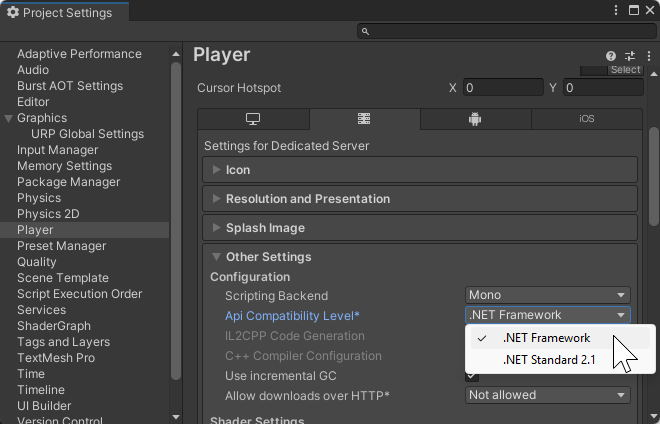
Set the API Compatibility Level
In the Project Settings window, click the Player section in the left menu. Then select the Dedicated Server settings tab, and set the API Compatibility Level to .NET Framework.
Open My Registries
Open the Package Manager window by pressing the top dropdown menu option Window > Package Manager. At the top left, click the package source menu dropdown and select Packages: My Registries.

Install the Package
Select the Genies Experience Sdk package. Then click the Install button which will begin the Genies SDK package installation.
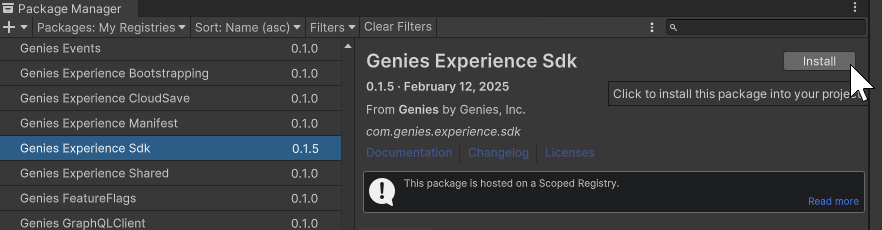
This Package Manager window is also the place to update the Experience SDK package version or remove the package.

Activate the SDK
Once the Genies SDK package is installed, it will need to be activated with your Genies account information.
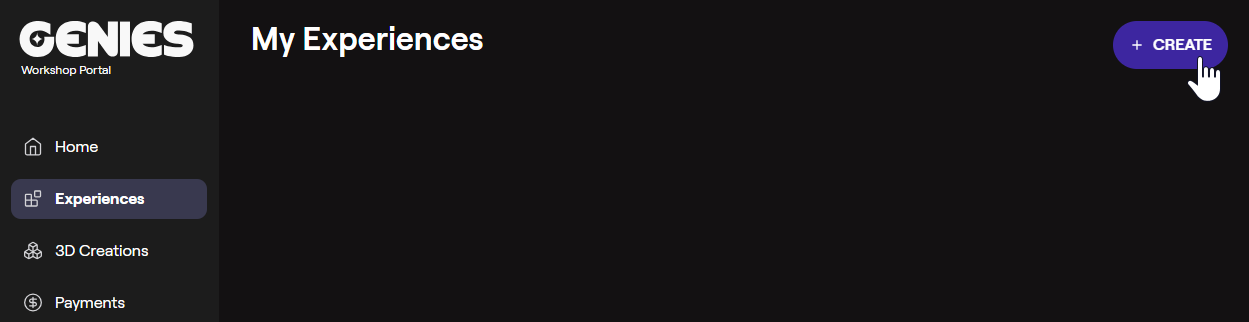
Log into Genies Hub Portal
Log into the Genies Hub Portal page with the phone number associated with your Genies account. Click the Experience section on the left side and then click the Create button at the top right.
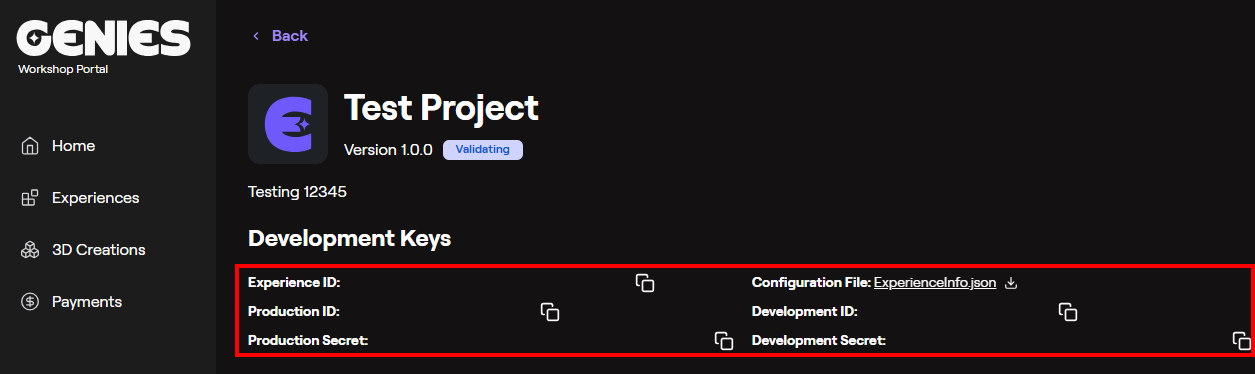
Create a New Experience
Enter a name and description for your Experience and click the Save button. This will open the Experience page with the various Development Keys required for activating your Unity project.
Connect your Account
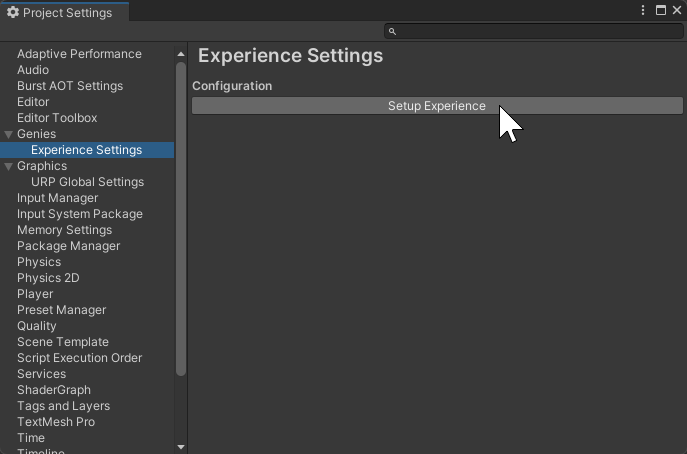
Return to Unity. Open the Project Settings window by pressing the top dropdown menu option Edit > Project Settings. Select the Genies > Experience Settings section in the left menu. Click the Setup Experience button.
Verify Account
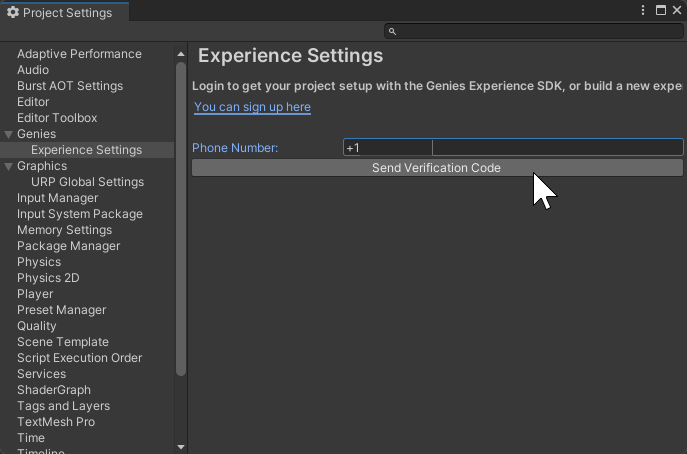
Once the Experience is setup, it will require you to verify your Genies account. Add your associated phone number and then verify with the code sent to your phone.
Link the Experience
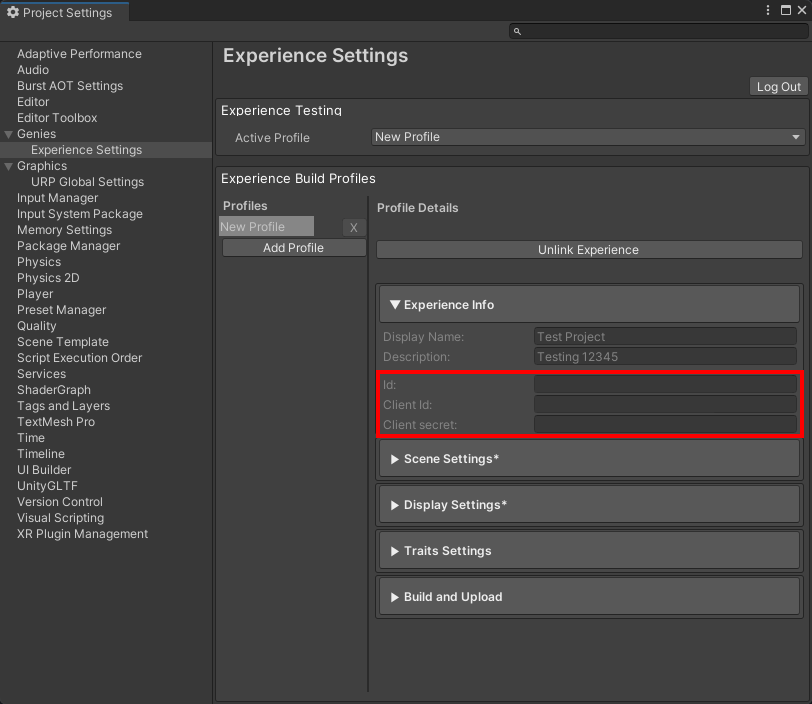
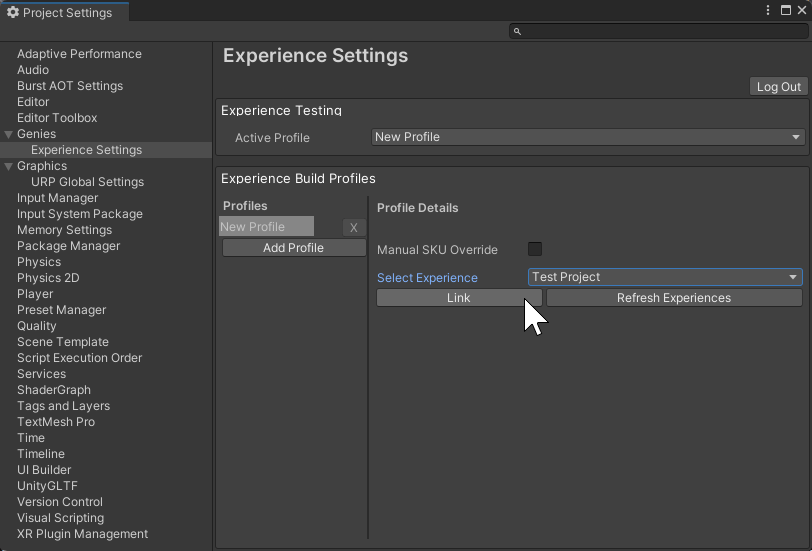
Once the account is verified, it will display the build settings. Open the dropdown menu for Select Experience and select the Experience created in the Genies Hub Portal. Then press Link.
Verify the Keys
Once linked, verify the keys are the same as the ones shown in the Genies Hub Portal.