UV Unwrapping
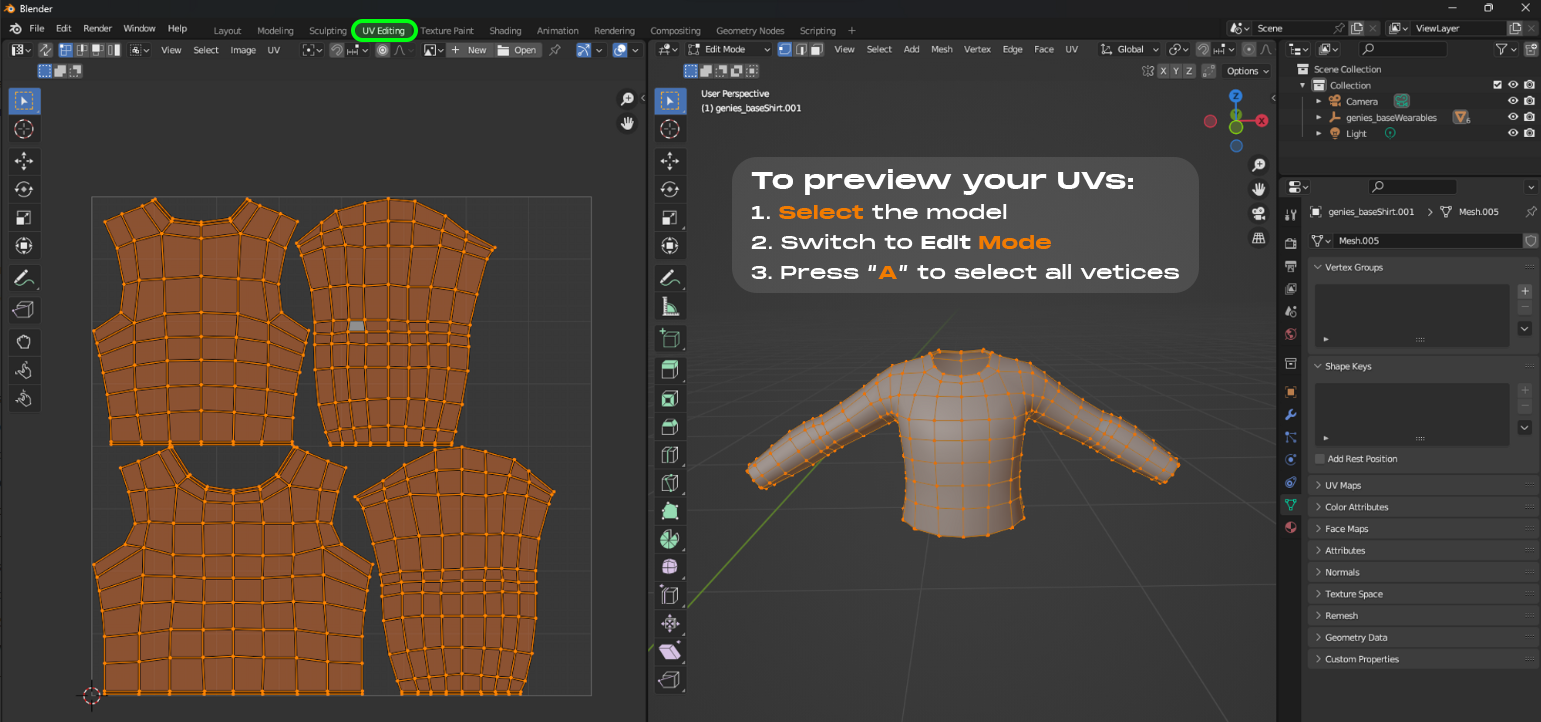
UV Editing Layout
To view your UV’s select the UV Editing tab on the top of the Blender UI.
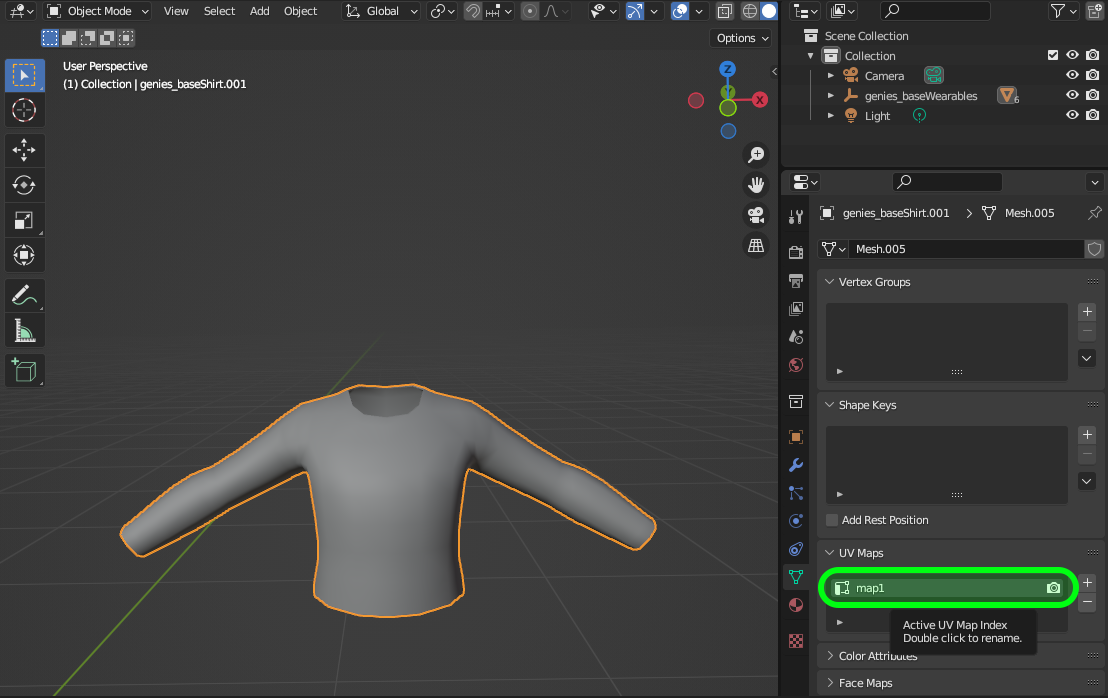
UV Map Name
You can edit the UV map name in the Object Data Properties → UV Map tab.
Please name the UV map for your digital Wearable “map1” to make it compatible with our system.
Object Data Properties → UV Map tab is the area where you can edit your UV map name, create a new UV map for the same object and remove existing UV maps.
Please make sure your final digital Wearable has only ONE UV map named “map1”.
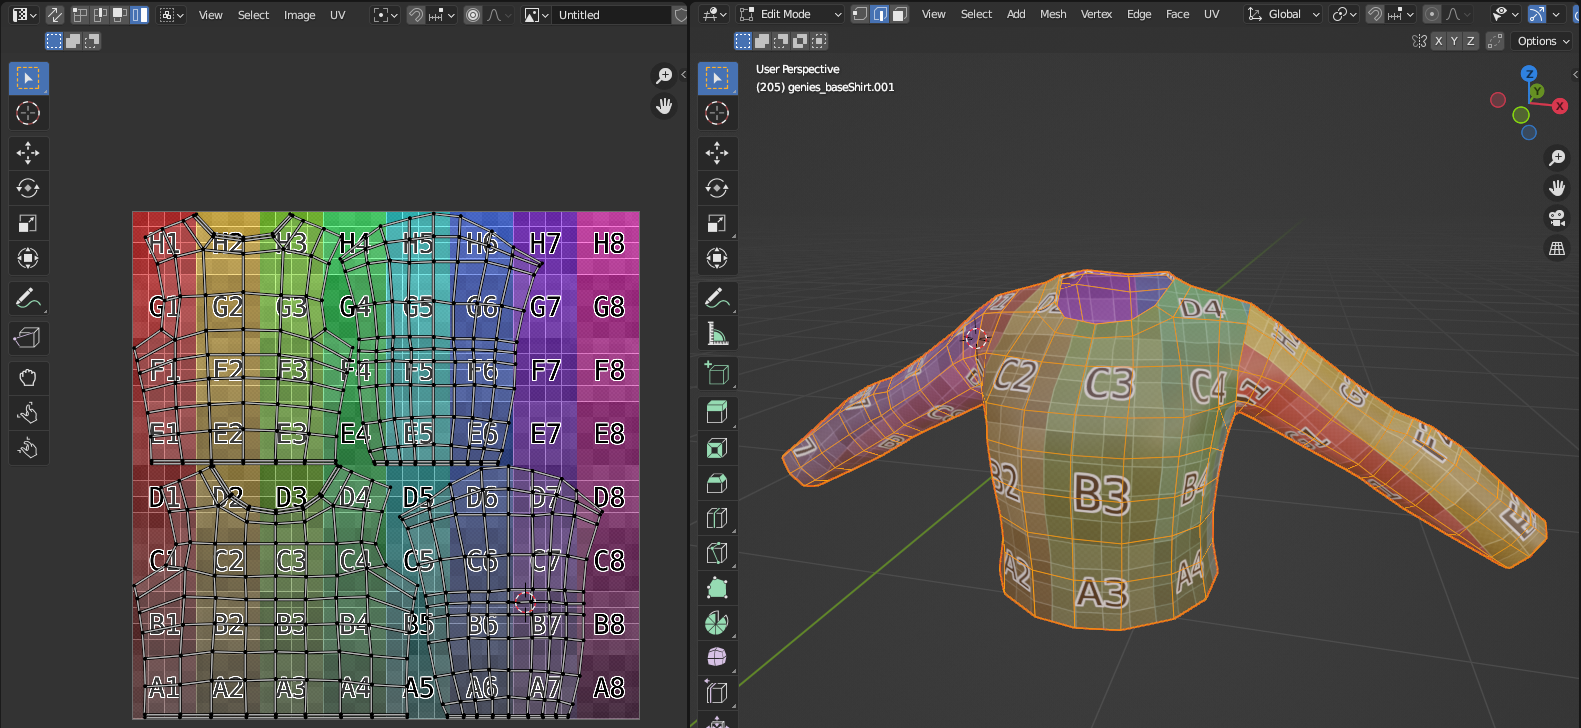
UV Grid Texture
We highly advise you to use this set up while your are UV Unwrapping your digital Wearable.
By adding a UV Grid texture as a color to your shader will help you to preview the rotation and position of your UV shells.
Setting up a UV Grid Texture
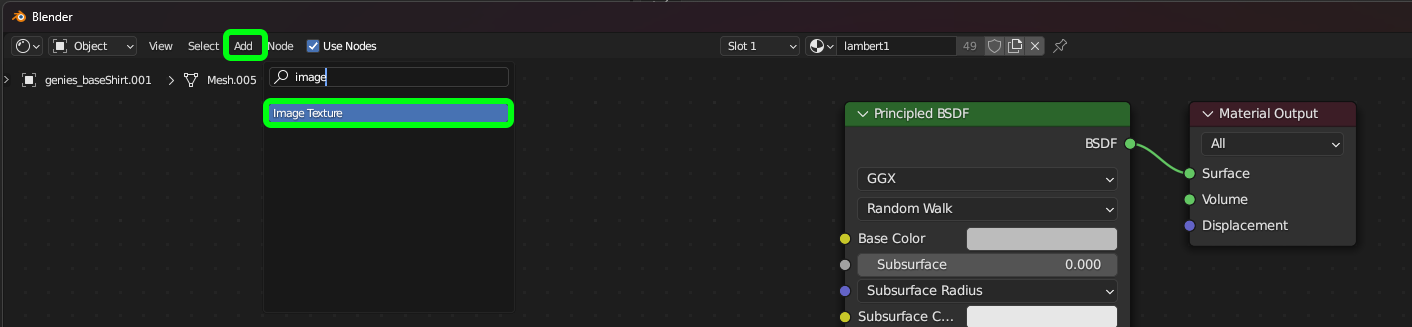
- In Shader Editor Window, go to Add → Search for “Image Texture”
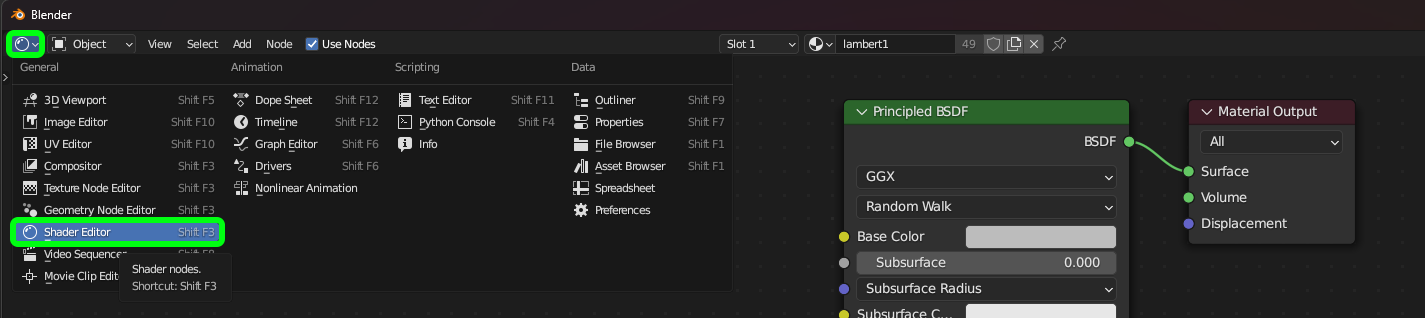
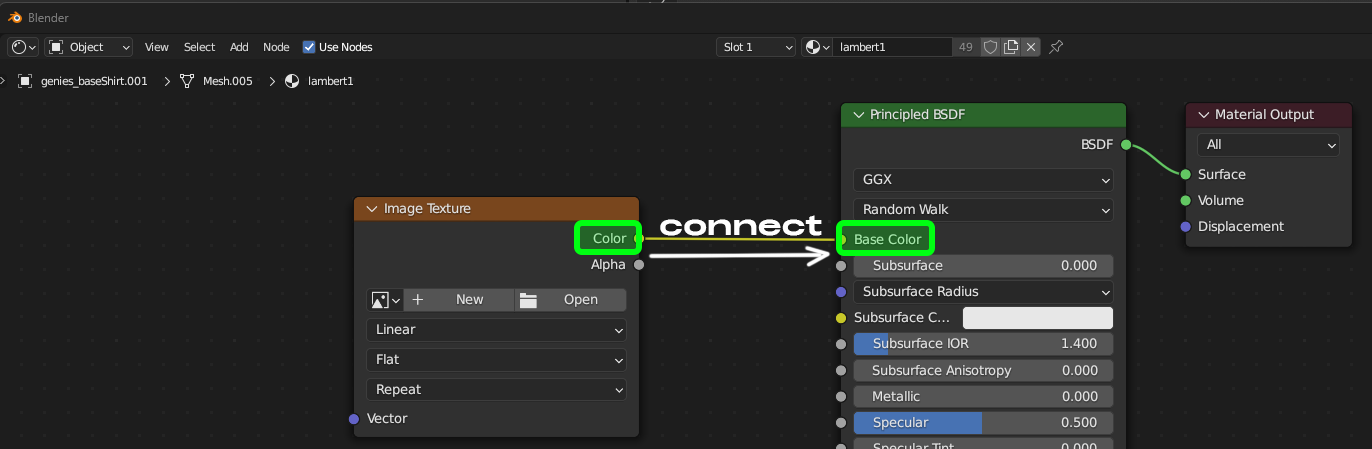
- Connect the Color output of the Image Texture node to the Base color of the Principled BSDF shader node.
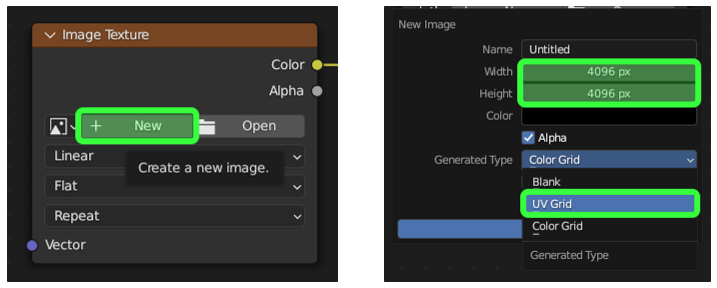
- In the Texture Image node, click on + NEW.
Edit the Width and Height of the image to be 4096 by 4096 pixels. Then select the Generated Type → UV Grid and click “OK”.
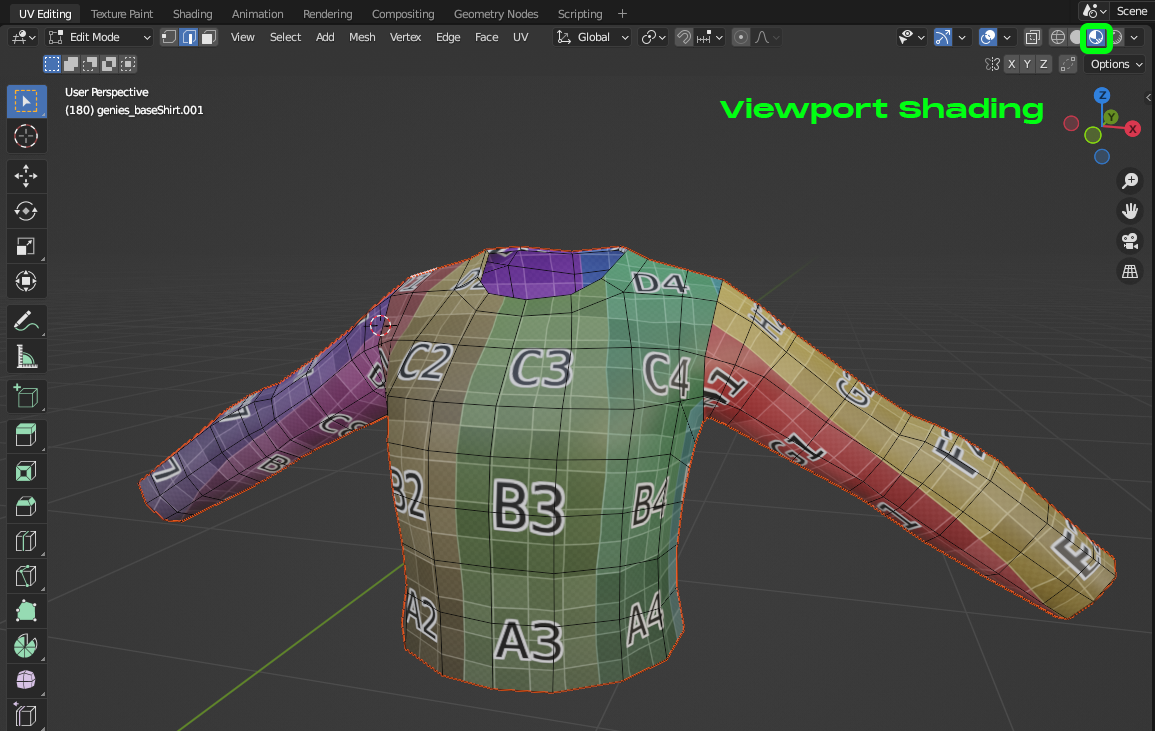
- To preview this set up, change your viewport setting to “Viewport Shading” option.
UV Unwrapping
Blender offers a variety of quick and easy ways to UV unwrap a 3D model. Lets look into a couple of those.
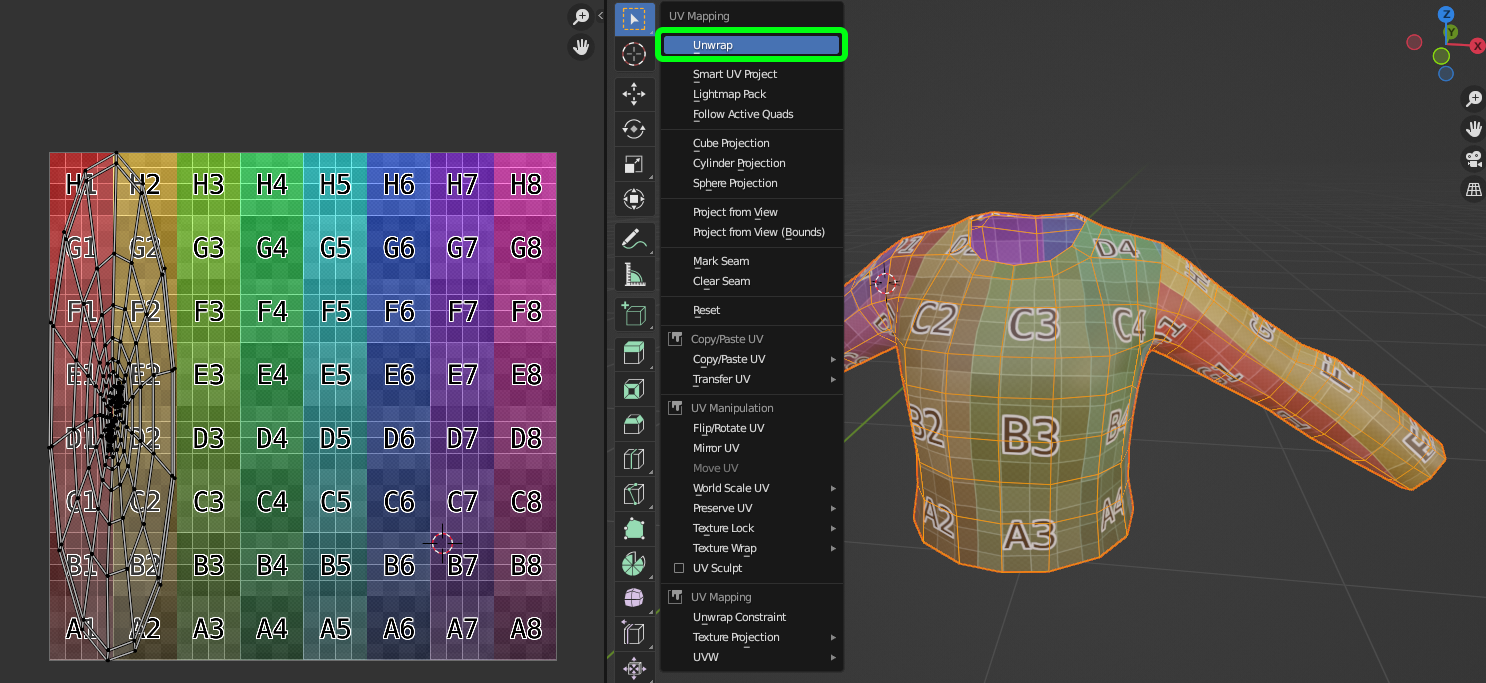
Unwrap
If you click on the UV tab in the viewport, you can access the UV unwrapping menu. You can also access this menu by pressing “U”.
The first option there is “Unwrap”. This option takes your full model and attempts to create a flat 2D version of you asset. This option will work best for simple one sided objects.
To see what this option do, you need to be in the Edit Mode first. Press “A” to select all the vertices in the scene and then click on “Unwrap”.
In order for the “Unwrap” function to work correctly, we need to establish SEAMS - edges where the “unwrap” function will make cuts in order to flatten the complex 3D shape.
To create UV seams, you need to select the needed edges n the Edit Mode and the got to the UV Mapping menu and select “Mark Seams”.
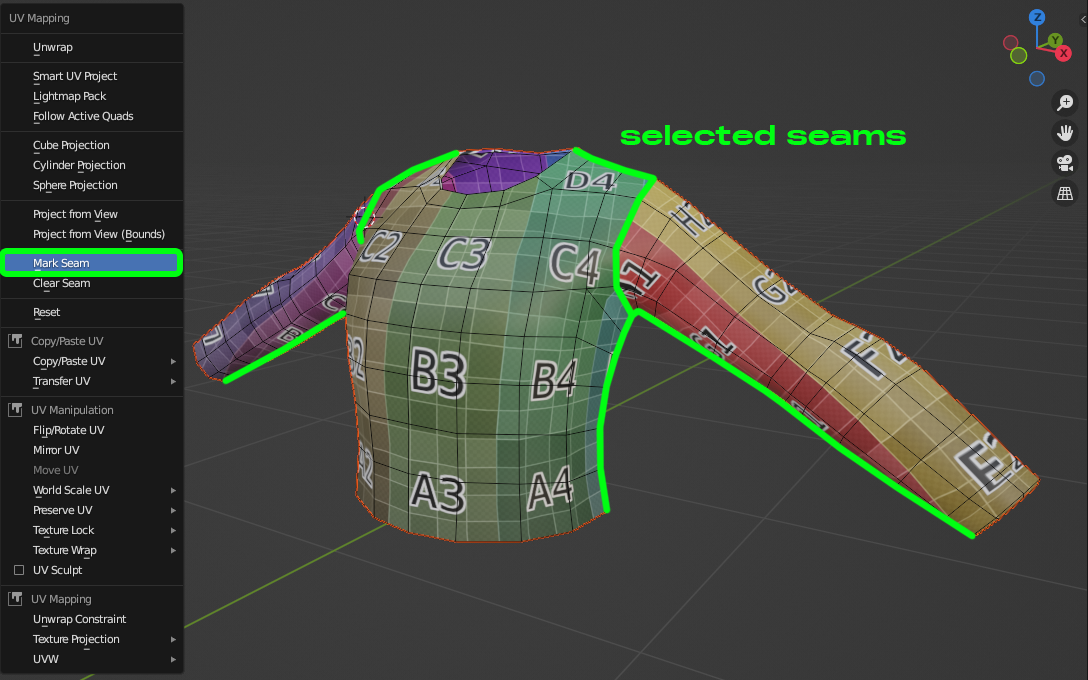
You can hold Shift and click on the needed edges to select them.
If you are creating a cut on the continuous edge loop, you can hold Shift + Alt and click on one of the edges to select the whole loop.
When you have your UV Seams marked - they will be highlighted red on the model in the Edit Mode.
To remove the UV seam, select it on the model and in the UV Mapping menu select “Clear Seam”.
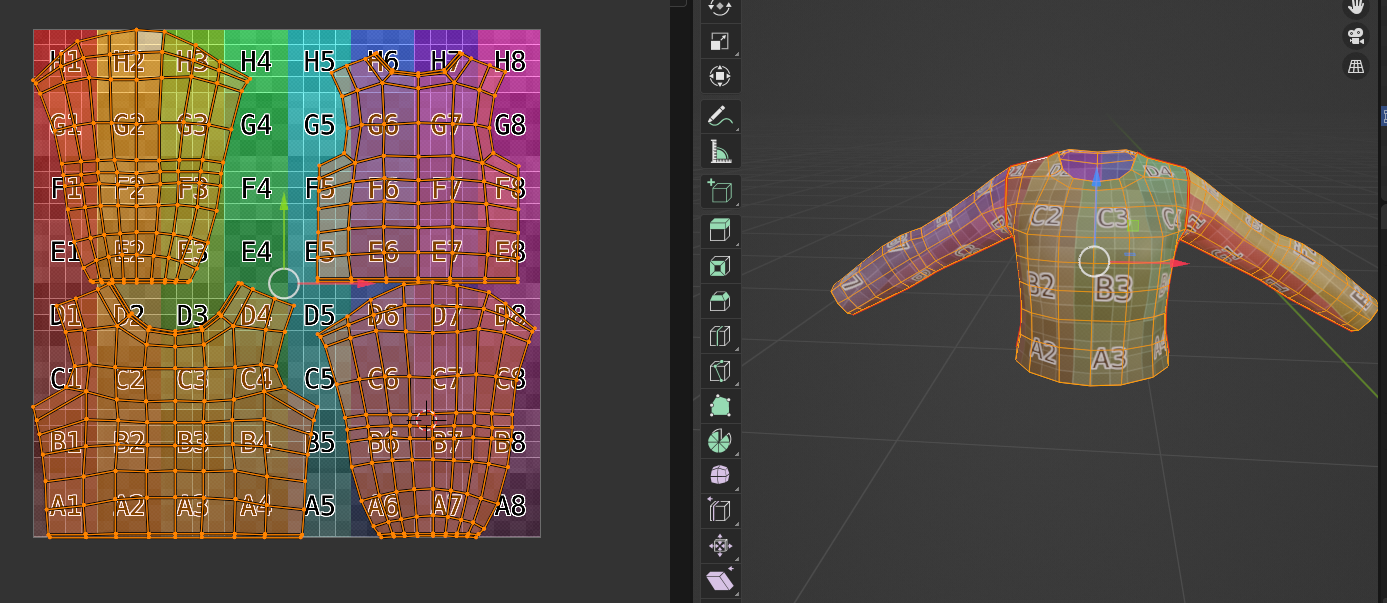
Lets do the “Unwrap” again.
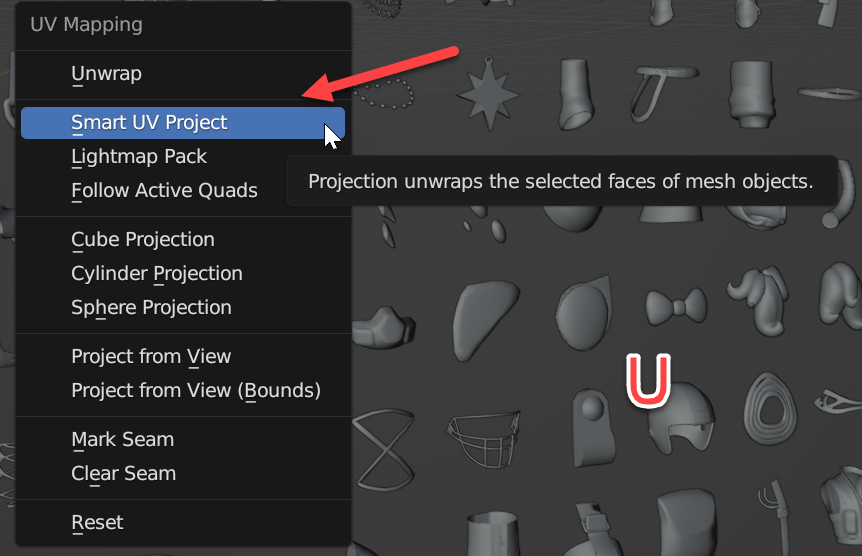
Smart UV Project
“Smart UV Project” is a great automated way to create UV shells in Blender.
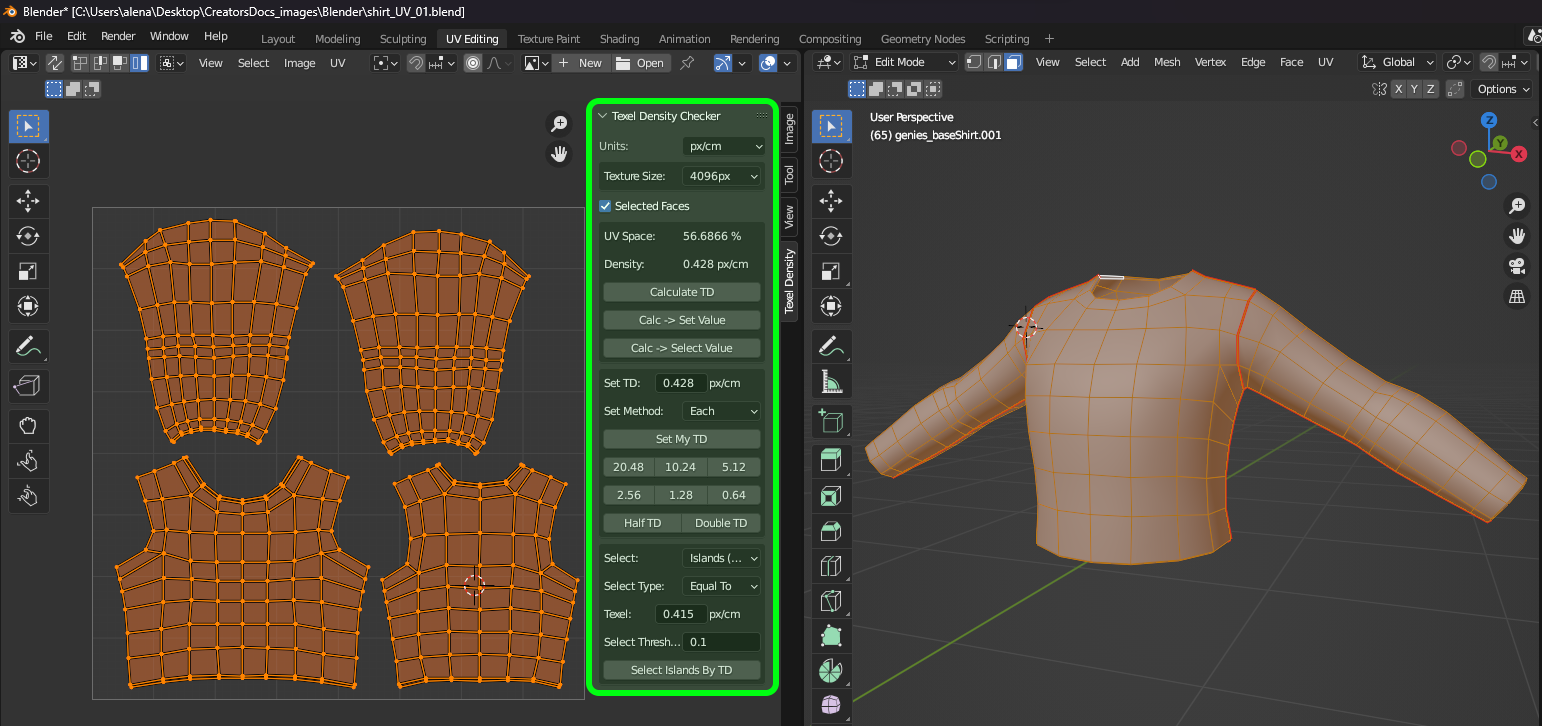
Texel Density
Blender doesn’t have a regular way of checking Texel density. We need to use third party addons or check it by hand using UV checker maps.
Texel Density Checker 3.4 by Ivan Vostrikov (free on Gumroad)
You can find more information on how to Install an Add-on HERE.
To find Texel Density Add-on after the installation, click on the UV Editor Window and press “N” to see the right side Toolbox menu. You will see the “Texel Density” tab there.
UV Packing
Please make sure all the UV shells are fitted within 1:1 UV square.
”UvSquares” by Radivarig (free on Github)
”UV Packmaster 2 SDK STANDARD” by glukoz (free on Gumroad)