Export Texture Maps
AlbedoTransparency Map
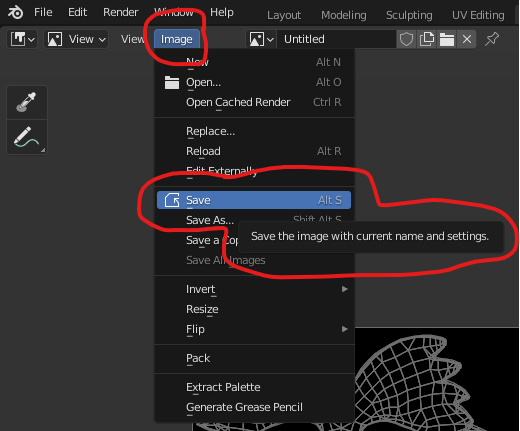
Export Color (or albedo) by simply saving the map from the “image editor”:
MetallicSmoothness Map
Select the Compositing Shelf:
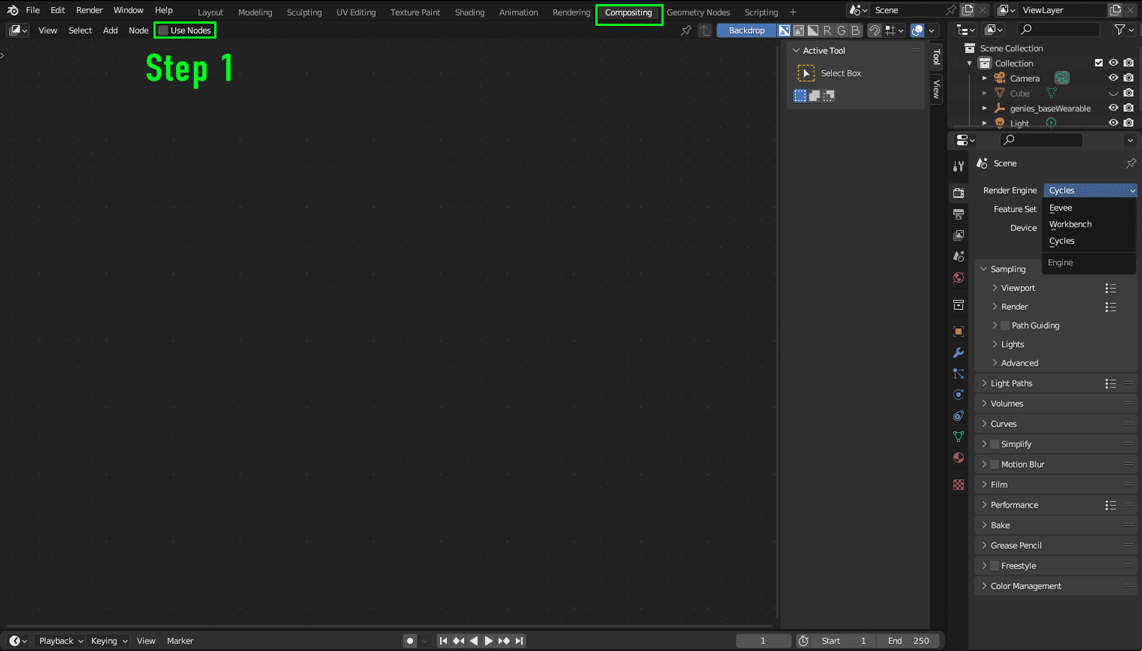
- Check on the “use nodes” check box. Ignore the Dope sheet at the bottom since we don’t need that. (Double click image to enlarge)
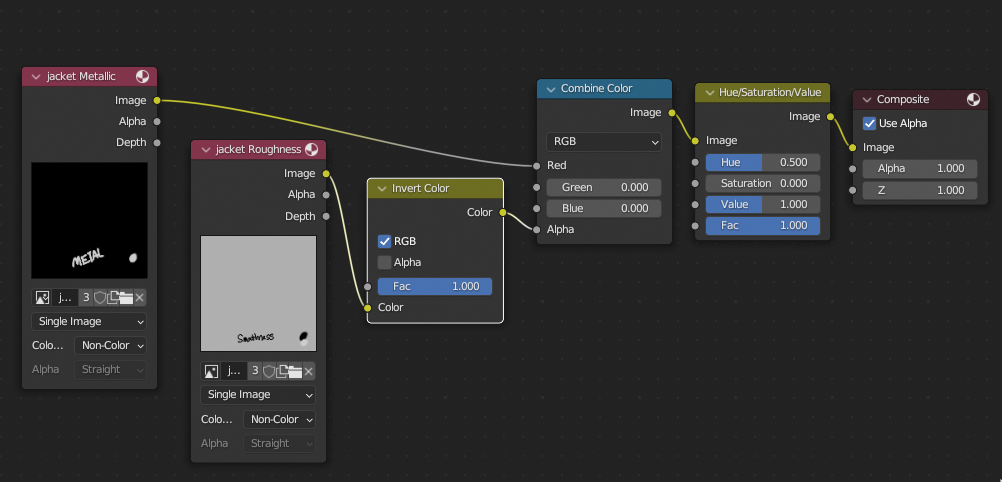
- Delete the “Render Layers” node with the “X” key
- Shift+A on keyboard to bring up search bar
- Type in Image to and confirm for an “image node”
- Open image and select the existing metallic texture.
- Repeat Steps 3-5 for another node and open the existing roughness texture map.
- Shift+A to add “invert color” confirm to add node.
- Shift+A to add “Hue/Saturation” node.
- Connect nodes like below example:
- Set up render settings by setting resolution to 4096 by 4096 (or the resolution you set when creating the textures when painting).
- Click F12 to render. A new window will appear with the render results.
- Save image as a .png and you’re done!
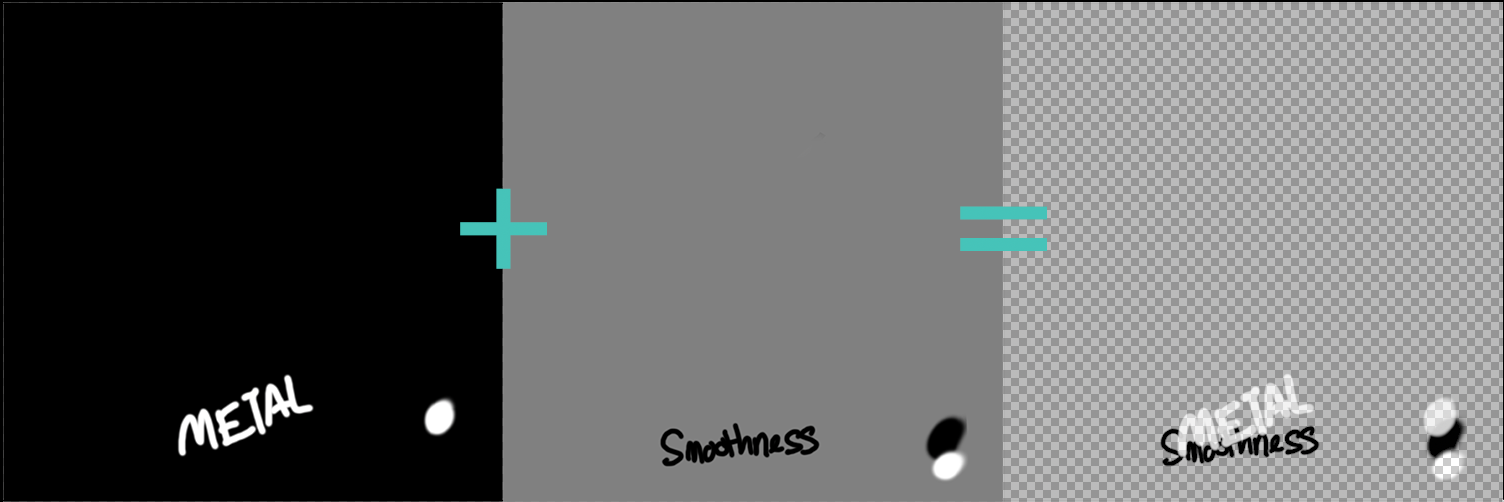
Below is an example of the maps are supposed to look:
Normal Map
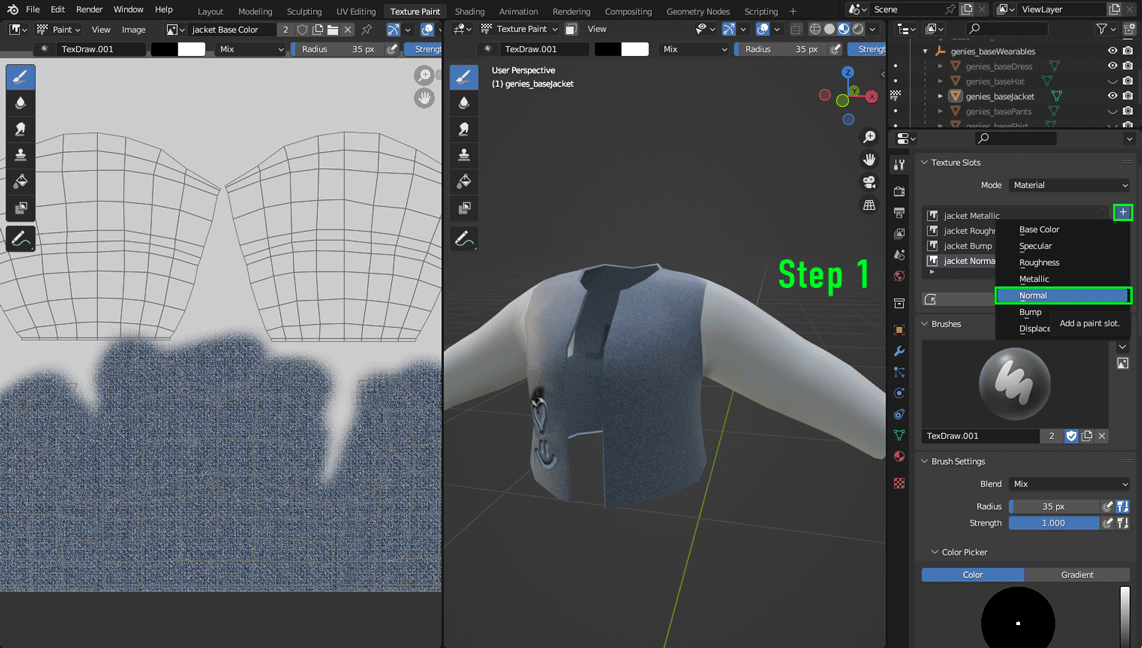
- Add a Normal map from the Texture slots.
- Set resolution to 4096 x 4096.
- Save empty normal map. Name appropriately
- (optional_only if model is low-poly and has hard edges) Navigate to Layout shelf and go to modifier settings.
- (optional_only if model is low-poly and has hard edges) Add a Multi-resolution modifier. Click on Subdivide.
- Go to Render options.
- Set bake type to “Normal”
- Bake
- Head back over to the “texture paint” shelf to see preview of normal map.
- Save texture. DONE!
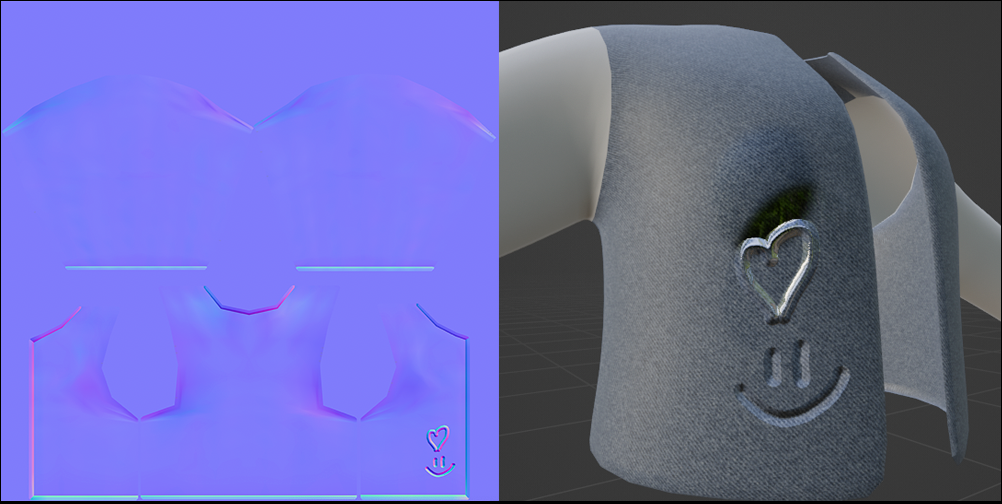
Below image shows how normal map looks on 3d model:
RGBA Mask
RGBA Mask Map
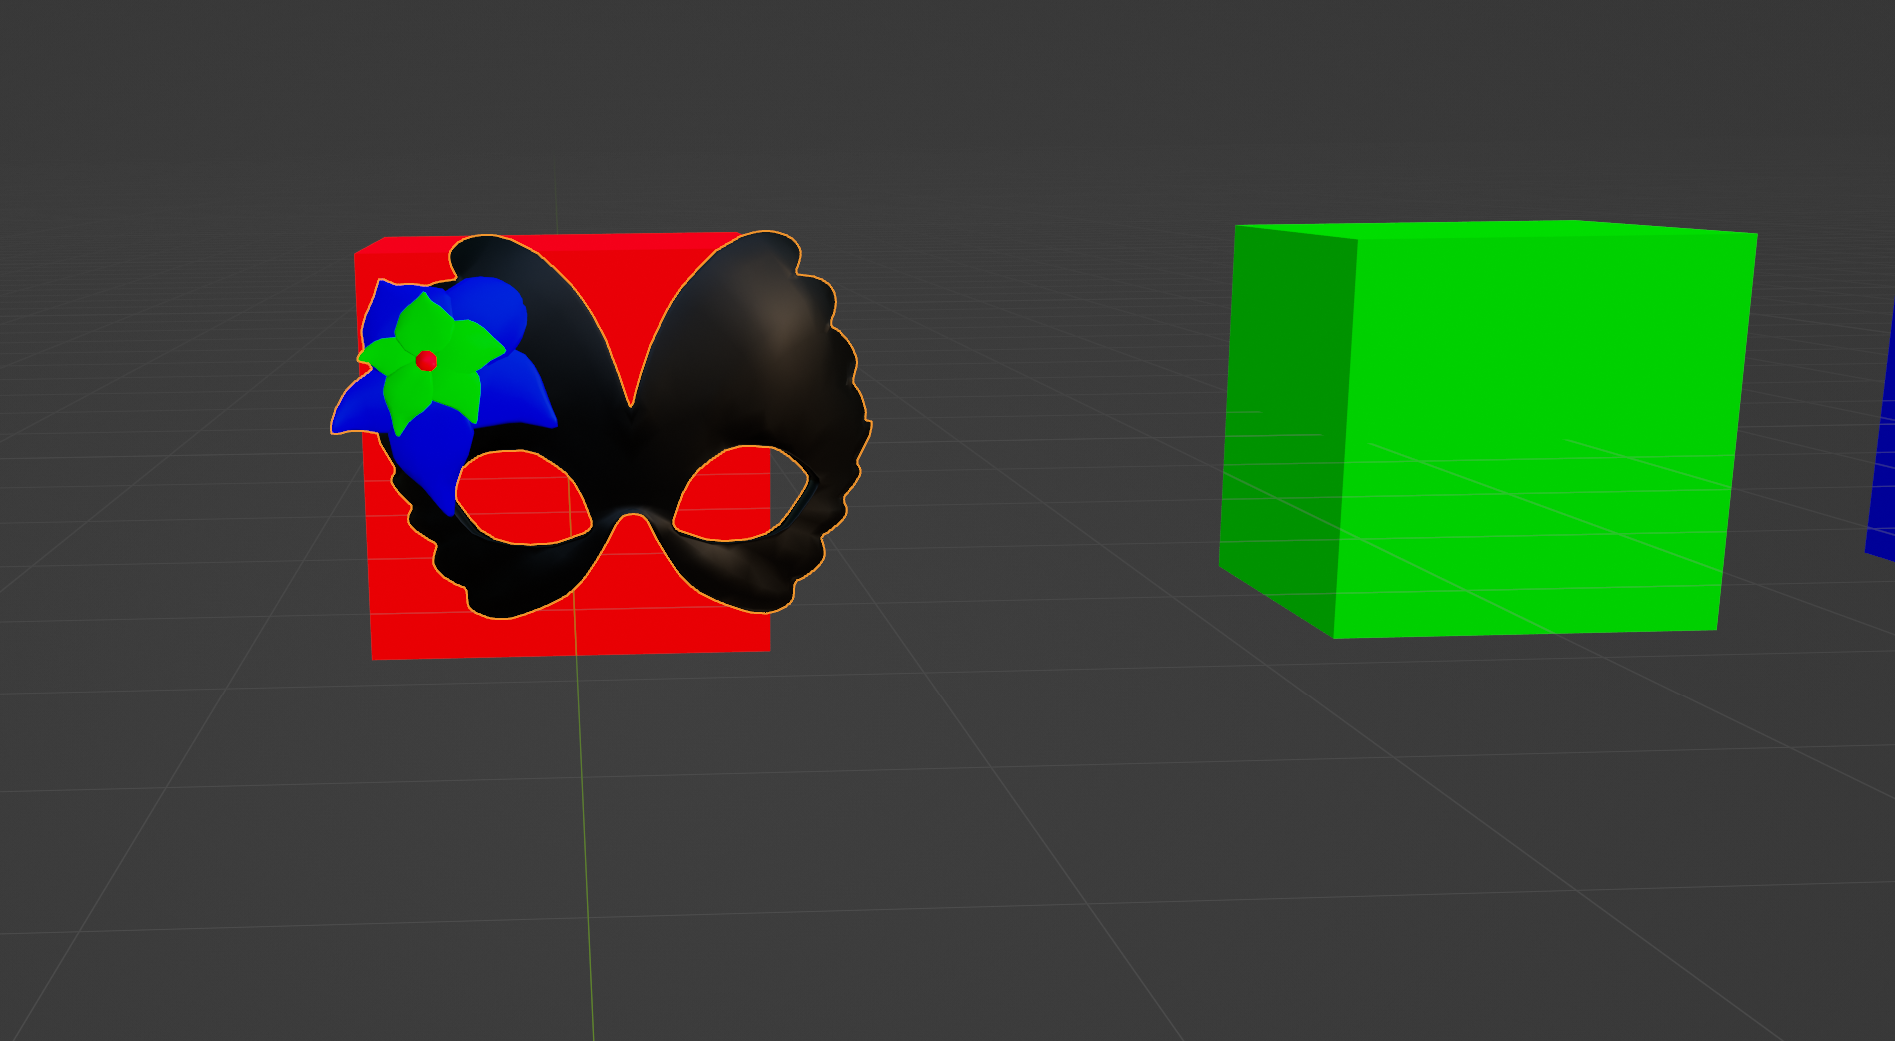
RGBA Masks are used as an ID map to allow us to change the materials of different parts of a 3D model. We choose different parts of the model and apply a single color to that model. Each color represents a different material on the model.
To help create the RGBA Mask, we have provided a template that you can easily apply the color to each UV shell and then bake the 4 color ID maps out with an alpha channel in the texture.
Download Template
Download RGBA Mask Template here: genies_RGBAMask_Template.blend.
The Template comes with settings predefined to optimally create RGBA Masks for any mesh with one UV and all materials applied to it.
Creating RGBA Mask Map
- Make sure your model:
- Is 1 Mesh
- Has UV’s unwrapped in one UV Space together
- Has Materials applied. (This works best when there is more then one material)
- Start by opening the Shading Tab
- Select your Mesh
- Go to the Material Panel
- Select a material on the mesh
- Replace that material with one of the 4 material options.
- Continue until all materials have been replaced. All 4 colors do not need to be used.
- Select the Texture Image Node in EACH color so all 4 image textures are selected in the Shader Editor
- We have created an empty image texture called BakeMap to bake all of the materials to. Each Texture Image should have BakeMap selected and the image color space set to sRGB
- Go to the Render properties Panel
- Check the Bake Section of the Render Properties Panel. All settings have been applied.
- Make sure all 4 image nodes are selected in the shader editor. Press the Bake Button.
- See the results in the Image Editor Window
- Save the images PNG with “_RGBAMask” at the end of the file name
Creating a New Image settings:
- Name the Image with “assetName_RGBAMask”
- Keep the Alpha Channel ON
- Image Size should Be 4096 x 4096
- For _AlbedoTransparency and _RGBAMask the color space should be sRGB
- For all other texture maps the color space should be Non-Color