3D Modeling
Please make sure to download the Wearables Starter Pack that contains a mannequin and layering guides and our Fashion Kit for your convenience. Next, simply import the provided .fbx files into Blender and start creating (Steps on Importing shown below)!
Creating Wearable with Genies Fashion Kit
Step 1. Import Starter Files
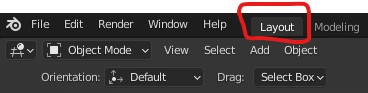
Open Blender and make sure you are in the Layout Tab shown below (This is already open by Default):
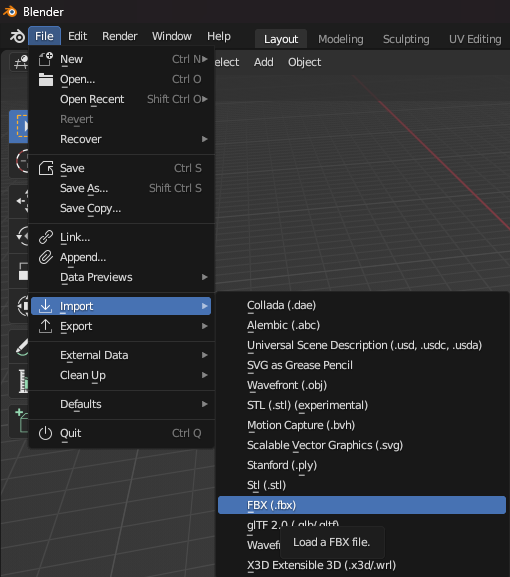
Go to File > Import and open the Blender Fashion Kit Template:
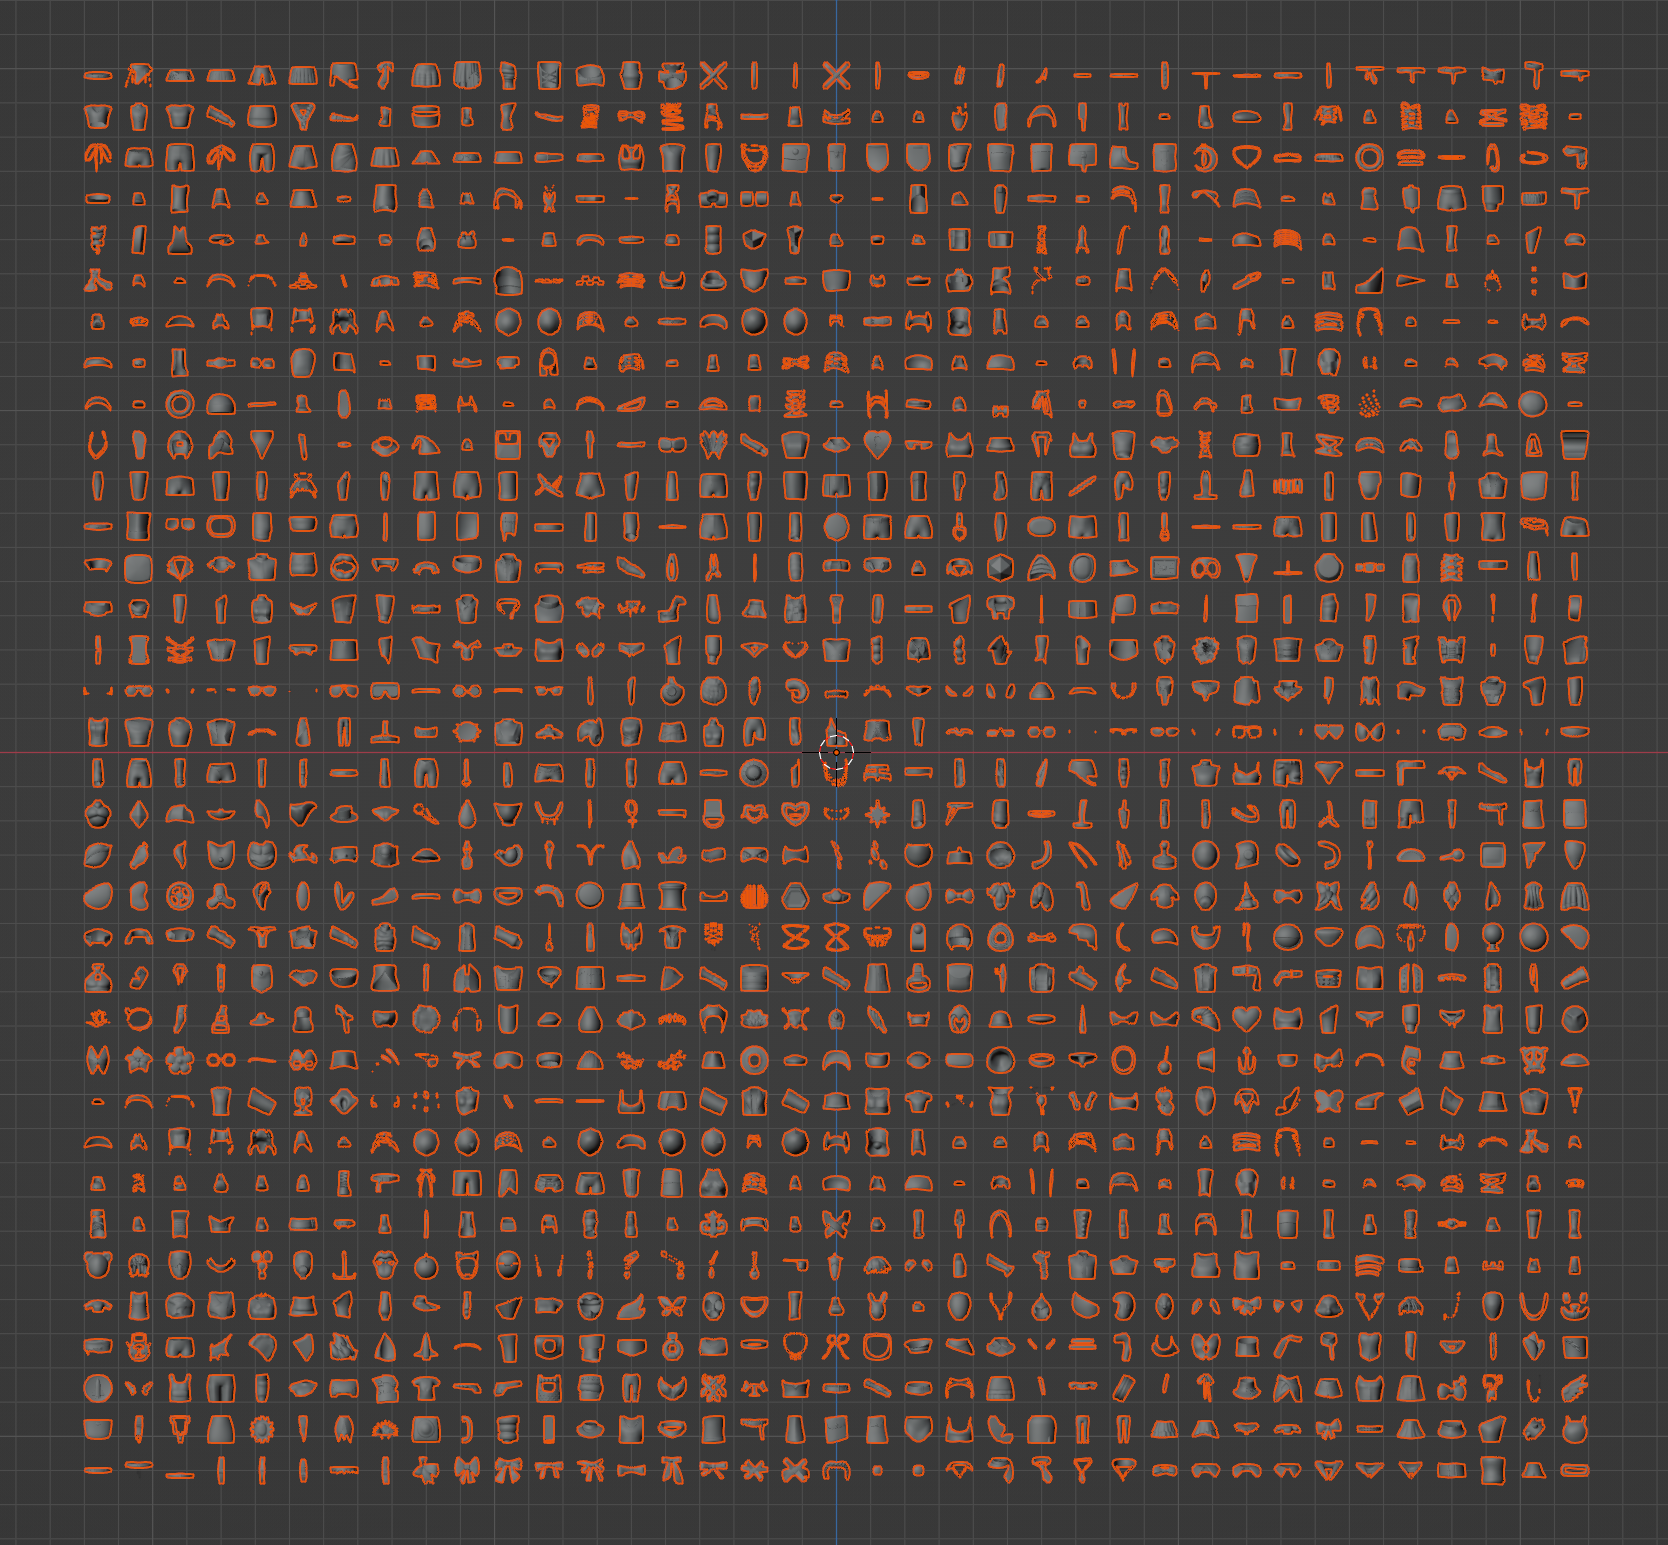
Below is what the fashion kit should look like, but hold tight - We can move these around later!
Step 2. Select and Copy from the Fashion Kit
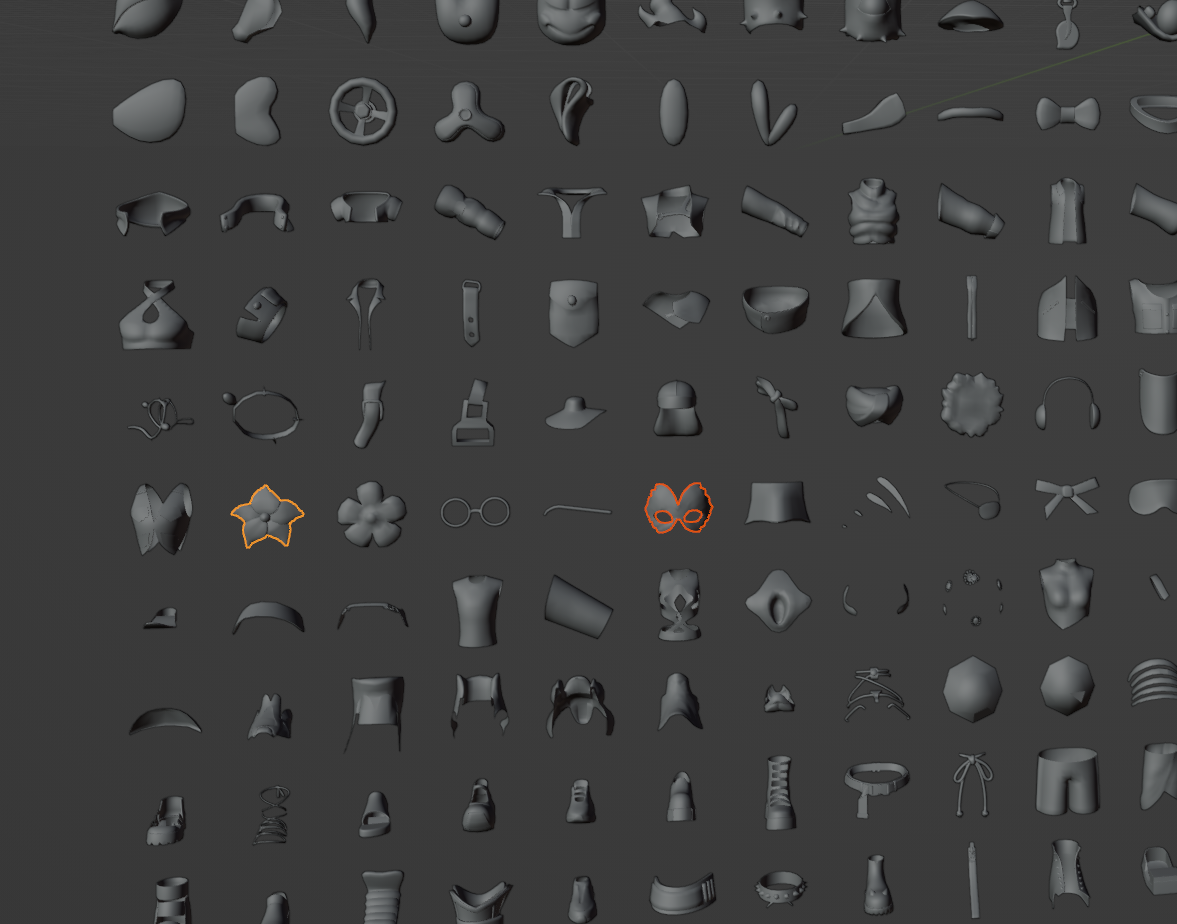
Next, pick the assets you want to create with. In this example we are going to pick a mask shape and a flower shape.
To select multiple objects, first click on one object, then hold shift and click the second.
Next, we want to duplicate these objects from the kit. To find Copy or Paste Objects in the menu, you can find it here:
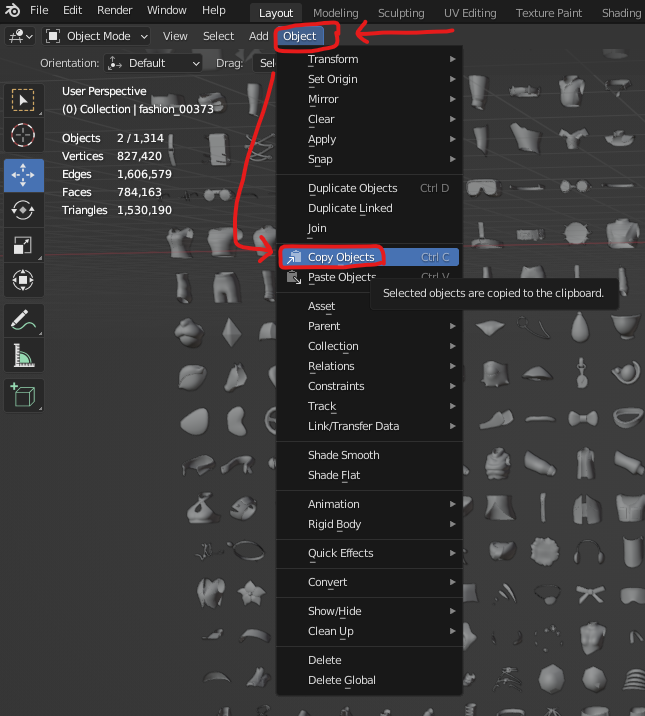
If you want a shortcut for this option, Press CTRL + C (Windows users) or COMMAND + C (Mac users) to copy object(s).
Step 3. Copy + Paste into a New Scene
Step 3.1
Open a New Blender Scene by navigating to the top right of your screen shown here:
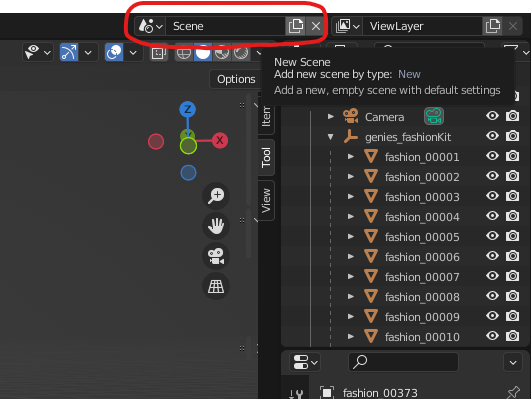
Click the icon that looks like a stack of papers and open a NEW SCENE:
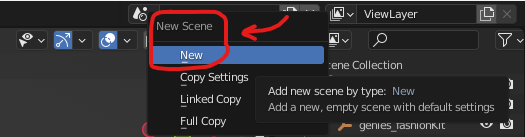
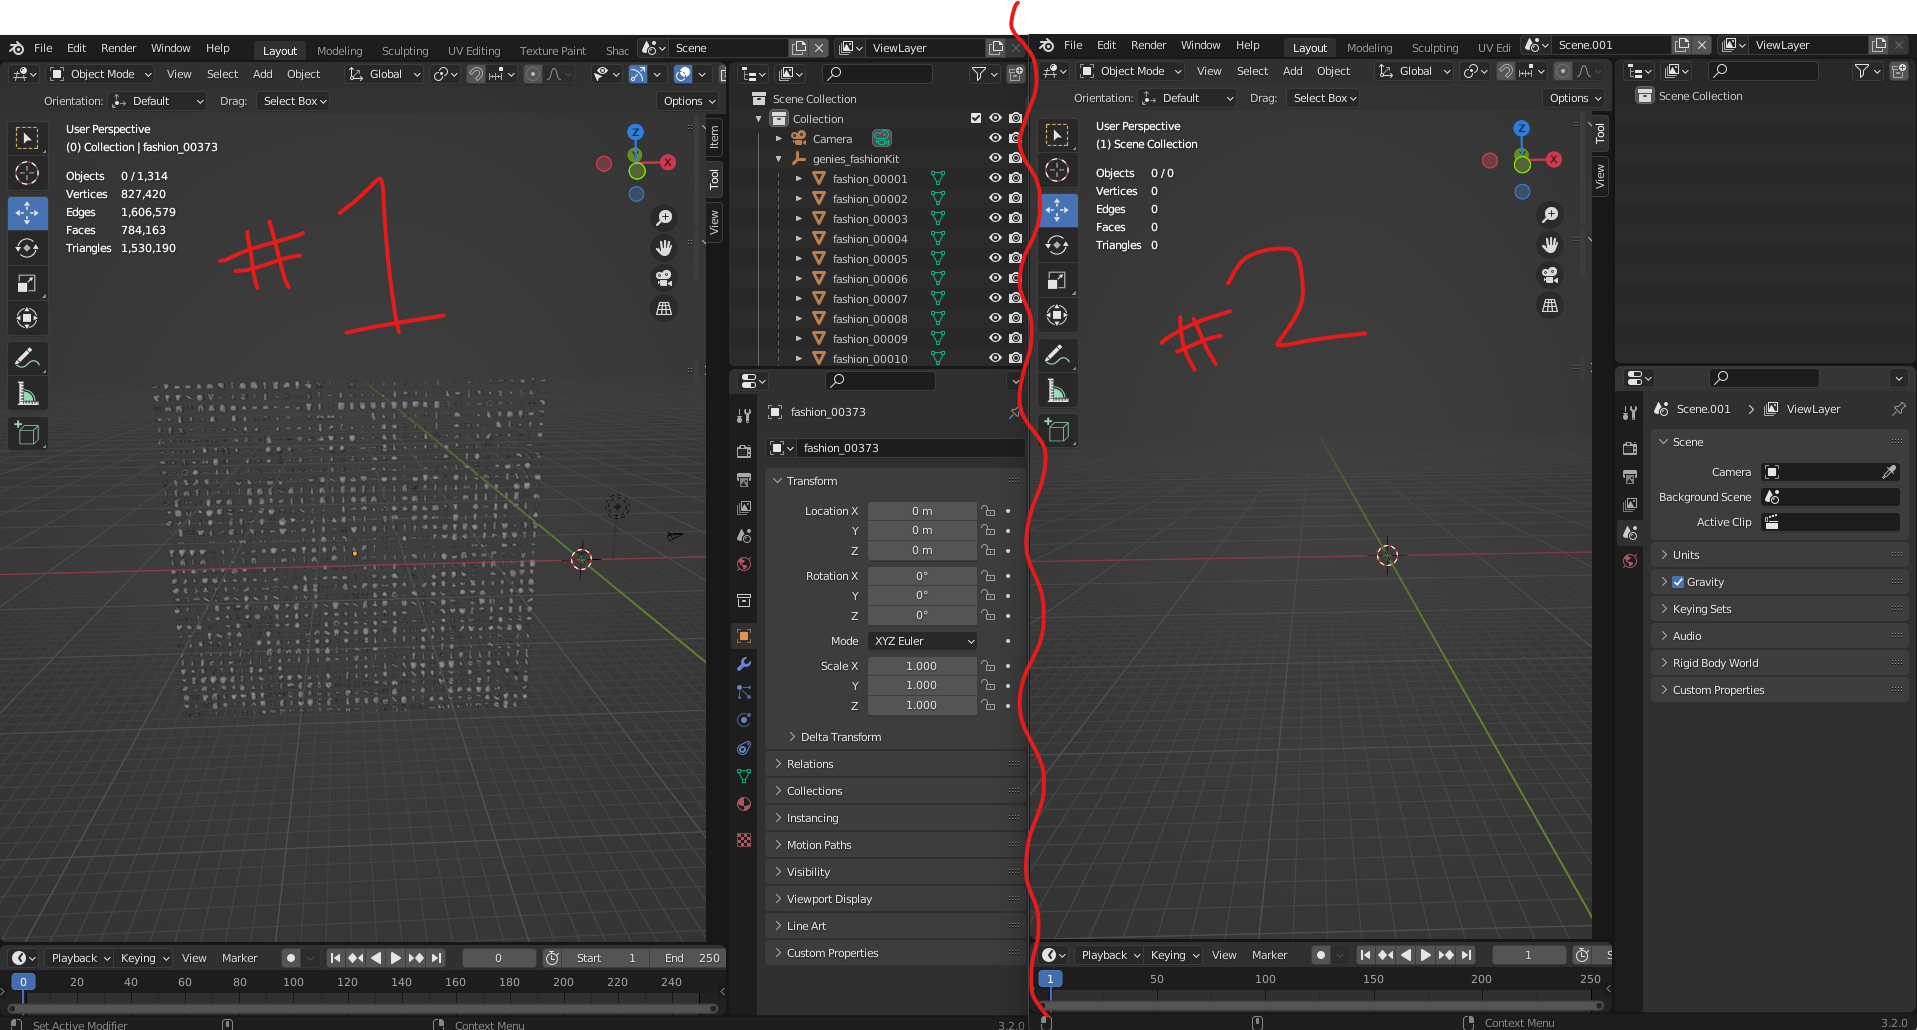
You may name your new scene something different if you’d like to differentiate them, but otherwise, you now have 2 scenes to work with!
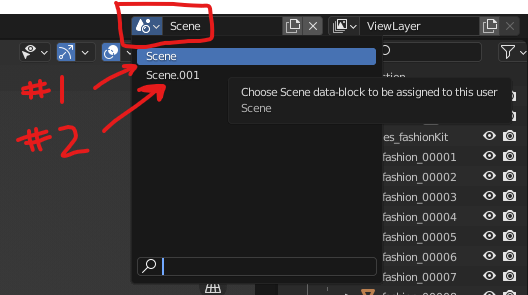
We want to be able to toggle quickly between scenes if necessary. We can look at our scenes by clicking this water droplet icon here:
If you want to see both of your scenes at the same time on your screen, Go to Window > New Main Window. This will open up a second tab of Blender, where you can then open up your second scene and “split screen” the two!
Step 3.2
Now that we have our 2 scenes and our 2 objects from scene #1 are copied, lets PASTE these objects into scene #2 by either going to: Object > Paste Object (Same place you found Copy Object) OR Press CNTRL + V (Windows users) or COMMAND + V (Mac users).
Step 3.3
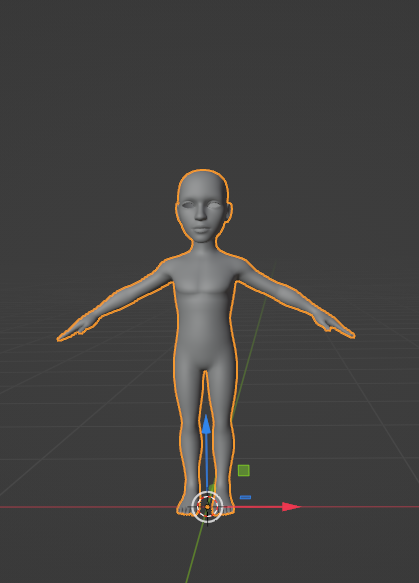
We also want to Copy + Paste our Mannequin from scene #1 into scene #2 so we have a good reference to fit the Wearables onto.
Step 4. Position to Fit on the Mannequin
Step 4.1
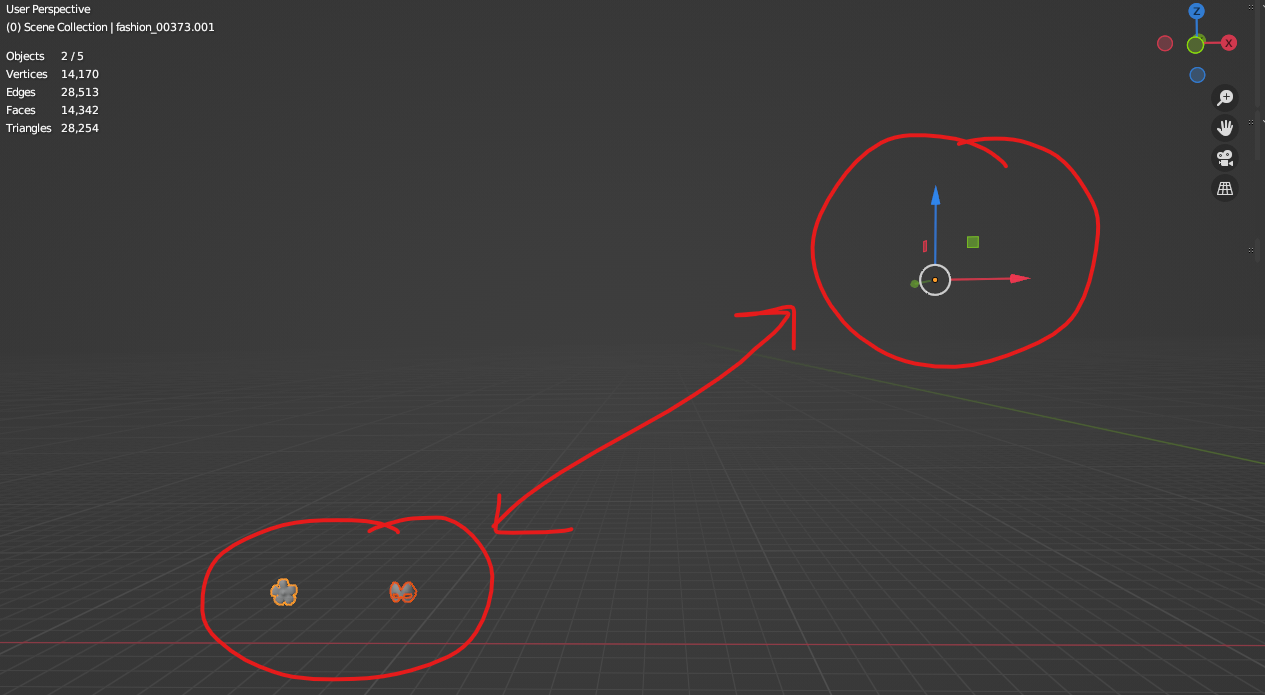
You will notice that the 2 wearable pieces you pasted are REALLY far away from the gizmo tool, which also includes the origin. It would make things quite difficult for us if we kept it this way, so lets fix this!
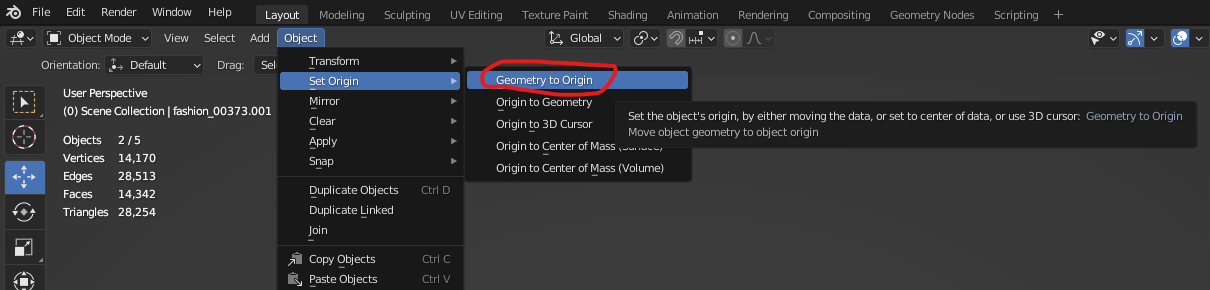
We want to bring the object back to World Center origin by going to the Object menu > Set Origin > Geometry to Origin.
Now both objects are in the World Center!
Step 4.2
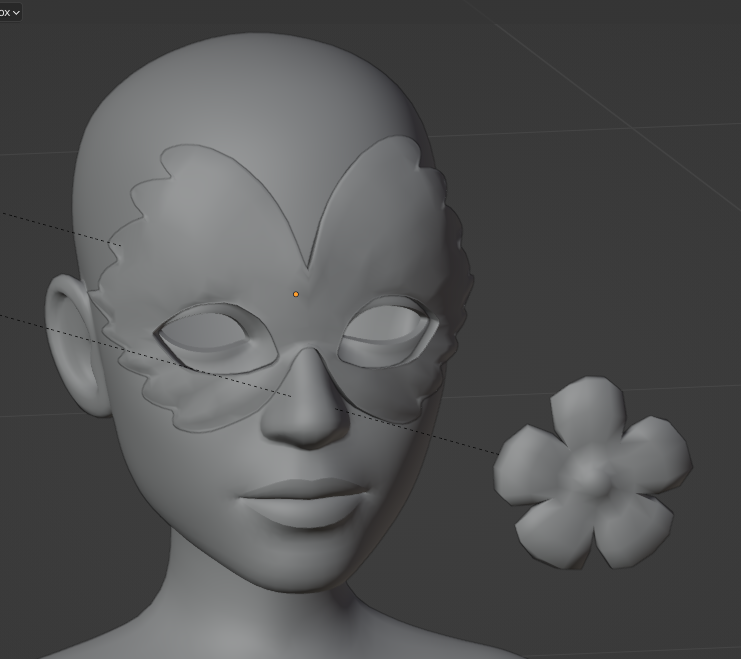
Now on to the fun stuff! We can begin designing. As you know, we chose a face mask with a flower decoration for this example, but their sizes are too similar! Let’s move and scale the flower so it fits the mask.
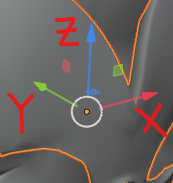
Select the Flower and mask by shift selecting or highlighting both objects. From there, use the 3D gizmo directional arrows to place these near your Genie Mannequin so we can fit it to the model. These arrows allow us to move an object across the X, Y or Z axis.
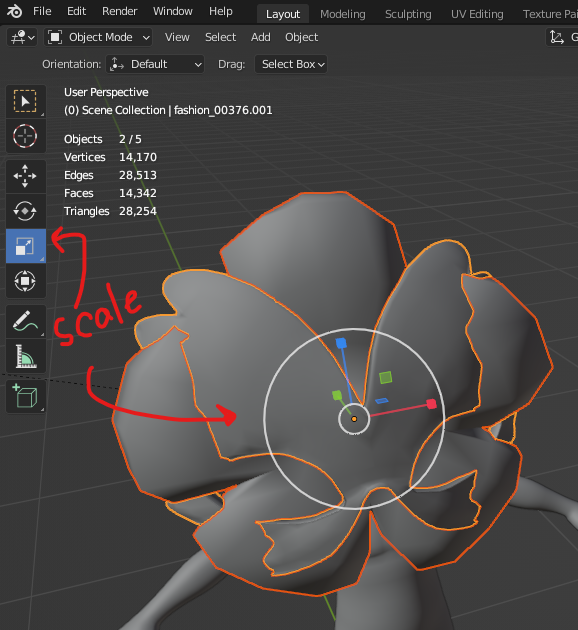
We can find the Move, Rotate and Scale tools on the left side of our screen menu:
The keyboard shortcuts are:
Gkey for Move ToolRkey for Rotate ToolSkey for Scale Tool
Move the mask and flower in front of the face. As we can see here, these objects are way too big for the mannequin! Lets scale it down. In this case, the white circle around all 3 axis arrows will scale all three axis at the same time.
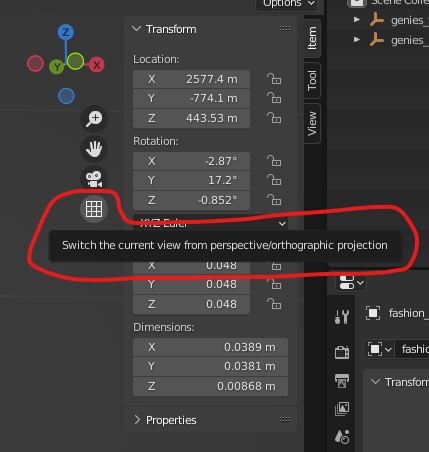
If you would like to change the perspective/orthographic views for your objects (depending on your preference), the button to toggle perspective on/off is here:
Step 4.3
After scaling down both objects, we can adjust the main Mask shape onto the face and separate it from the flower shape for now.
Step 4.4
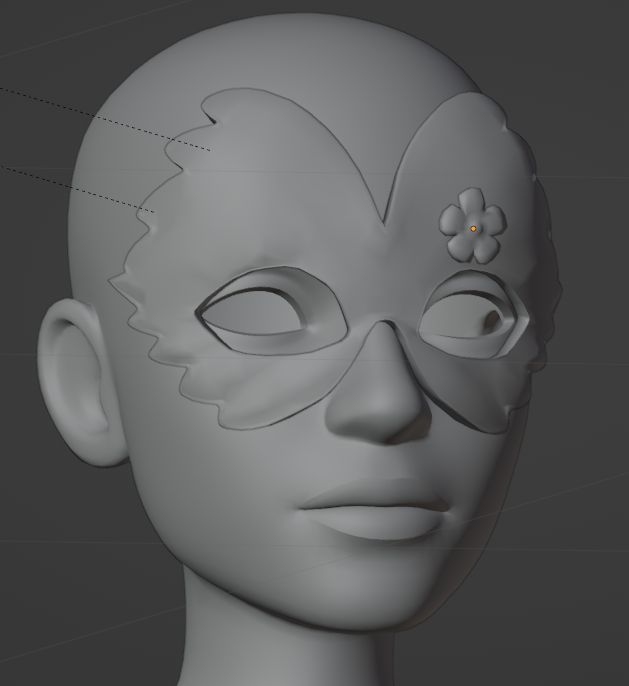
Now let’s place the flower in a good spot! Use Move, Rotate and Scale tools to fit this onto the mask.
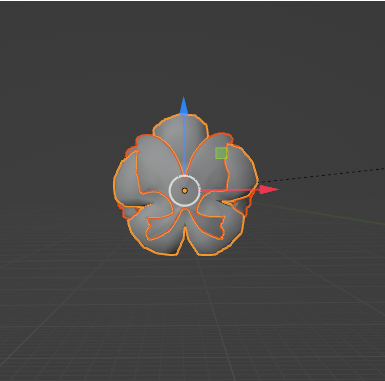
Now that we have adjusted these objects onto the model, you may notice that the gizmo tool points in a different direction!
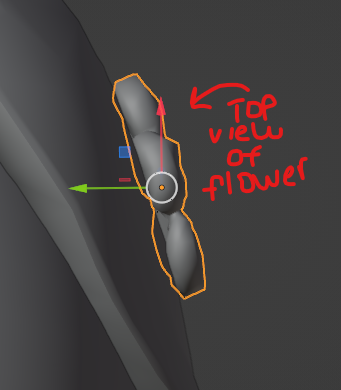
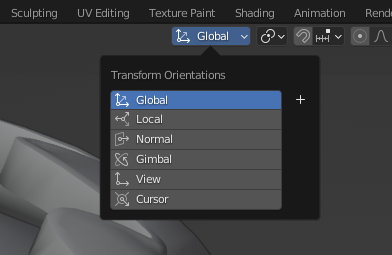
This is due to the gizmo being in the World Space setting. Instead, we can use the Local space setting (Objects local coordinates) to move the model. We do this by switching the transform space at the top middle of the screen.
Now we can move the model using its local coordinates. This means the gizmo tool keeps its forward direction, no matter how the model is rotated in the World Space setting. We can now place the model where it needs to go!
Step 4.5
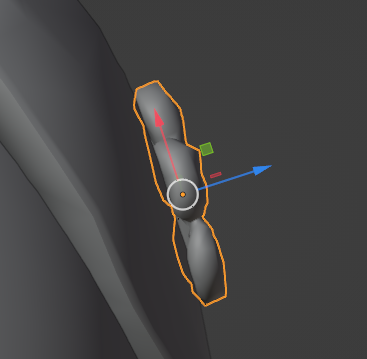
Lets duplicate this flower shape to make this piece more interesting!
Make a duplicate object by pressing Shift + D, then scale the object by pressing the S key. We can now make a smaller version of this flower to place on top of the first flower shown below:

Step 5. Combine into One Mesh
Step 5.1
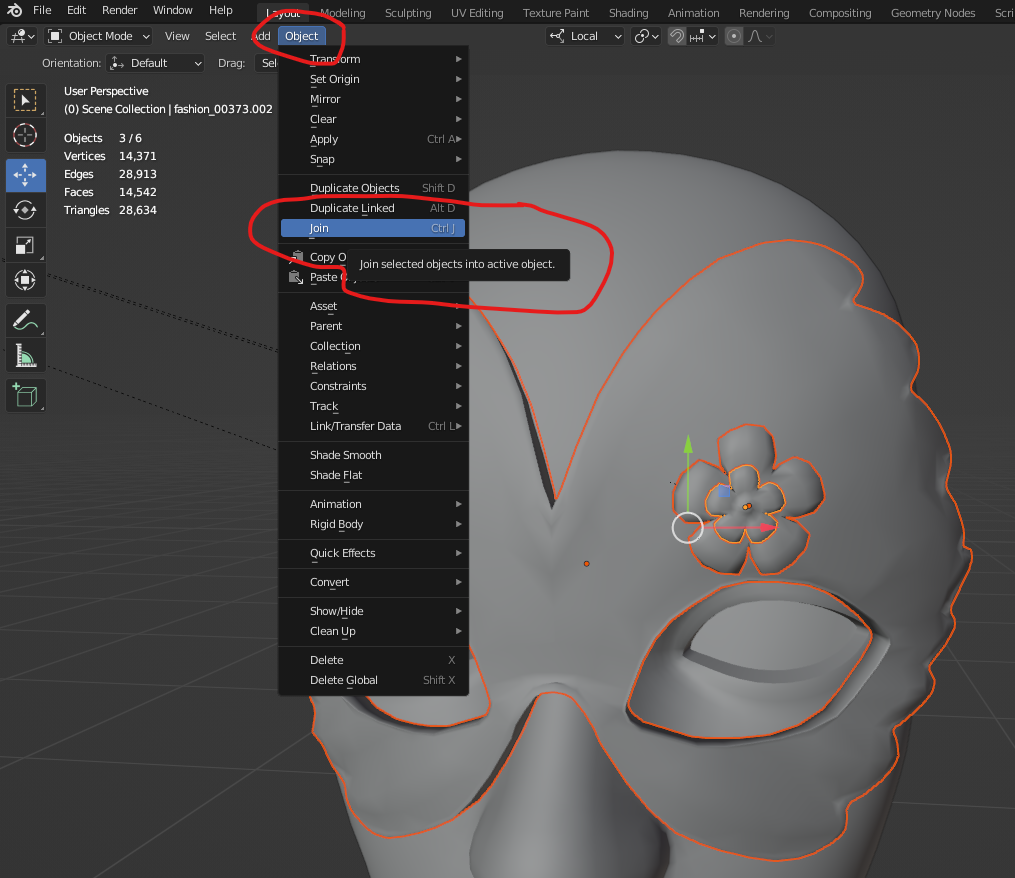
We will now COMBINE these objects into one mesh (One object)!
Select all three mesh objects (Shift Click each one) and press CNTRL + J or Object menu > Join.
Step 6. Set to World Origin and Apply Transformations
Step 6.1
We now have one Mesh! Let’s double check to make sure it’s at the World Origin (repeat Origin steps above to put it back into Global setting).
Step 6.2
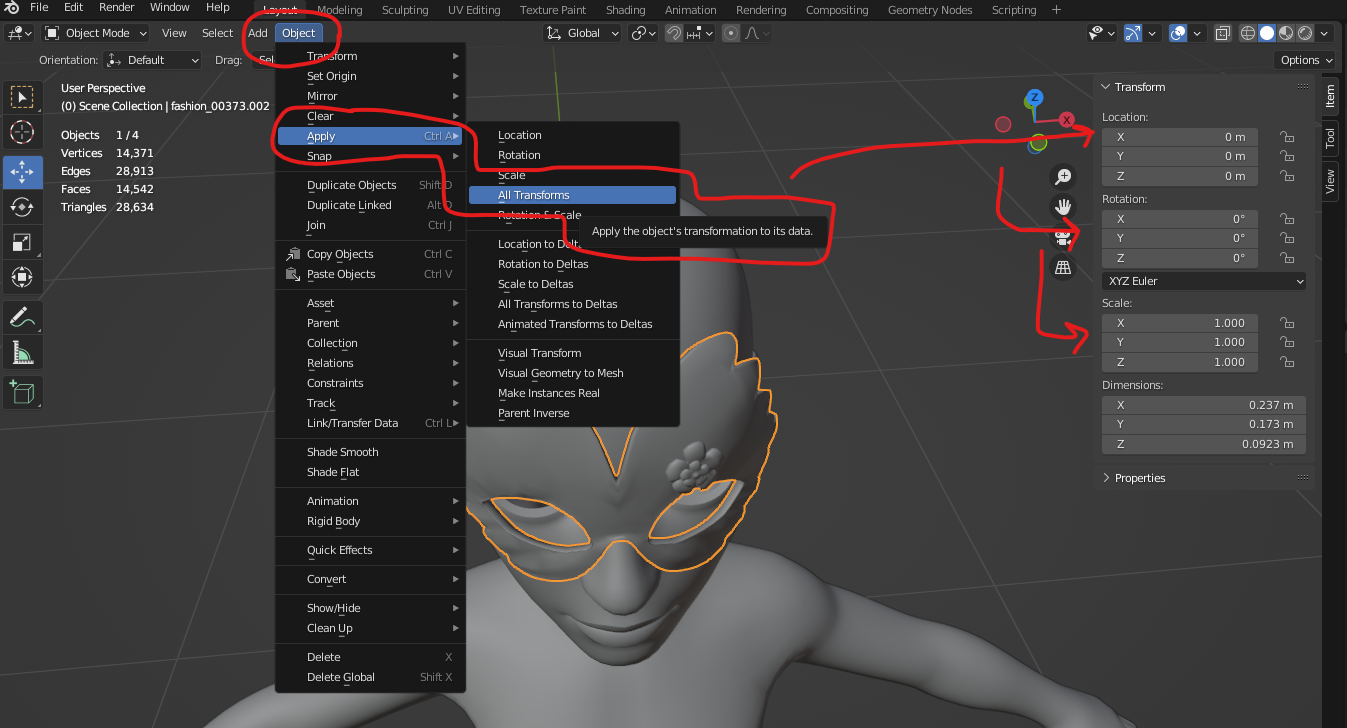
LAST STEP (IMPORTANT!)
We must apply our transformations! Applying transform values essentially resets the values of object’s location, rotation or scale, while visually keeping the object data in-place. The object origin point is moved to the global origin, the rotation is cleared and scale values are set to 1.
Congratulations! You just made your first 3D model!