Create a Shirt
This tutorial will demonstrate how to use the Genies Art Forge SDK to create a shirt model with a text prompt.
Install the SDK
Follow the Getting Started tutorial to install the Genies Art Forge SDK and authenticate the backend.
Open the Genies Art Forge Window
Once installed, you can open the Genies Art Forge window by selecting from the top dropdown menu Tools > Genies > Art Forge Hub.

You can also open the Genies Art Forge window with the keyboard shortcut Ctrl + G.
Generate a Model Preview
Open the Model Generator Tab
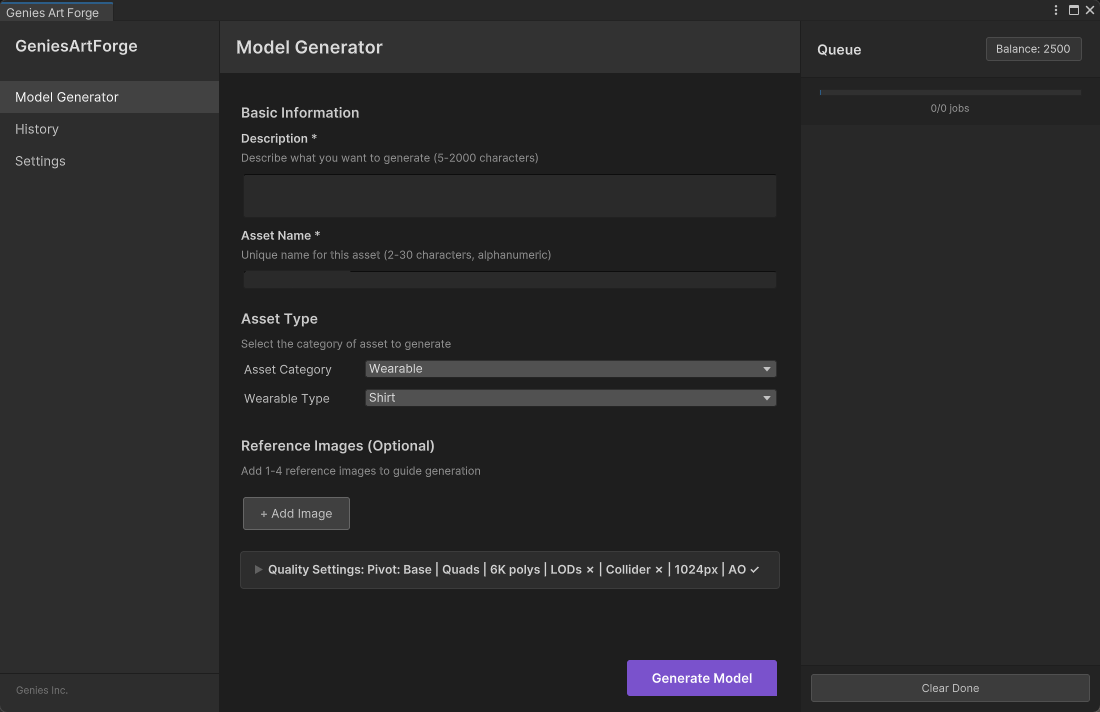
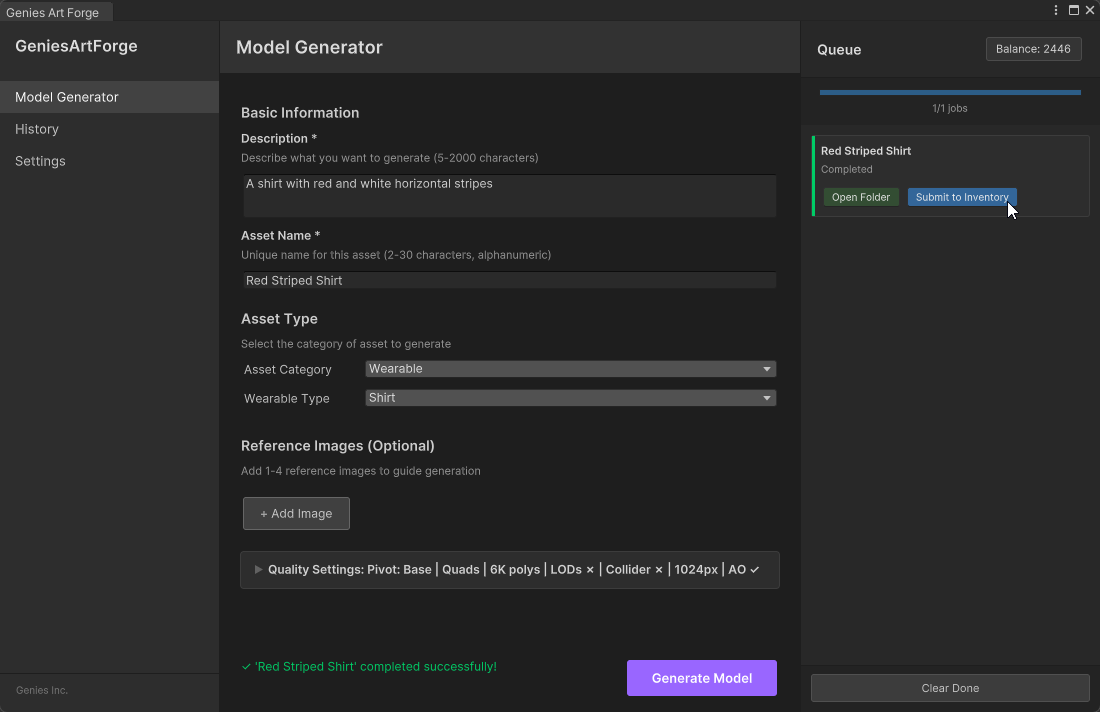
Once the Genies Art Forge window is open, make sure the Model Generator tab is selected in the left-side menu.
Add the Name and Description
Add text for the Description and Asset Name input fields.

The Description text will be used to generate the model so make sure it is descriptive. The Asset Name text needs to be unique for your generated models and will be displayed in the user's inventory if using it with the Genies Avatar SDK.
Choose the Asset Type
Select Wearables for the Asset Category and Shirt for the Wearable Type.

The Wearable Type needs to be correctly selected for the model to be generated correctly and for the model to be auto-rigged to the Genies Avatar correctly.
Generate the Model
There are optional settings for adding an image prompt or changing the quality settings, but they are not necessary for generating a model. Click the Generate Model button.
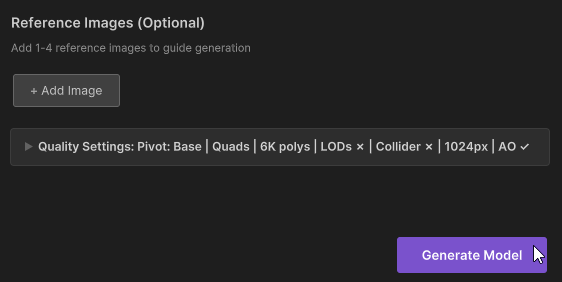
Changing the Quality Settings is not recommended unless you need to for a specific reason.
Approve the Preview
Once the model preview is generated, a popup window will appear displaying four different versions of the model. Find the desired version and then click the Approve button.

If none of the preview versions are adequate, try using the Retry button to generate new versions. If further versions are required, click the Cancel Job button and add a more descriptive text prompt and utilize image prompts.
Preview the Generated Model
Open the Model Folder
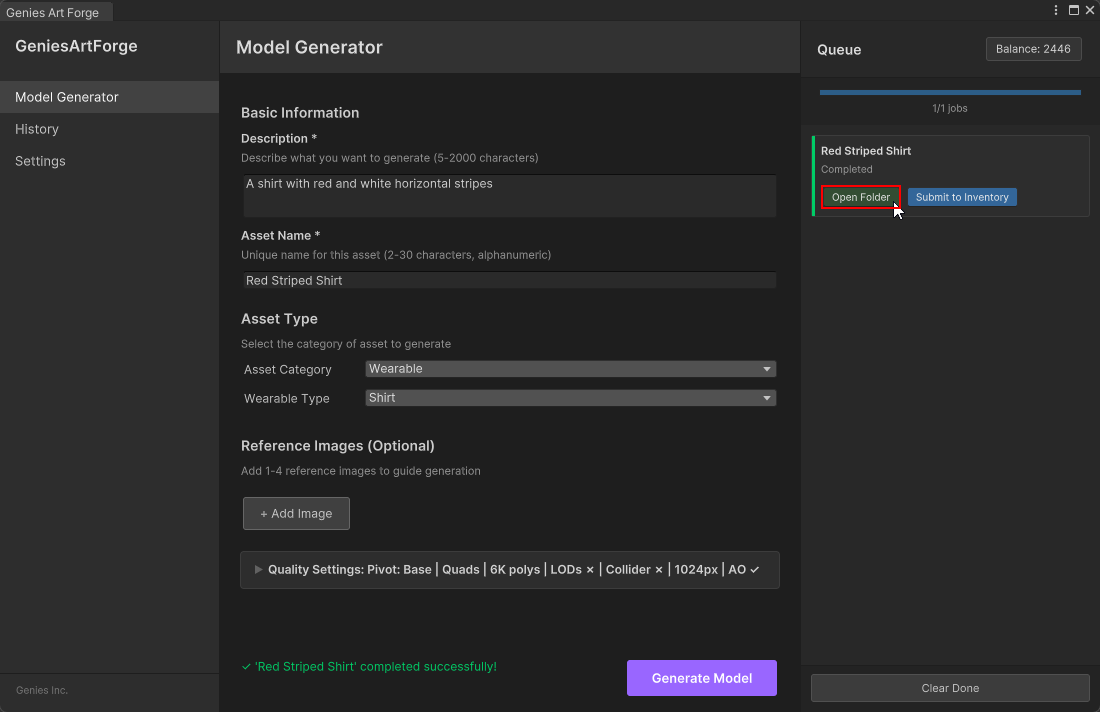
Once approved, it will take some time for the model to be generated. Once generated, click the Open Folder button on the right of the Genies Art Forge window.
Inspect the Model
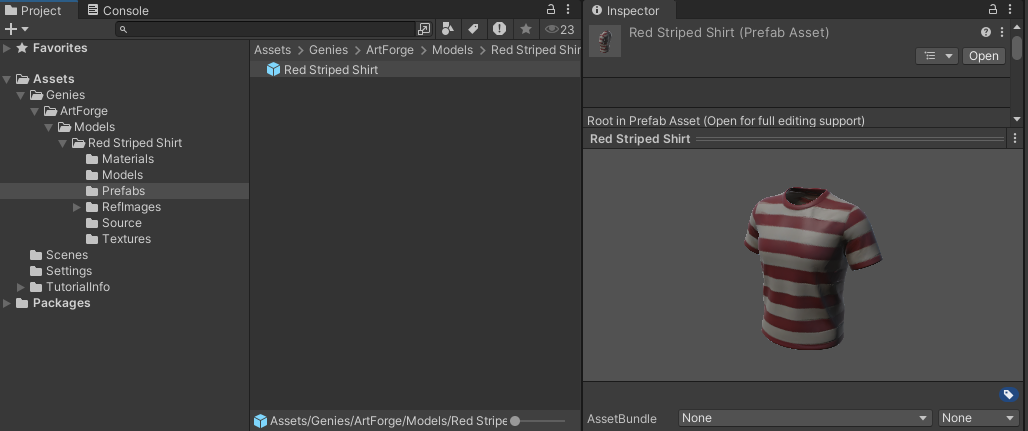
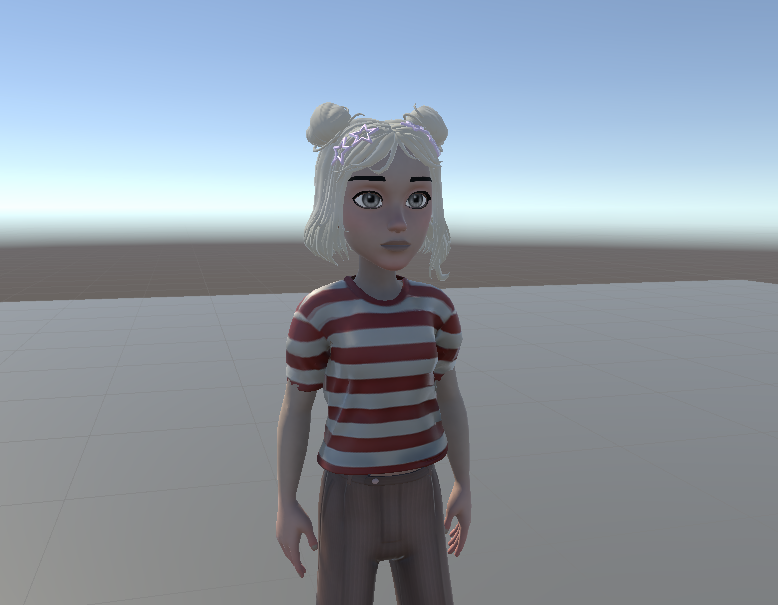
The generated models are stored by default in the Assets > Genies > ArtForge folder. There are many assets generated such as materials, textures, and a prefab. Select the prefab asset to view the generated model in the Unity editor.
Submit the Model to Inventory
Click the Submit Button
Open the Genies Art Forge window. Click the Submit to Inventory button.
Equip the Asset
Once the submission is complete, open a Unity project that uses the Genies Avatar SDK. The generated shirt should now appear in the inventory for the Avatar to equip.
Check out the Genies Avatar SDK documentation to create a Unity project using the Genies Avatar SDK.