Getting Started
This tutorial will show you how to install the Genies Art Forge SDK into a Unity project.
Check the Prerequisites
Download Unity Hub
Unity Hub is the software tool to create and launch Unity projects and choose which version of Unity to use for the project.
Start by downloading Unity Hub.
Download Unity Version
The Genies Art Forge SDK works with a minimum Unity version of 2022.3.62f2.
Here are the two recommended versions:
Create a Genies Account
Open the Developer Portal Page
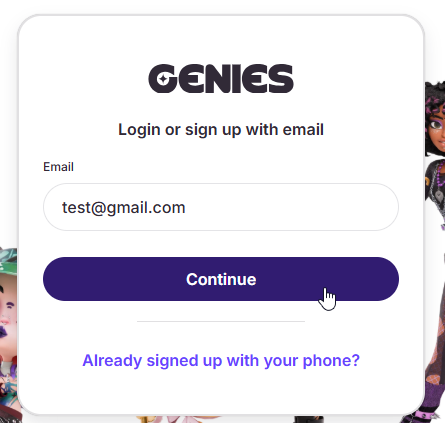
Navigate to the Developer Portal page. Start the account creation by typing your email into the input field and clicking the Continue button.
Finish the Sign Up
Fill out the necessary information. Then click the Sign up button to create your Genies account.

Create a Unity Project
Open Unity Hub and click the New project button at the top right. Select a suitable Editor version option. Then select the Universal 3D template and click Create Project.
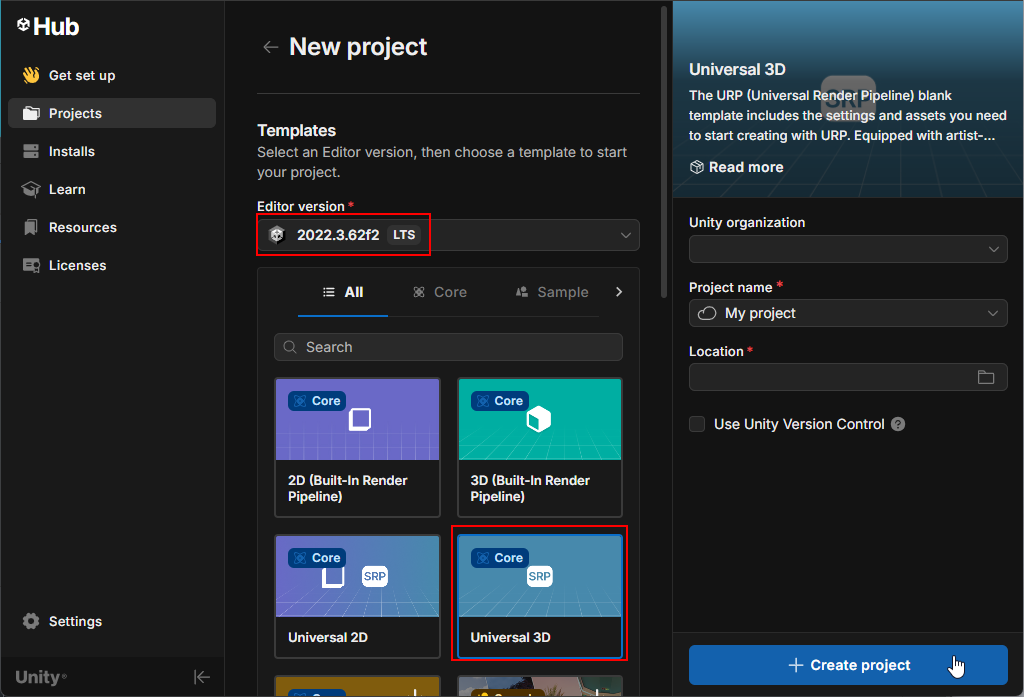
The Genies Art Forge SDK needs to be used with a project that supports the Universal Render Pipeline (URP). The Universal 3D template is a blank URP project. You may need to download the template before being able to create a project with it.
Install the Package
If you are installing the Genies Art Forge SDK and Genies Avatar SDK on the same project, then the two packages will become intrinsically linked because they share common files. Please refer to the Common Issues page for best practices.
Add the Package
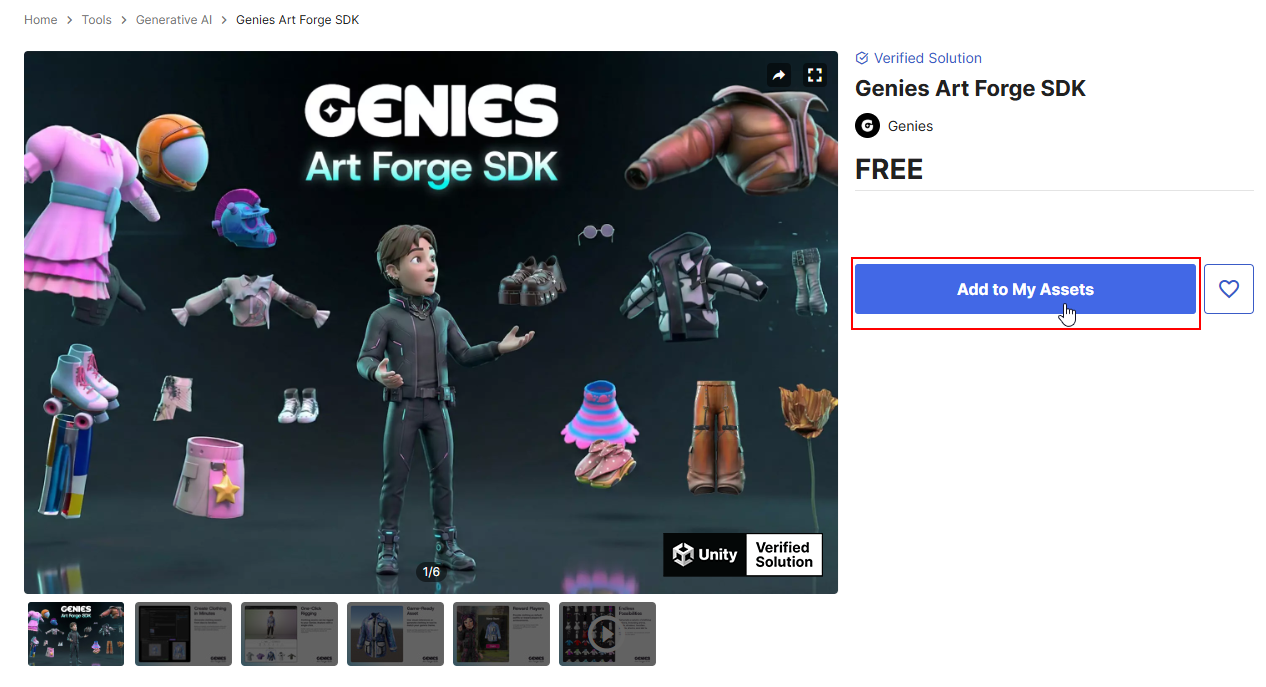
Go to the Unity Asset store page for the Genies Art Forge SDK package.
Click the Add to My Assets button.
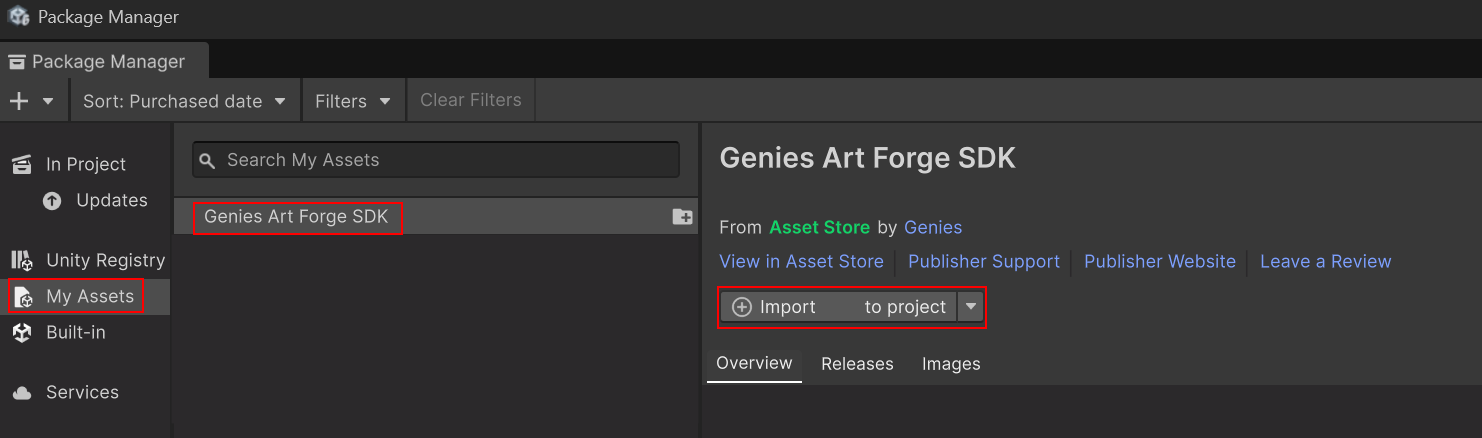
Download the Package
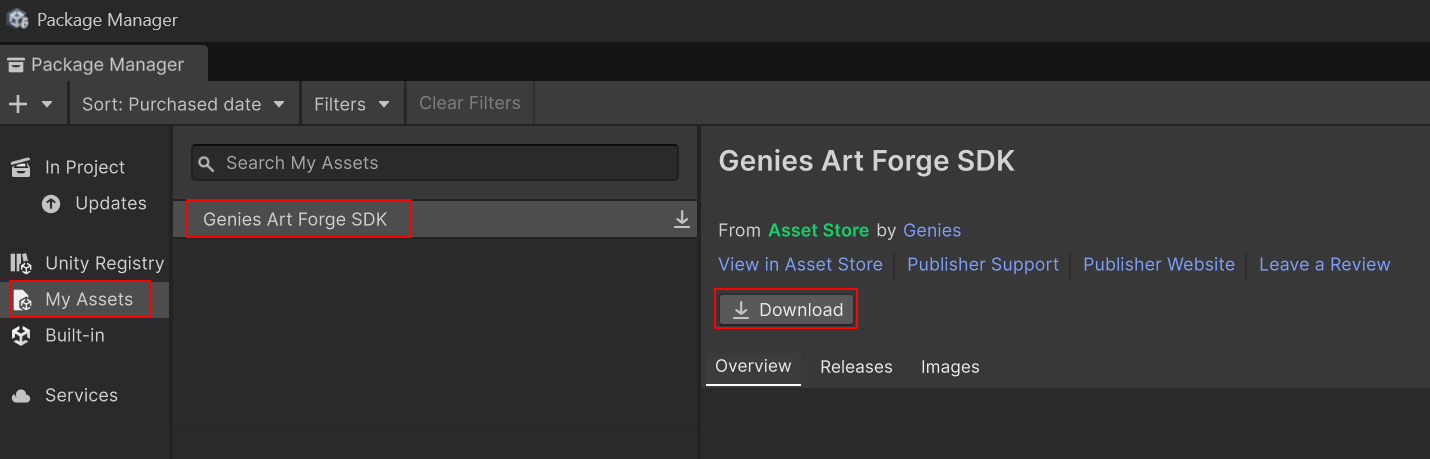
In Unity, click the top dropdown menu Window > Package Manager. When the Package Manager window opens, change the top left option to Packages: My Assets. Then search and select the Genies Art Forge SDK package in the left-side list. Click the Download button at the top right.
Import the Package
Once the package is downloaded, click the Import button at the top right.
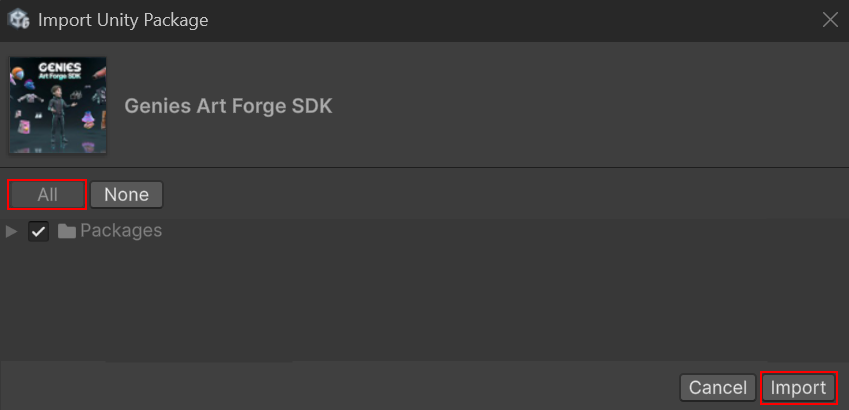
Import All Assets
A window will pop-up with import settings, click the All button at the top left. Then click the Import button at the bottom right.
Open the Genies Art Forge Window
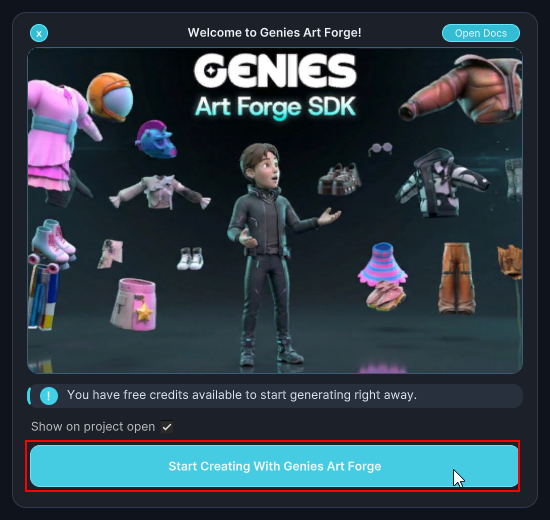
Open with the Welcome Window
Once installed, a welcome window should appear. Click the Start Creating with Genies Art Forge button to open the Genies Art Forge window.
Open with the Tools Menu
You can also open the Genies Art Forge window by selecting from the top dropdown menu Tools > Genies > Art Forge Hub.

You can also open the Genies Art Forge window with the keyboard shortcut Ctrl + G.
Login to Configure Backend Authentication
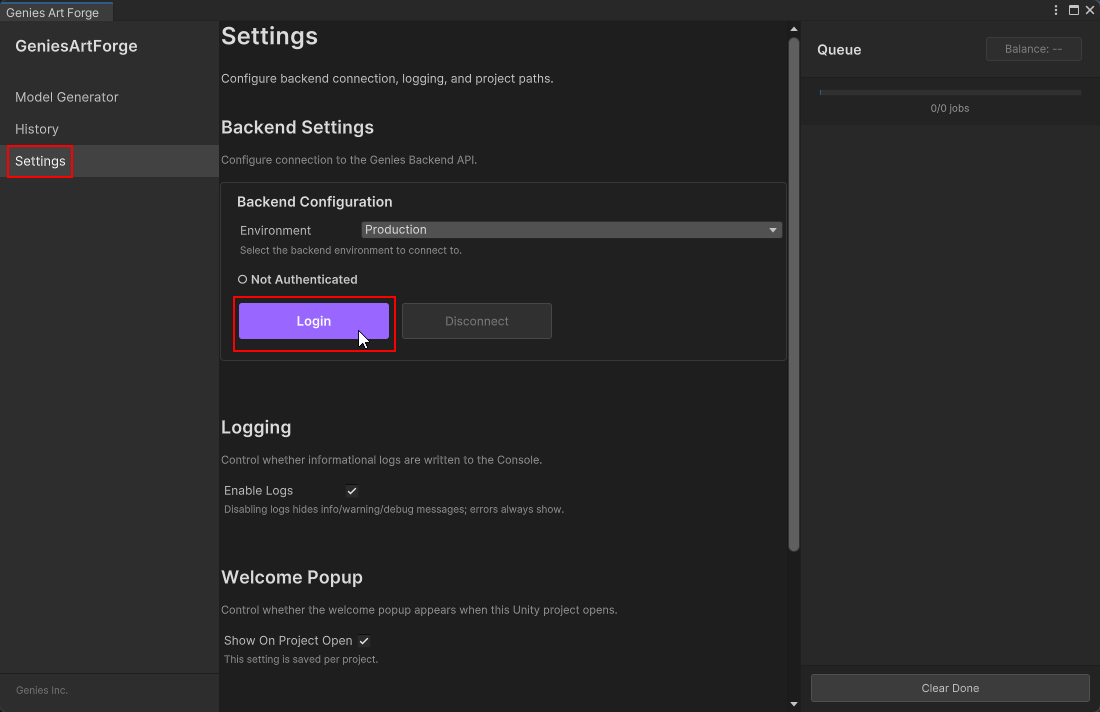
Login in the Settings Tab
With the Genies Art Forge window open, select the Settings tab on the left side menu. Click the Login button which opens a new browser window.
Login with Genies Login
In the window that opens, login with your Genies email login.
Select the Genies Users Organization
The next prompt is to select an organization. Select the Genies Users organization. Then click the Allow Access button.
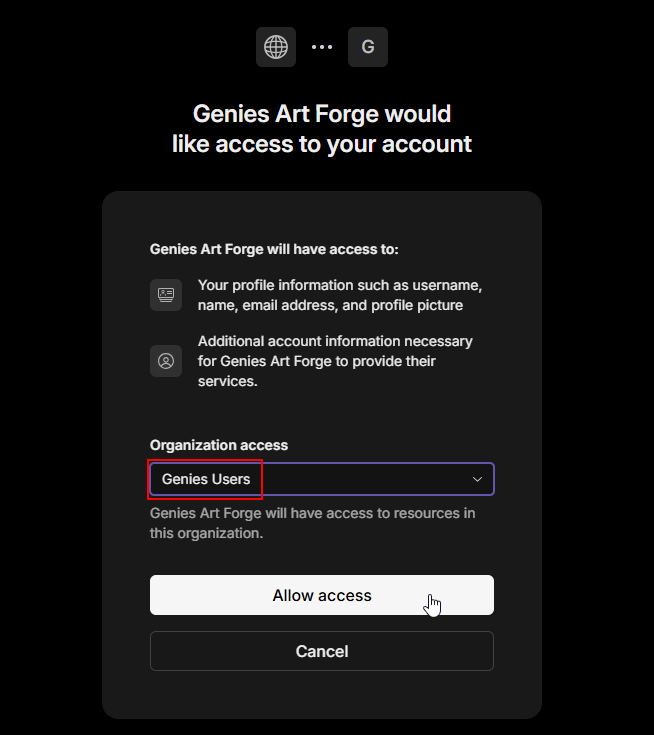
This is in place for future features. Ignore any other options for now.
Login Successful
The login should be completed and display the authentication is successful. You are now ready to start creating content with the Genies Art Forge SDK.

Check out the Create a Wearable tutorial to see directions on how to use the Genies Art Forge SDK.