UV Unwrapping
Unfold 3D Plug-in
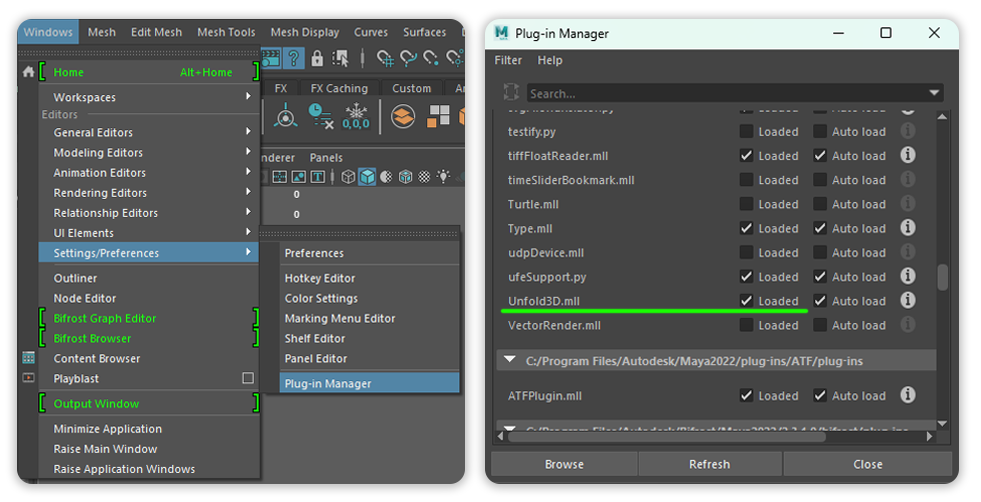
Maya has great UV Mapping tools. To make sure all of the tools work correctly, please double check if your Unfold3D plug-in is loaded.
All your loaded plug-ins can be found here: Windows → Settings / Preferences → Plug-in Manager.
UV Editor and UV Toolkit
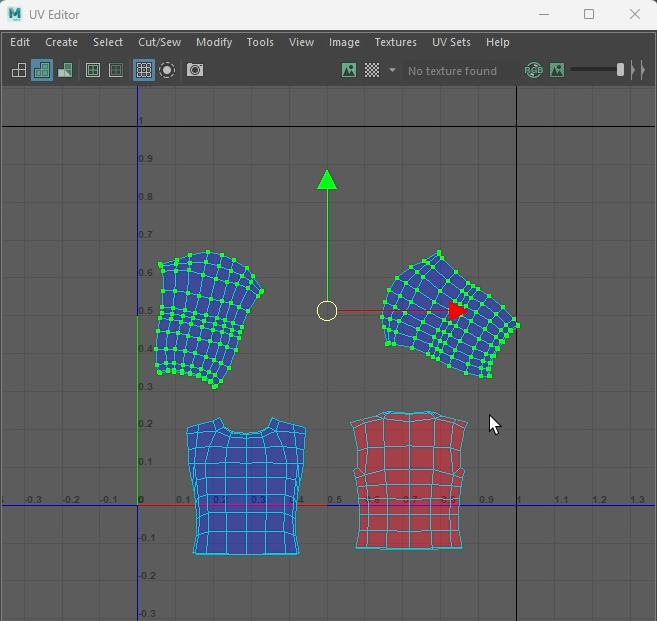
UV Editor is the space where you can view and edit your asset’s UVs.
UV Toolkit is a collection of useful tool for editing and arranging your UV shells.
To start the UV mapping, please open UV → UV Editor from the top bar menu.
This should open the main UV Editor menu and UV Toolkit menu.
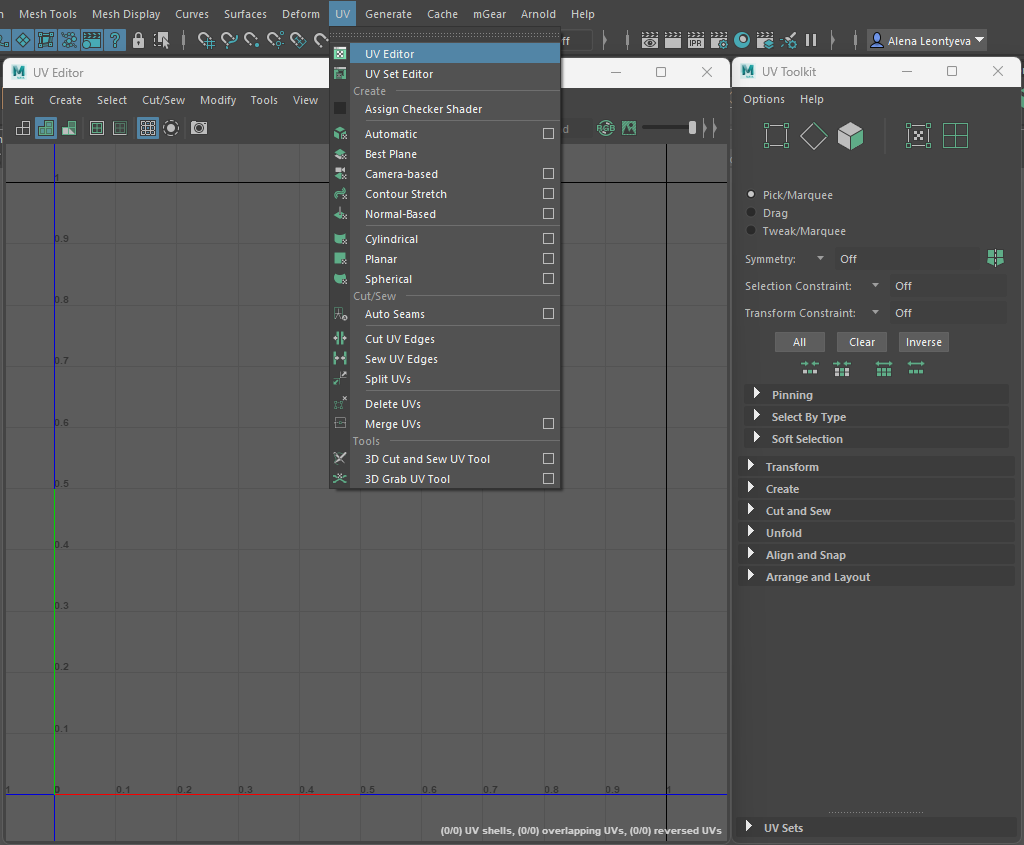
UV Editor is the space where you can view and edit your asset’s UVs.
UV Toolkit is a collection of useful tool for editing and arranging your UV shells.
Step-by-Step UV Unwrapping Process
Step 1. Create the initial UVs
With your asset selected, proceed to UV→ Planar Mapping Options and select the axis to project from.
In majority of cases, Z axis will give you a good front projection (your asset will be projected from the front of the mannequin).
Step 2. Split the initial UVs into appropriate shells
In Autodesk Maya, you can select the needed edges on your model and then select the “cut and sew” option in the UV Toolkit window.
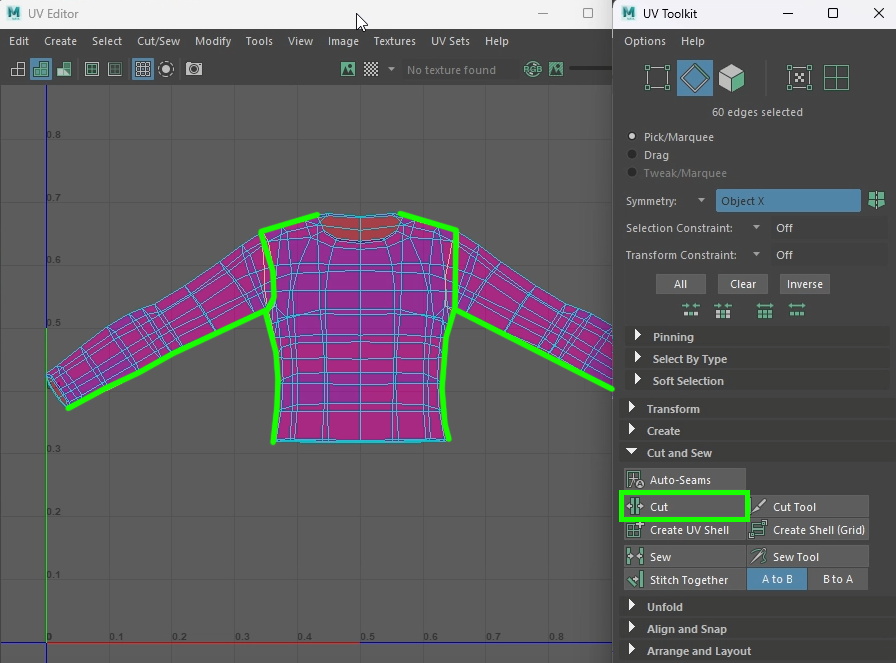
Do not forget to do additional cut lines to unfold the part better. For example, if you are creating cut lines for the sleeve, first - separate the sleeve from the body area. Then place a cut line on the bottom/underside of the sleeve to be able to unfold it into a flat shape.
Step 3. Unfold the pre-cut UV shells
Maya had a good unfold algorithm inbuild it the UV Toolkit ([Unfold3D plug-in]).
To unfold the UV shell, simply select the shell in the UV Editor and then click on “unfold” in the UV Toolkit.
*If Maya is having trouble unfolding the shell, please double check if all the needed edges are pre-cut correctly.
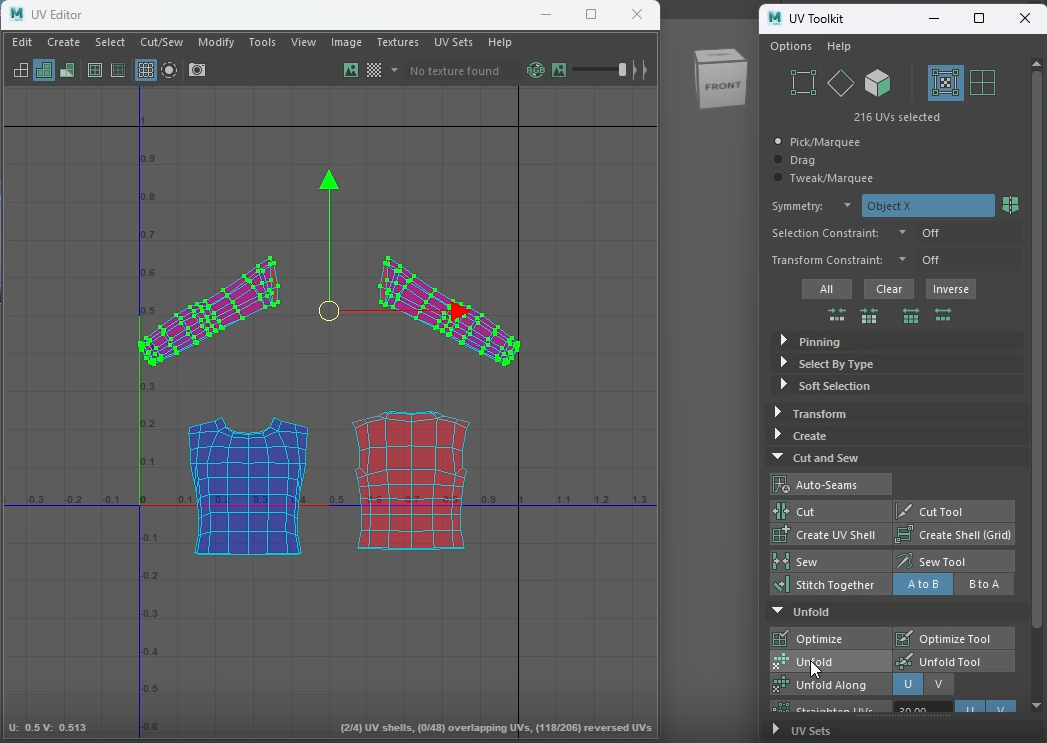
Step 4. Flip the UV shells if needed
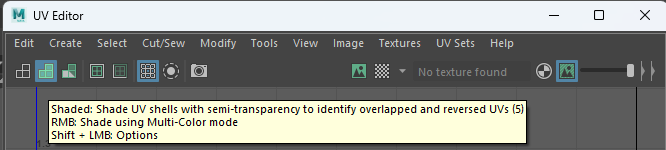
To ensure that all the texture maps will be created correctly, it is important to have all the UV shells placed the “correct” side up.
You can use the shaded UV shell preview in the UV editor to check if you have flipped UVs. Flipped UV shells will be displayed in red.
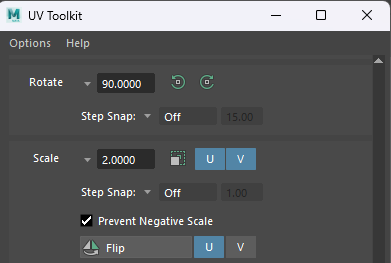
To edit the flipped UV shells, select the needed UV shell, then proceed to “UV Toolkit → Transform → Tools → Flip”.
Step 5. Rotate the UV Shells consistently
You can rotate the UV shells in the UV editor by selecting the needed UV shell and using the rotation tool (shortcut - E). You can also use the Rotate option on the “UV Toolkit → Transform → Tools” to rotate a shell more precise.
To double check if your UV shells are rotated in the same direction, please use [Genies UV Check Map] or any similar texture map.
Step 6. Scale and pack all your UV Shells into one UDIM space
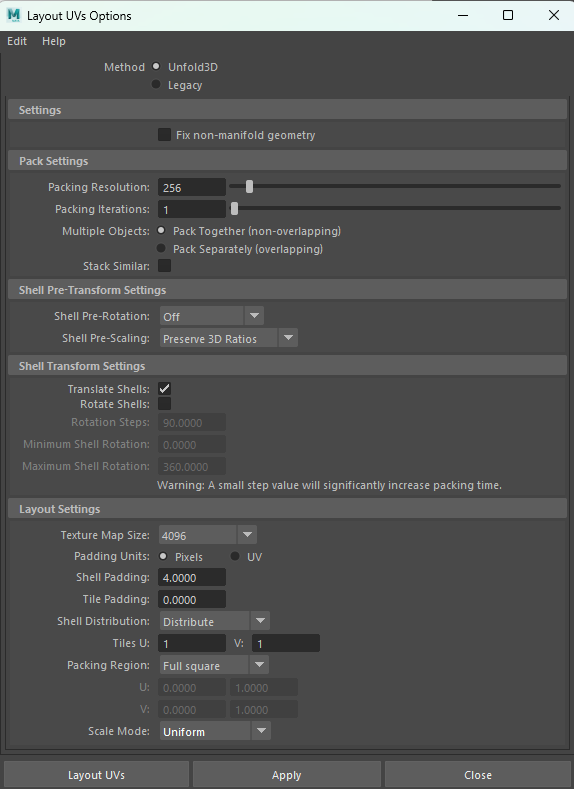
Autodesk Maya provides good automatic Layout options. You can access those in the UV Editor window under Modify → Layout.
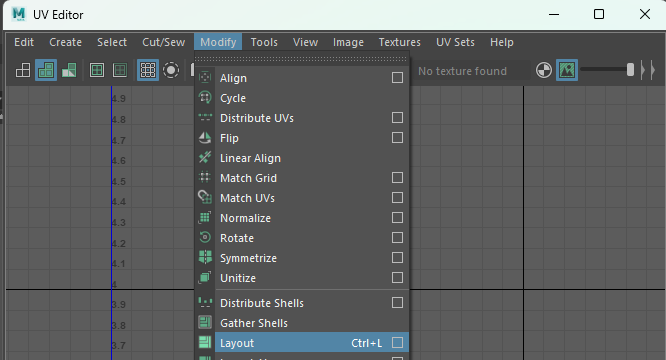
We recommend to use the following settings for the automated UV Layout:
- If you previously rotated the UV shells, please make sure to uncheck “Shell Pre-Transform Settings → Rotate Shells”
- Keep the “Shell Pre-Transform Settings → Translate Shells” on.
- Set your texture map size o 4k map and make sure to add at least 4px shell padding
- Make sure you select “Layout Settings → Scale Mode → Uniform”. This will uniformly scale your UV shells
UV Map Checklist
- No Flipped UV Shells
- UV Shells rotated consistently
- UV Shells scaled uniformly
- UV Shell efficiently packed in one UDIM
- No overlapping UV shells
- One UV Set named “map1”
- No non-manifold UVs
Read the UV Unwrapping page for more information.