First Project
This tutorial will show you how to create a basic project from scratch with the Genies Web SDK.
Create Folder Hierarchy
Create a new folder for the project. Then create two sub-folders: js and server.

Create NPMRC File
In the root folder, create a new file named .npmrc. Add the following code:
@geniesinc:registry=https://npm.pkg.github.com
Install Packages
Open the Command Prompt/Terminal and enter the following commands to initialize NPM and install the needed packages:
cd genies-web-sdk-project #replace with your project directory

npm init -y

npm install three@0.180.0

npm config set //npm.pkg.github.com/:_authToken=paste-auth-token-here
npm install @geniesinc/genies-naf-webgl
An auth token is required to install the Genies Web SDK. Reach out to Genies for a token.
Create Scripts
JavaScript Main Logic Script
Create a script named main.js in the js folder. Add the following code:
The JavaScript file requires three JSON files:
- Asset Resolver Config
- Texture Settings
- Avatar Definition
Please reach out to Genies for these files.
import * as THREE from 'three';
import { initialize } from 'naf';

// Two JSON configs required for assets and textures
const ASSET_RESOLVER_CONFIG_PATH="paste-cdn-here";
const TEXTURE_SETTINGS_PATH="paste-cdn-here";

// JSON that defines the Avatar
const avatarDefinition = {"assets":[{"id":"paste-avatar-id-here","version":"1","lod":"0"}],"shapeAttributes":{}}

const canvas = document.getElementById("canvasRef");

/**
 * Initialize the SDK with the canvas reference and asset/texture JSONs
 */
const naf = await initialize(
    {
        canvas,
        assetResolverConfigPath: ASSET_RESOLVER_CONFIG_PATH,
        textureSettingsPath: TEXTURE_SETTINGS_PATH,
    }
);

/**
 * Create a scene using Three JS functions
 */
const scene = new THREE.Scene();

const camera = new THREE.PerspectiveCamera(45, window.innerWidth / window.innerHeight, 0.1, 1000);
camera.position.set(0, 1.5, 5);
camera.lookAt(0, 1, 0);

const renderer = new THREE.WebGLRenderer({ canvas, antialias: true });
renderer.setSize(window.innerWidth, window.innerHeight);
renderer.outputColorSpace = THREE.SRGBColorSpace;
renderer.toneMapping = THREE.ACESFilmicToneMapping;
renderer.toneMappingExposure = 1.0;

scene.add(new THREE.AmbientLight(0xffffff, 0.3));
const directionalLight = new THREE.DirectionalLight(0xffffff, 1.5);
directionalLight.position.set(5, 5, 5);
scene.add(directionalLight);
scene.add(new THREE.GridHelper(10, 10));

/**
 * Load the Avatar and apply a shader
 */
const handle = await naf.loadAvatar(avatarDefinition, { renderer, lod: 0 });
scene.add(handle.mesh);

const shader = naf.getShaderManager();
shader.setActiveAvatar(handle.avatarId);
shader.toon.enable(true);
shader.toon.setParam('cartoonMix', 0.8);

/**
 * Setup a loop to render the Avatar
 */
let lastFrameTime = 0;

function animate(currentTime) {
    requestAnimationFrame(animate);

    const deltaTime = lastFrameTime ? (currentTime - lastFrameTime) / 1000 : 0;
    lastFrameTime = currentTime;

    naf.update(deltaTime, renderer);
    shader.validate();
    renderer.render(scene, camera);
}

animate();
HTML Website Script
Create a script named index.html in the root folder. Add the following code:
<!DOCTYPE html>
<html lang="en">
  <head>
    <!-- Import map for legacy mode (always present, harmless if unused) -->
    <script type="importmap">
    {
        "imports": {
            "three": "./node_modules/three/build/three.module.js",
            "three/addons/": "./node_modules/three/examples/jsm/",
            "naf": "./node_modules/@geniesinc/genies-naf-webgl/dist/naf.js"
        }
    }
    </script>
    <meta charset="utf-8">
  </head>
  <body>
    <!-- Main JS script and canvas reference -->
    <script type="module" src="/js/main.js"></script>
    <canvas id="canvasRef"></canvas>
  </body>
</html>
Python Server Script
Create a script named server.py in the server folder. Add the following code:
"""
Simple HTTPS local server using Python.

- Enables HTTPS using a provided SSL certificate and key (cert.pem, key.pem)
- Adds Cross-Origin isolation headers (COOP/COEP) required for Genies Web SDK
- Intended for local development (https://localhost:8000)
"""

import http.server
import ssl

PORT = 8000

class Handler(http.server.SimpleHTTPRequestHandler):
    def end_headers(self):
        self.send_header("Cross-Origin-Opener-Policy", "same-origin")
        self.send_header("Cross-Origin-Embedder-Policy", "require-corp")
        super().end_headers()

httpd = http.server.HTTPServer(("localhost", PORT), Handler)

context = ssl.SSLContext(ssl.PROTOCOL_TLS_SERVER)
context.load_cert_chain(certfile="cert.pem", keyfile="key.pem")

httpd.socket = context.wrap_socket(httpd.socket, server_side=True)

print(f"Serving on https://localhost:{PORT}")
httpd.serve_forever()
Create SSL Certificates
The python script requires two SSL certificates (cert.pem and key.pem) in the root folder.
In the Command Prompt/Terminal, type this command:
openssl req -x509 -newkey rsa:2048 -nodes -keyout key.pem -out cert.pem -days 365
OpenSSL needs to be installed for this command to work.
Run Project
- Windows
- Mac
In the Command Prompt, type this command:
python server/server.py
In the Terminal, type this command:
python3 server/server.py
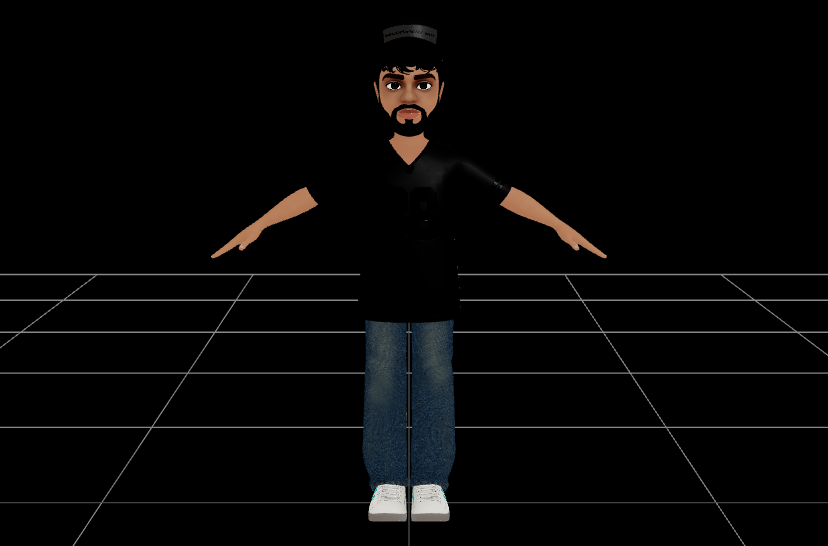
Then open https://localhost:8000/. You should see an Avatar after a couple seconds.