Thing Model Tutorial
This tutorial will demonstrate how to rig a 3D model using Blender so it is ready to be used for a Thing-max in Unity.
A Thing-max requires its 3D model to be skinned correctly, sitting on the ground, and have a specific bone joint hierarchy.
Read the 3D Model Requirements page for more information.
Download Blender
This tutorial uses Blender 4.0 which can be downloaded here: https://www.blender.org/download/releases/4-0/
Download the Model
You can use a 3D model of your choice. This tutorial will use a traffic cone downloaded from Turbo Squid which is a great site for free 3D models.
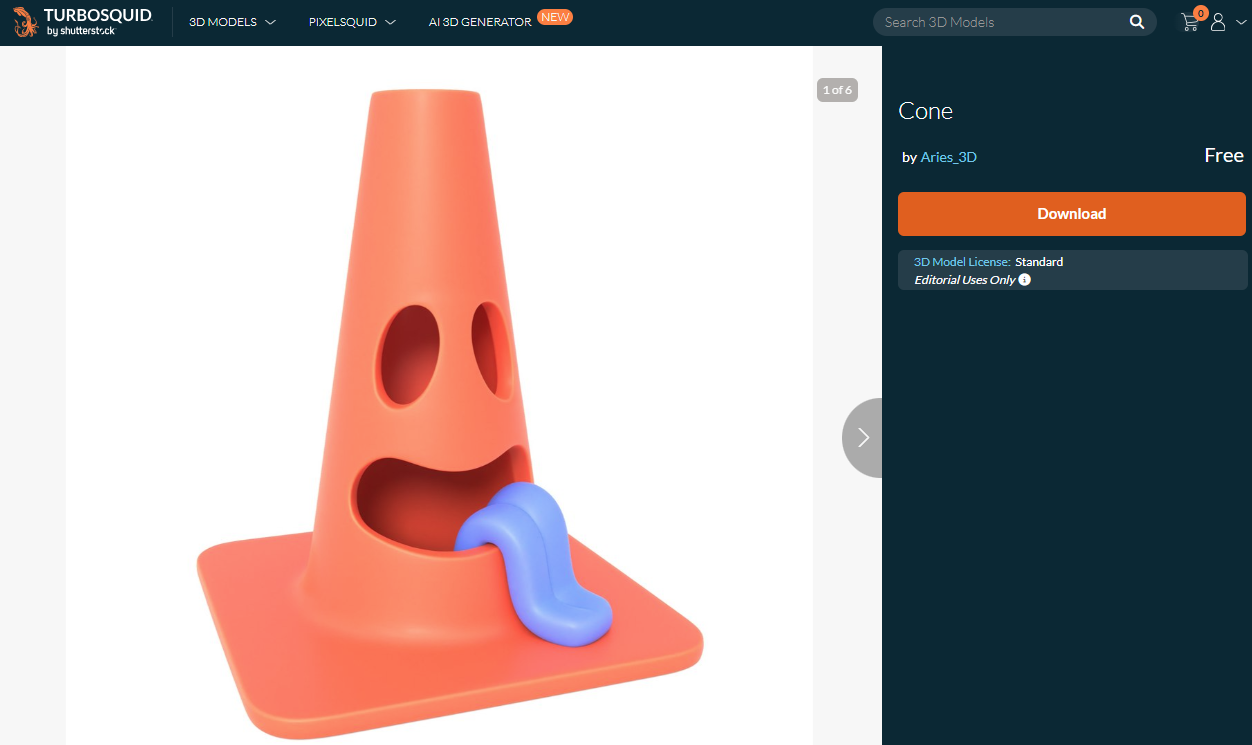
Make sure the 3D model is able to imported into Blender. This is usually FBX, OBJ, or BLEND file types.
Import the Model
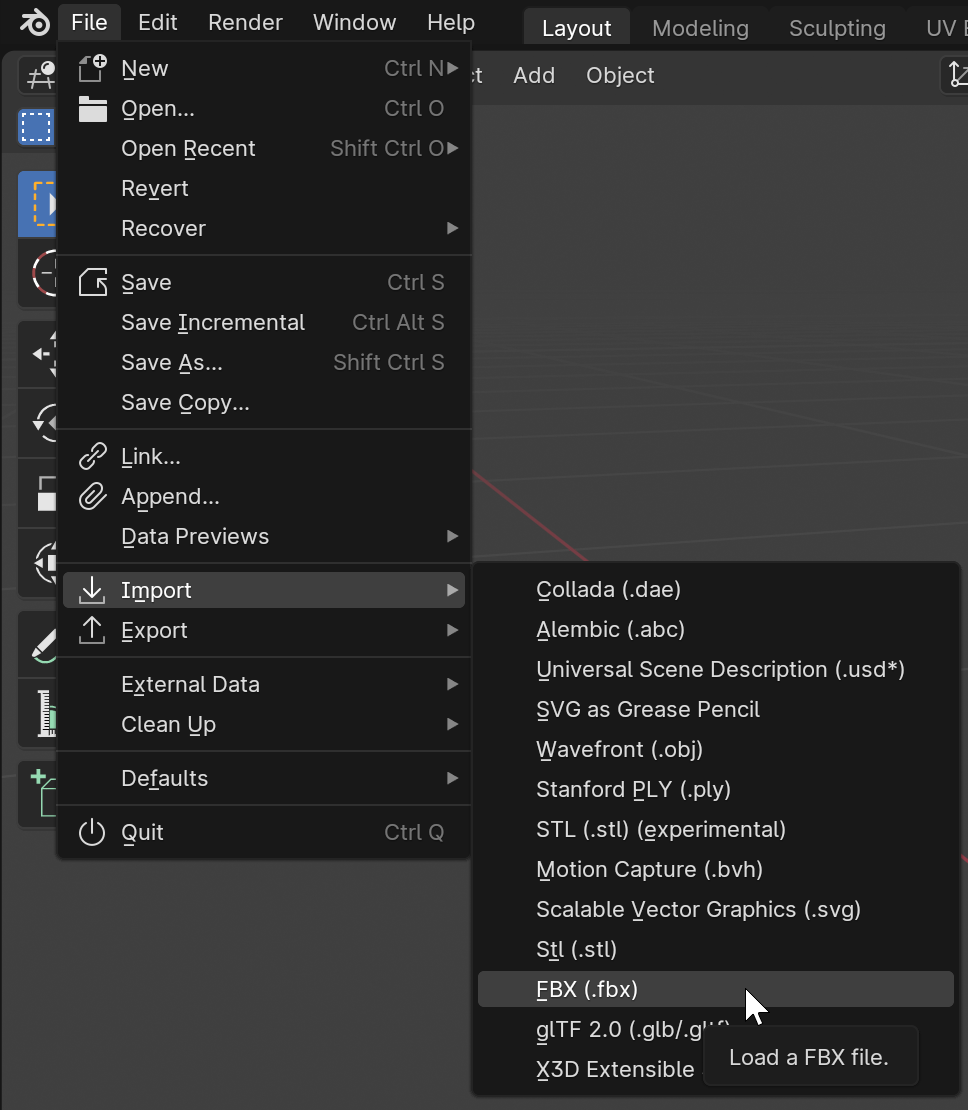
Open Blender and click the File top dropdown menu. If your 3D model is a BLEND file type then select the Open option. If not, then select the Import option and select the appropriate file type. Find the 3D model file and click the blue button to open or import the file.
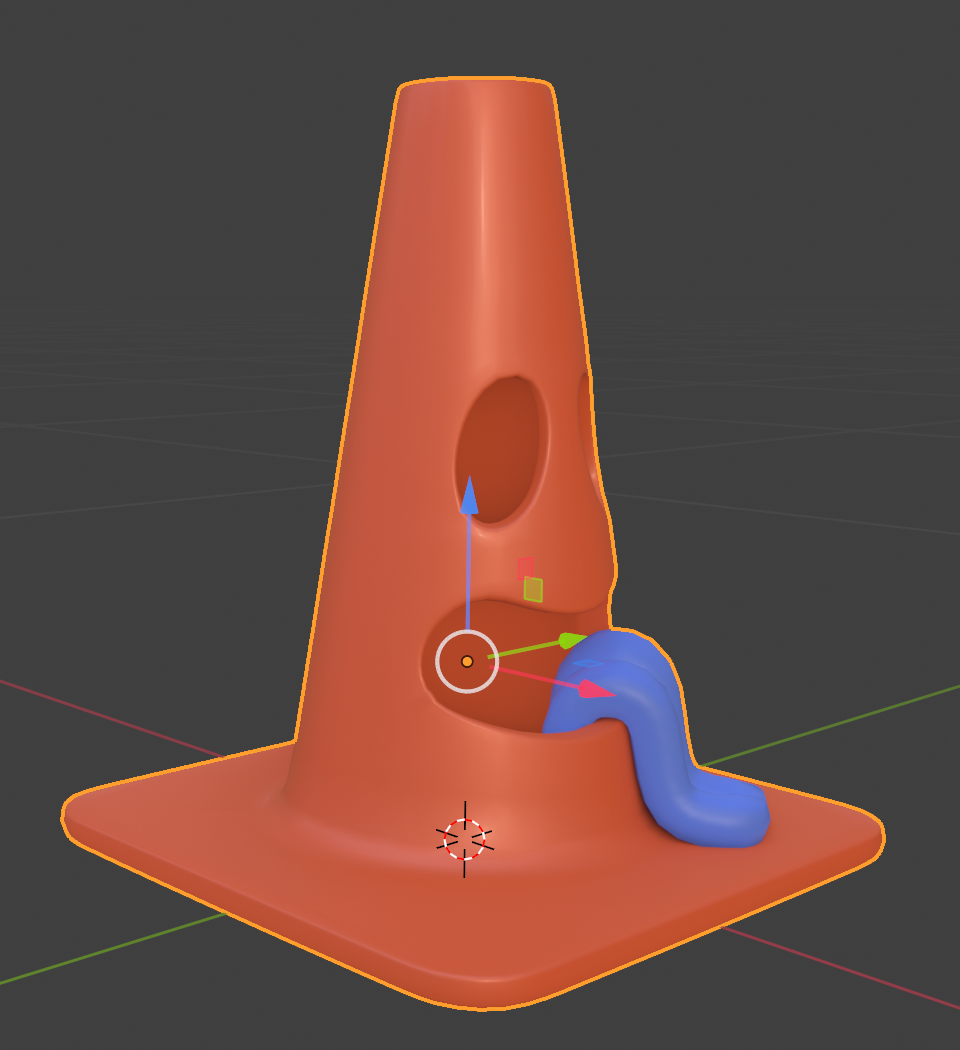
Position Model on World Origin
A Thing-max requires the 3D model to be sitting on the ground so it needs to be positioned just above the world origin.
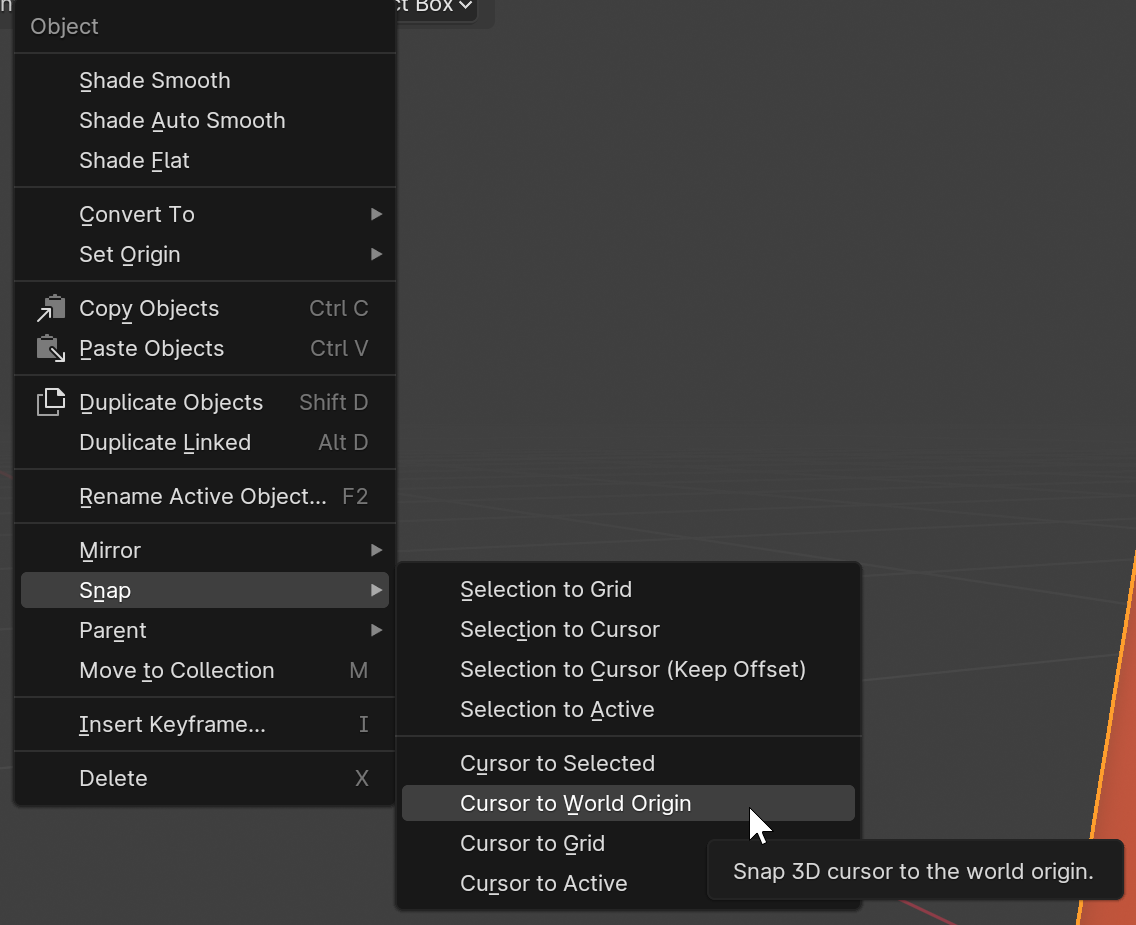
Move Cursor to World Origin
Right click in the scene and select Snap > Cursor to World Origin.
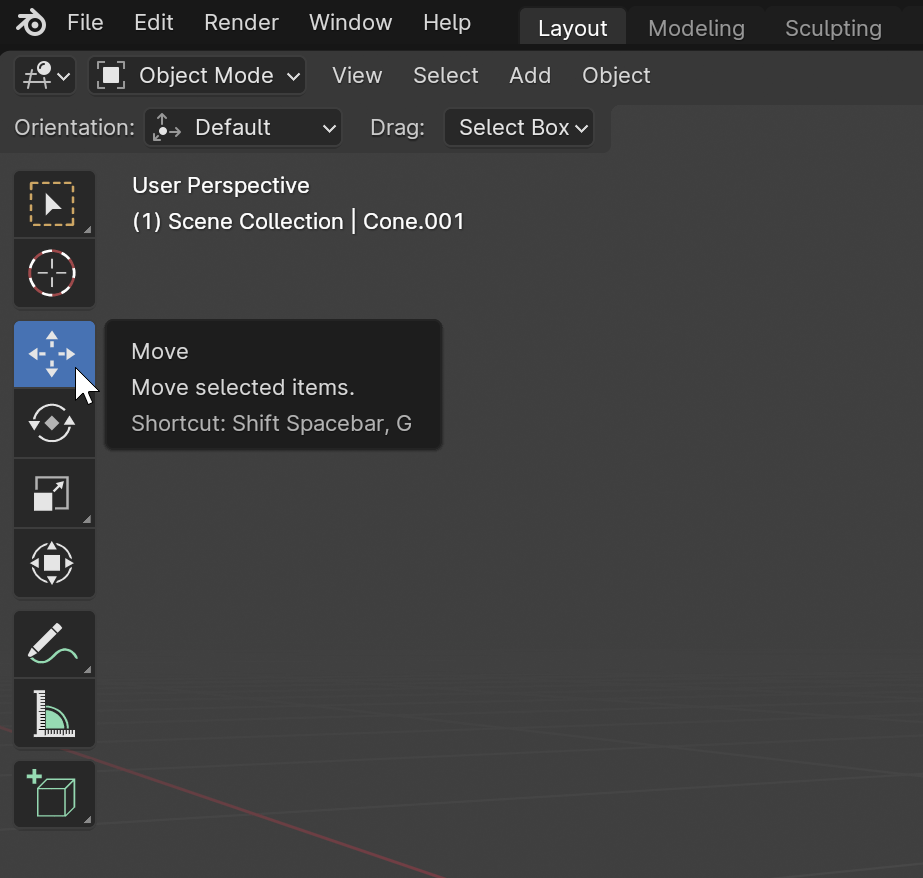
Enable Move Mode
Click the Move button at the top left to enable movement on the model.
Move Model on World Origin
Use the arrows to position the model on top of the world origin.
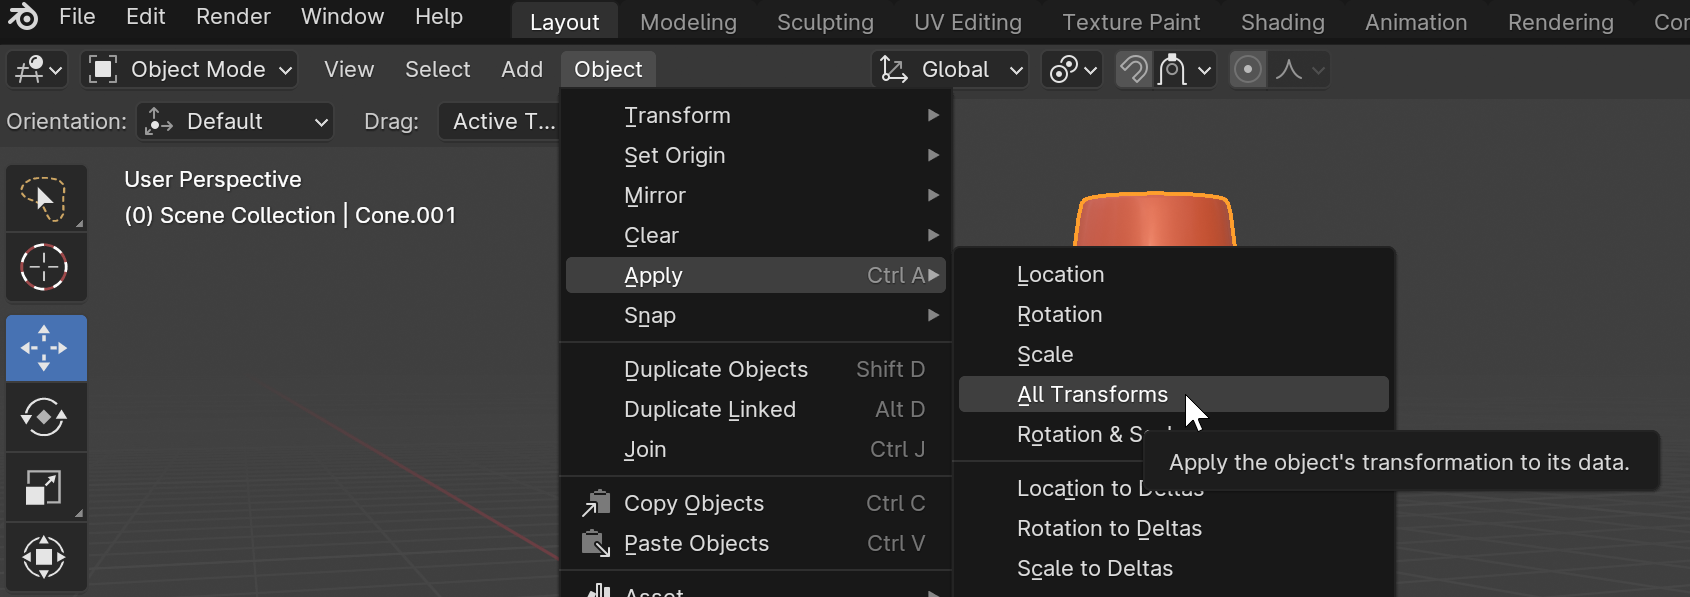
Apply Transforms
The current position of the 3D model needs to be baked so all the objects in the model keep this default position.
From the top menu dropdown, select the Object > Apply > All Transforms option.
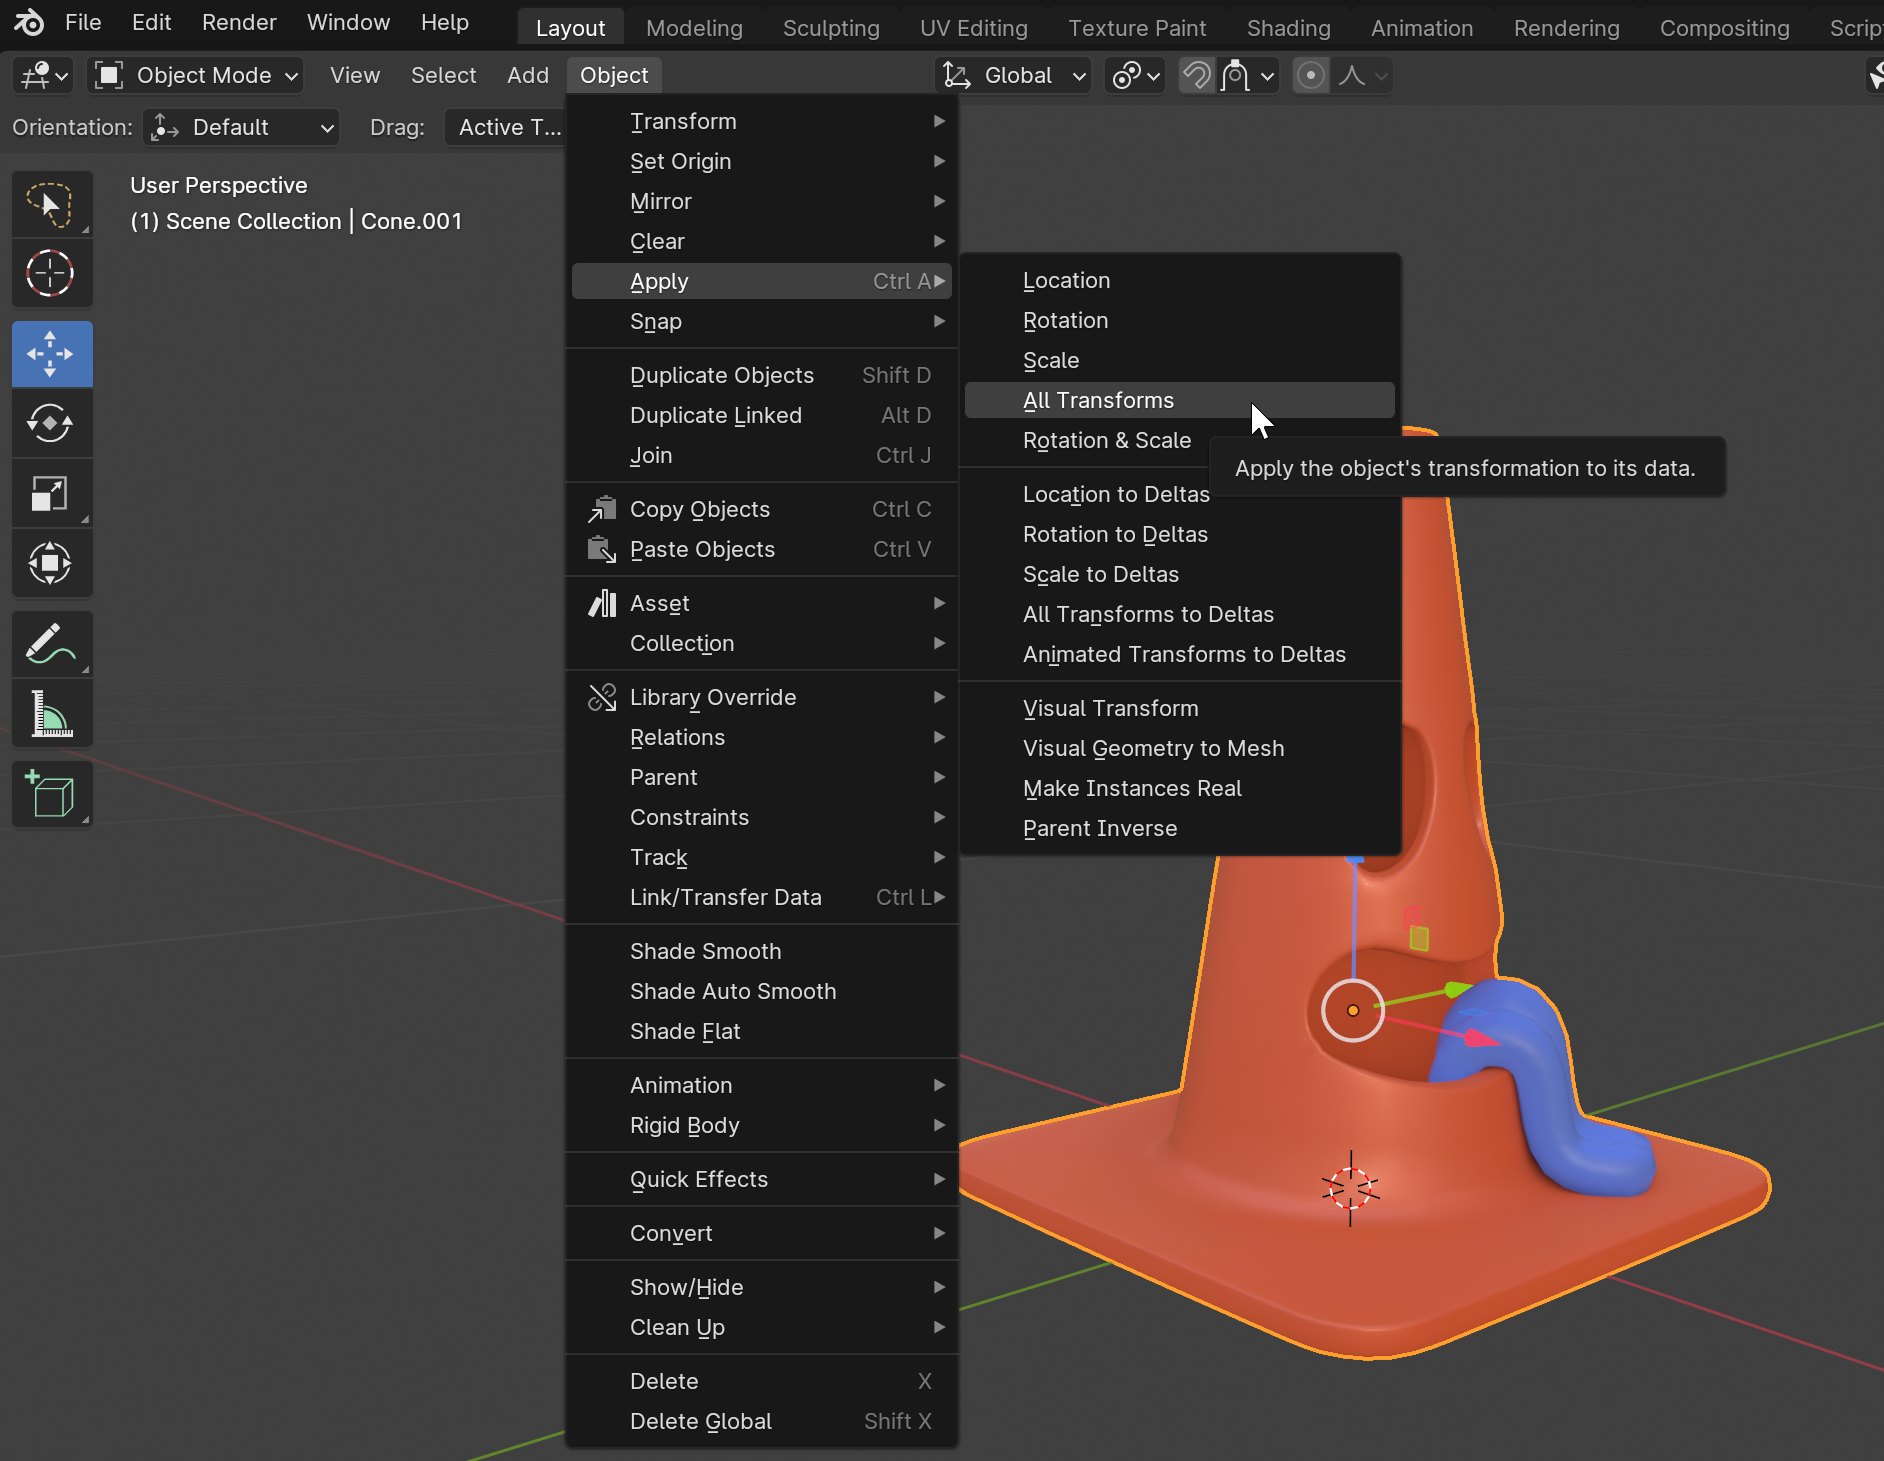
The movement arrows should move to the world origin after applying the transforms.
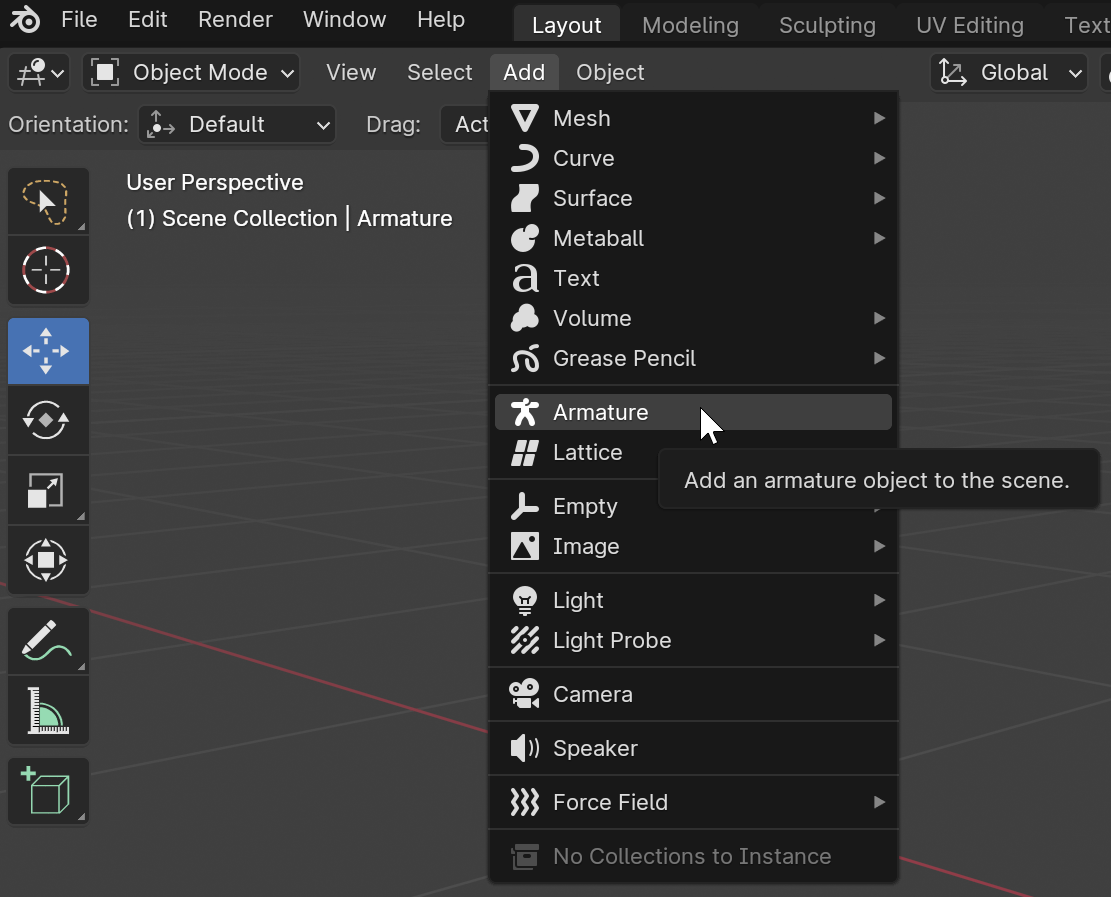
Add Armature
A Thing-max requires the 3D model to have a specific bone joint hierarchy so adding an armature is the first step. Then it will require three transforms: Root, Cog, and Bind.
Select the top menu dropdown Add > Armature. This will create an armature object in the scene with 1 bone.
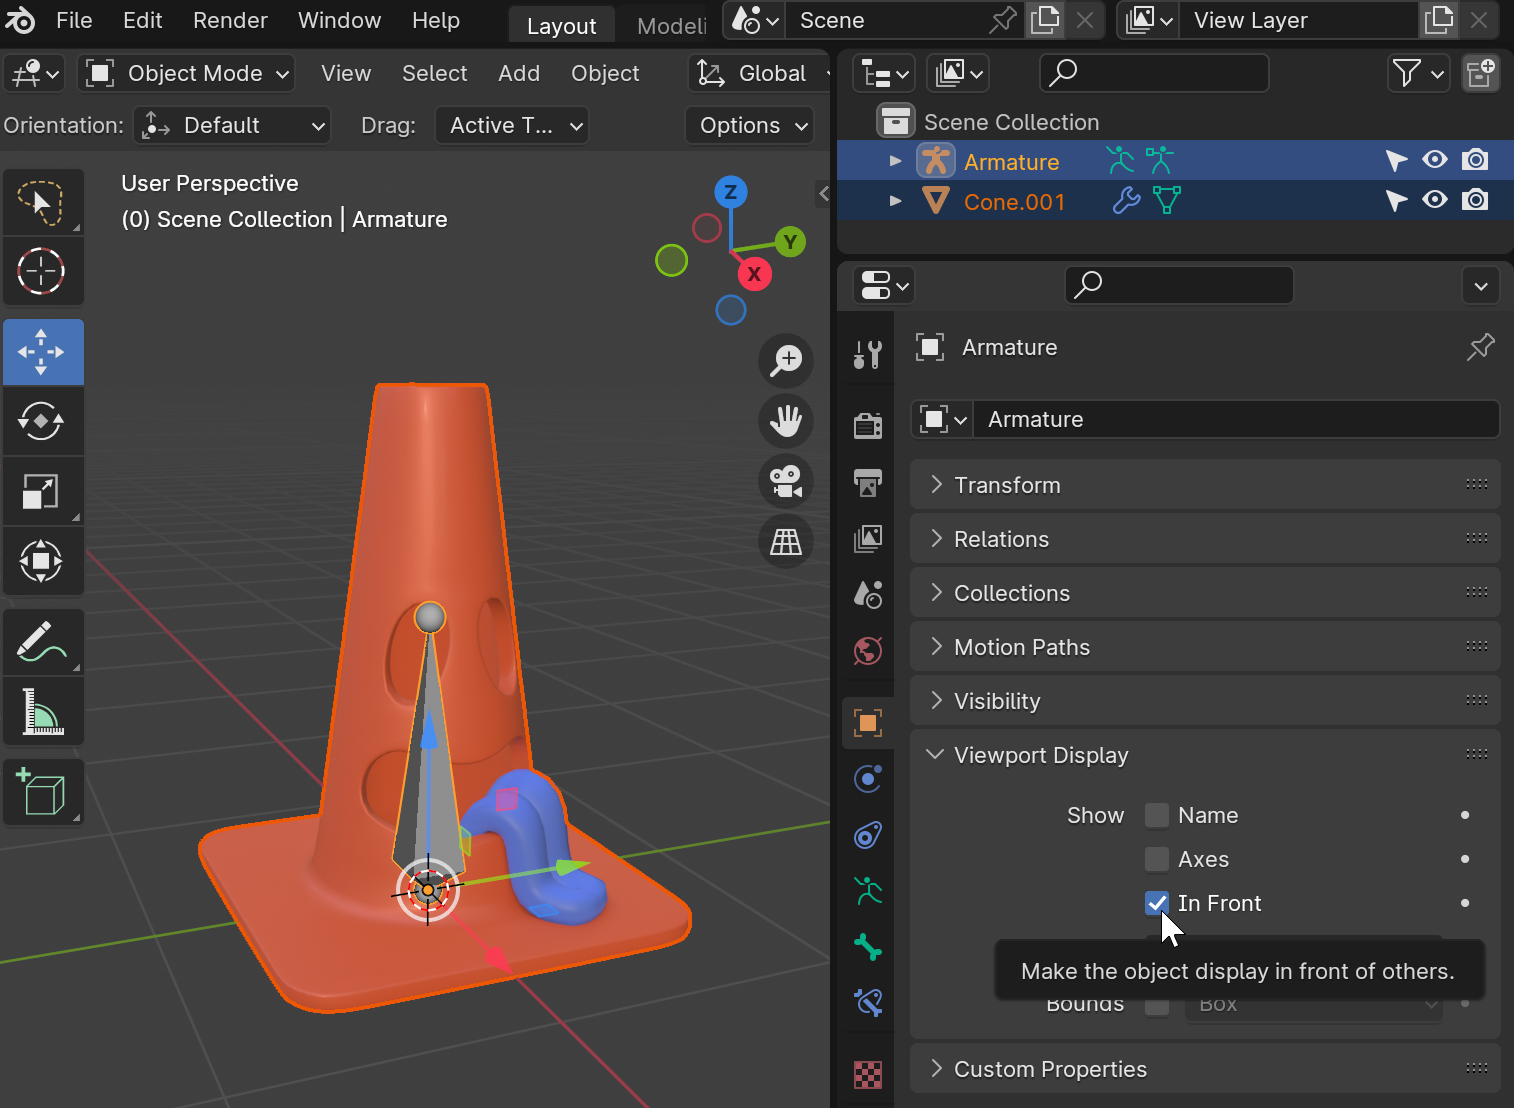
Display Armature in Front
The armature object may be hidden within the object. Select the Armature object in the Outliner window. In the Properties window, open the side menu category Object and enable the In Front property within the Viewport Display section.
Configure the Root Transform
The Root transform represents the object's pivot where it touches the ground. This should always be the world origin.
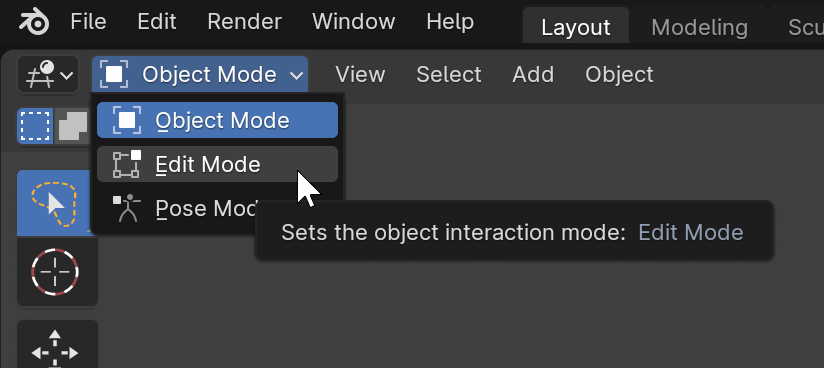
Switch to Edit Mode
Using the top left dropdown menu, switch from Object mode to Edit mode.
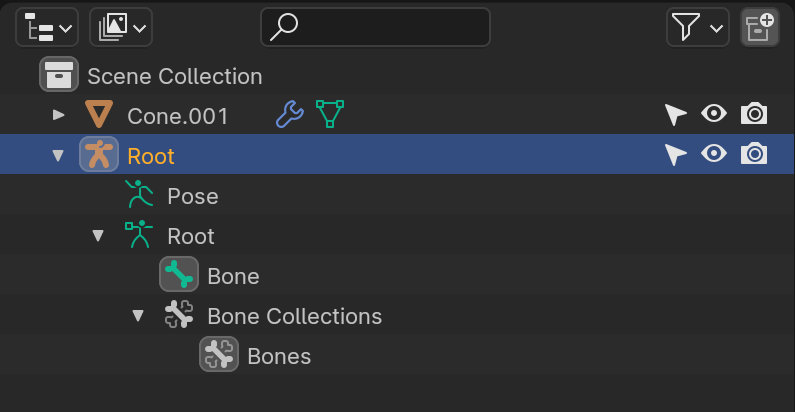
Rename the Root Transform
Since the 3D model is now centered at the world origin, simply rename both the parent and child Armature objects to Root in the Outliner window.
Configure the Cog Transform
The Cog transform is an acronym that stands for "center of gravity". This will be the rotation center of the object and varies on the object's shape. Blender has a convenient process to snap to the exact mathematical center of mass.
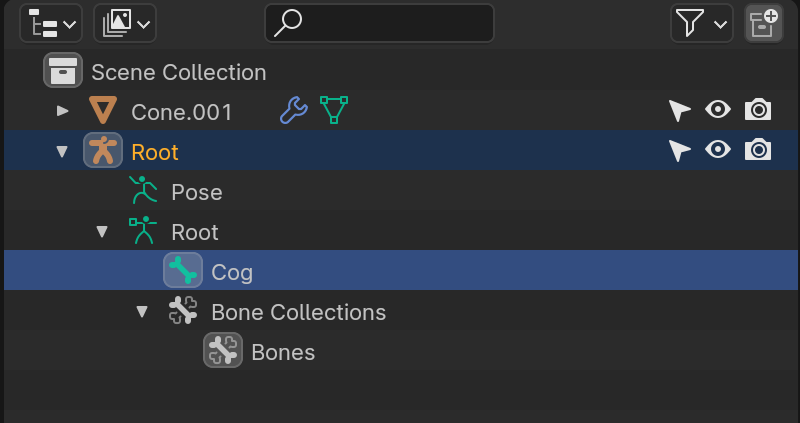
Rename the Cog Transform
Rename the Bone object to Cog and move it to the center of the object.
Set Origin to Center of Mass
Switch from Edit mode to Object mode using the top left dropdown menu. Select the 3D model and select the top menu dropdown Object > Set Origin > Origin to Center of Mass (Surface) option.

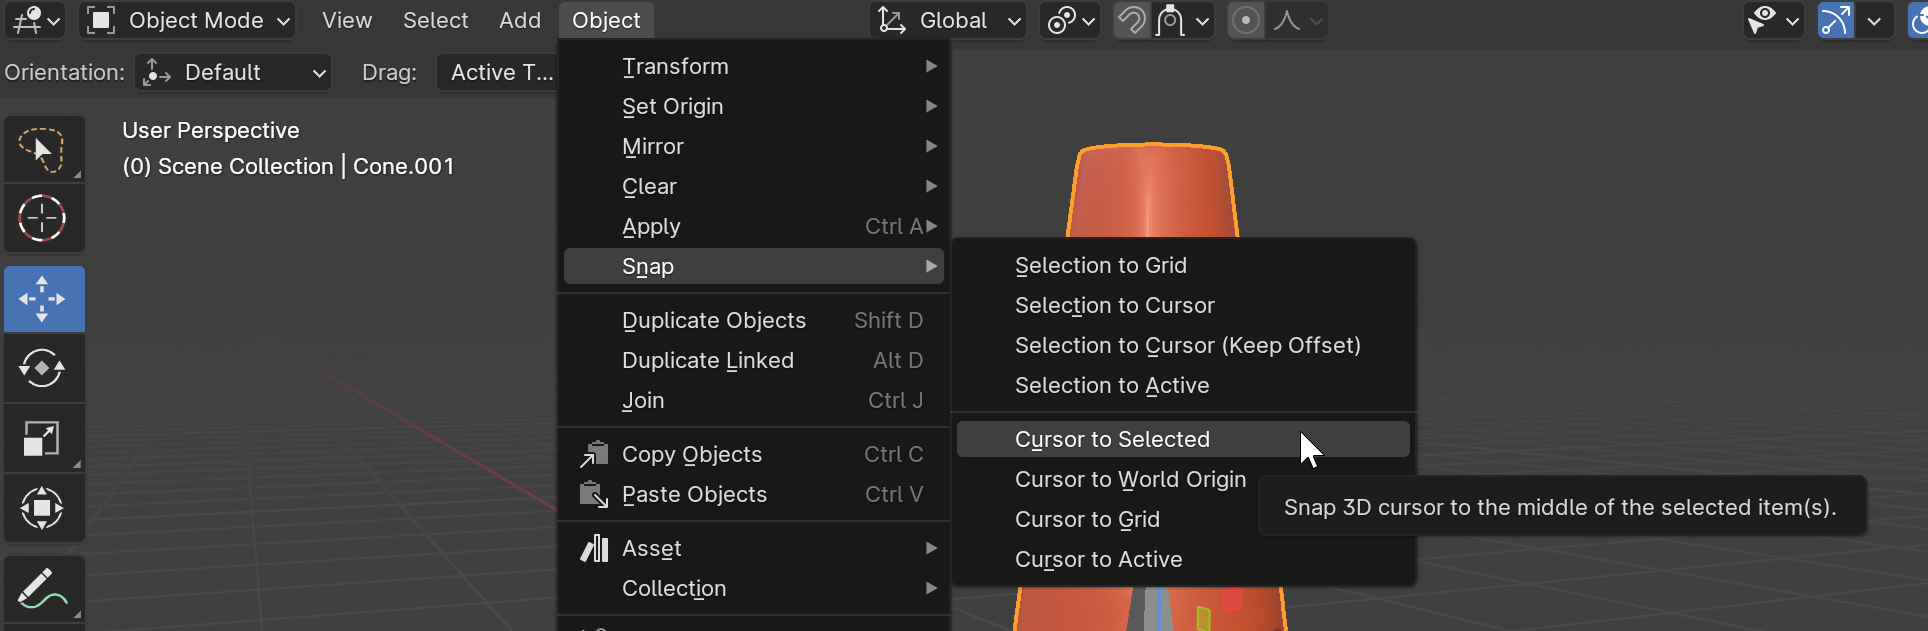
Set Cursor to Origin
Select the top menu dropdown Object > Snap > Cursor to Selected. The cursor will move to the center of mass.
Reset the Origin
Select the top menu dropdown Object > Apply > All Transforms. This will reset the 3D model's origin back to the world origin.
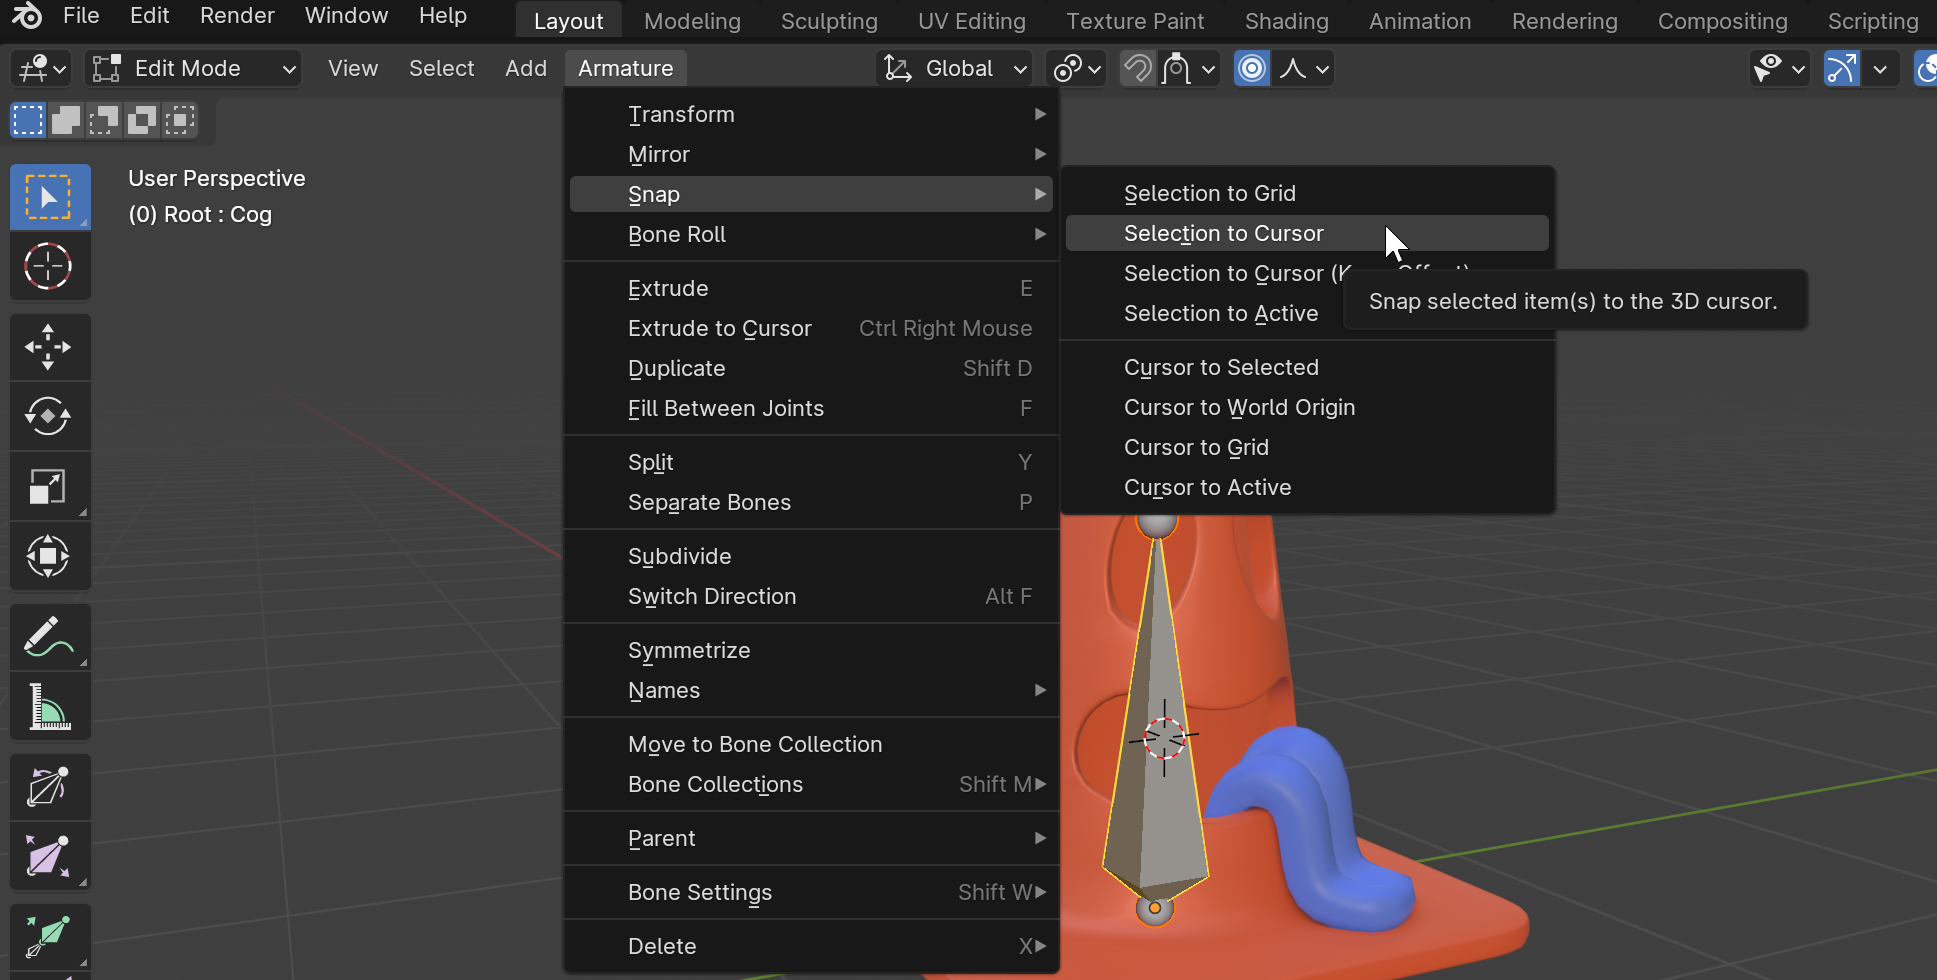
Move Cog to Cursor
Return to Edit mode. In the Outliner window, select the Cog object. Then select from the top dropdown menu Armature > Snap > Selection to Cursor.
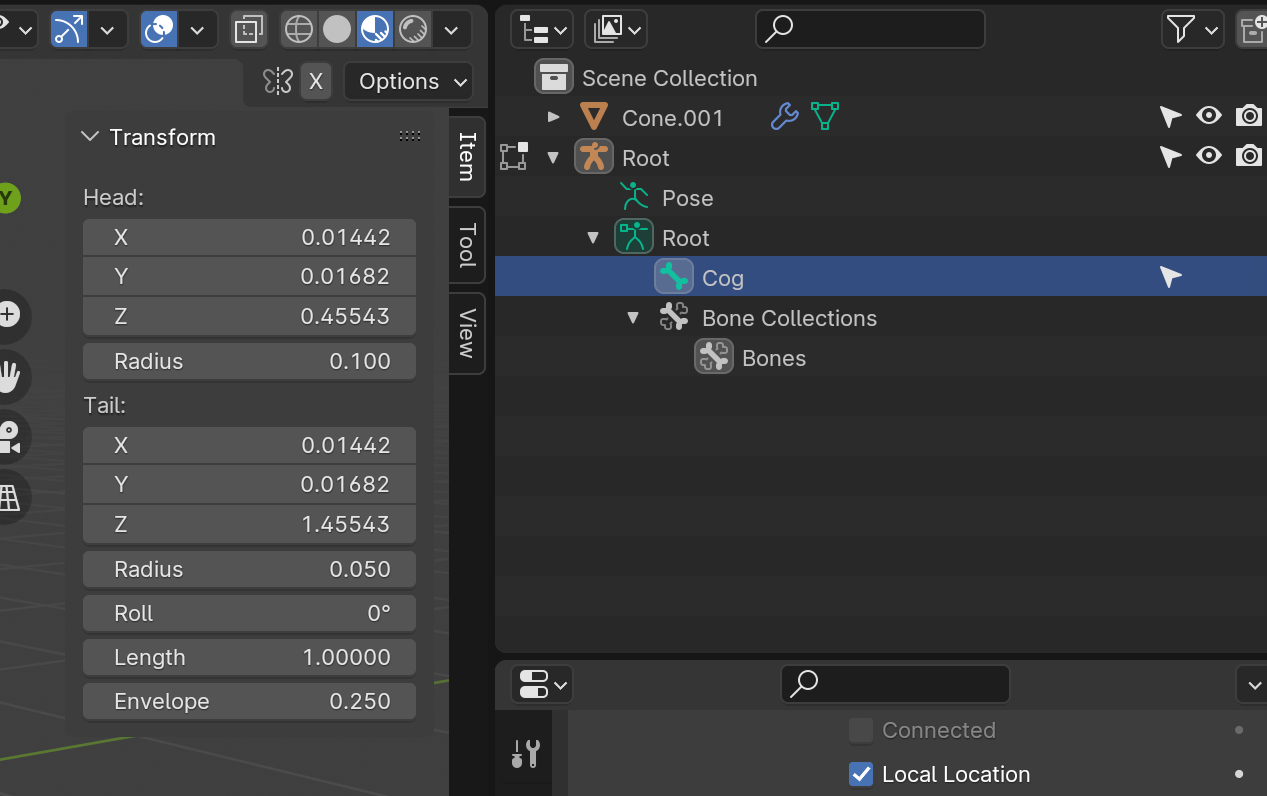
Fix Cog Transform
It's required that the Cog points straight up. Select the Cog object in the Outliner window and open the Transform properties at the top right of the viewport.
Make sure of the following:
- The Roll property is
0. - The Tail X and Y property match the Head X and Y property.
- The Tail Z property is greater than the Head Z property.
Configure the Bind Transform
The Bind transform is a child of the Cog transform and is placed in the same position as its parent. Bind is the bone that attaches all of the object's vertex weights to during skinning.
The Bind transform has no animation at runtime which allows the Thing-max to be controlled even if it's influenced by an animation.
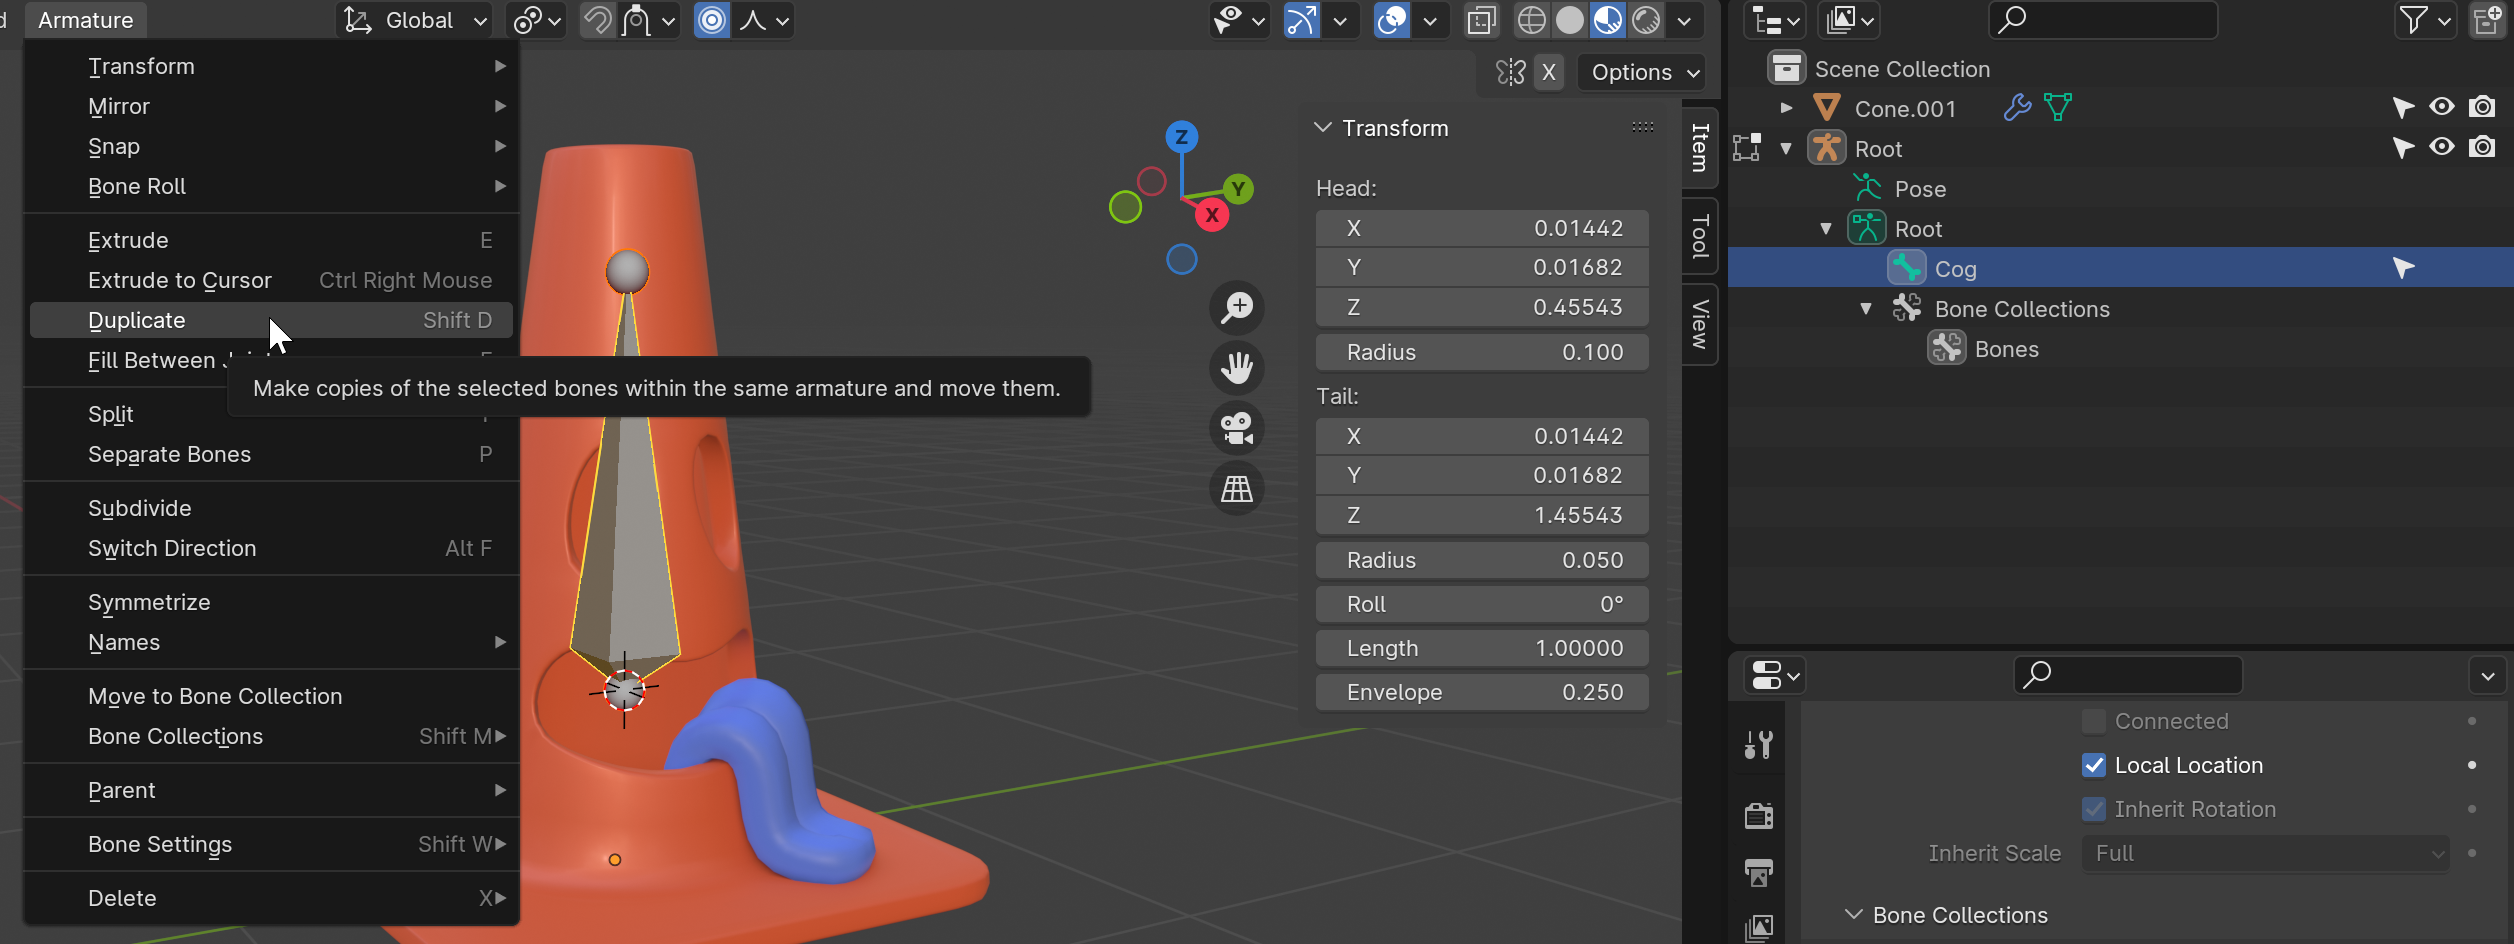
Duplicate the Cog
In the Outliner window, select the Cog object. Then select the top menu dropdown Armature > Duplicate.
Rename the Bind Transform
In the Outliner window, rename the duplicate Cog object to Bind. Make sure the Bind and Cog object's have the same head and tail transform properties.

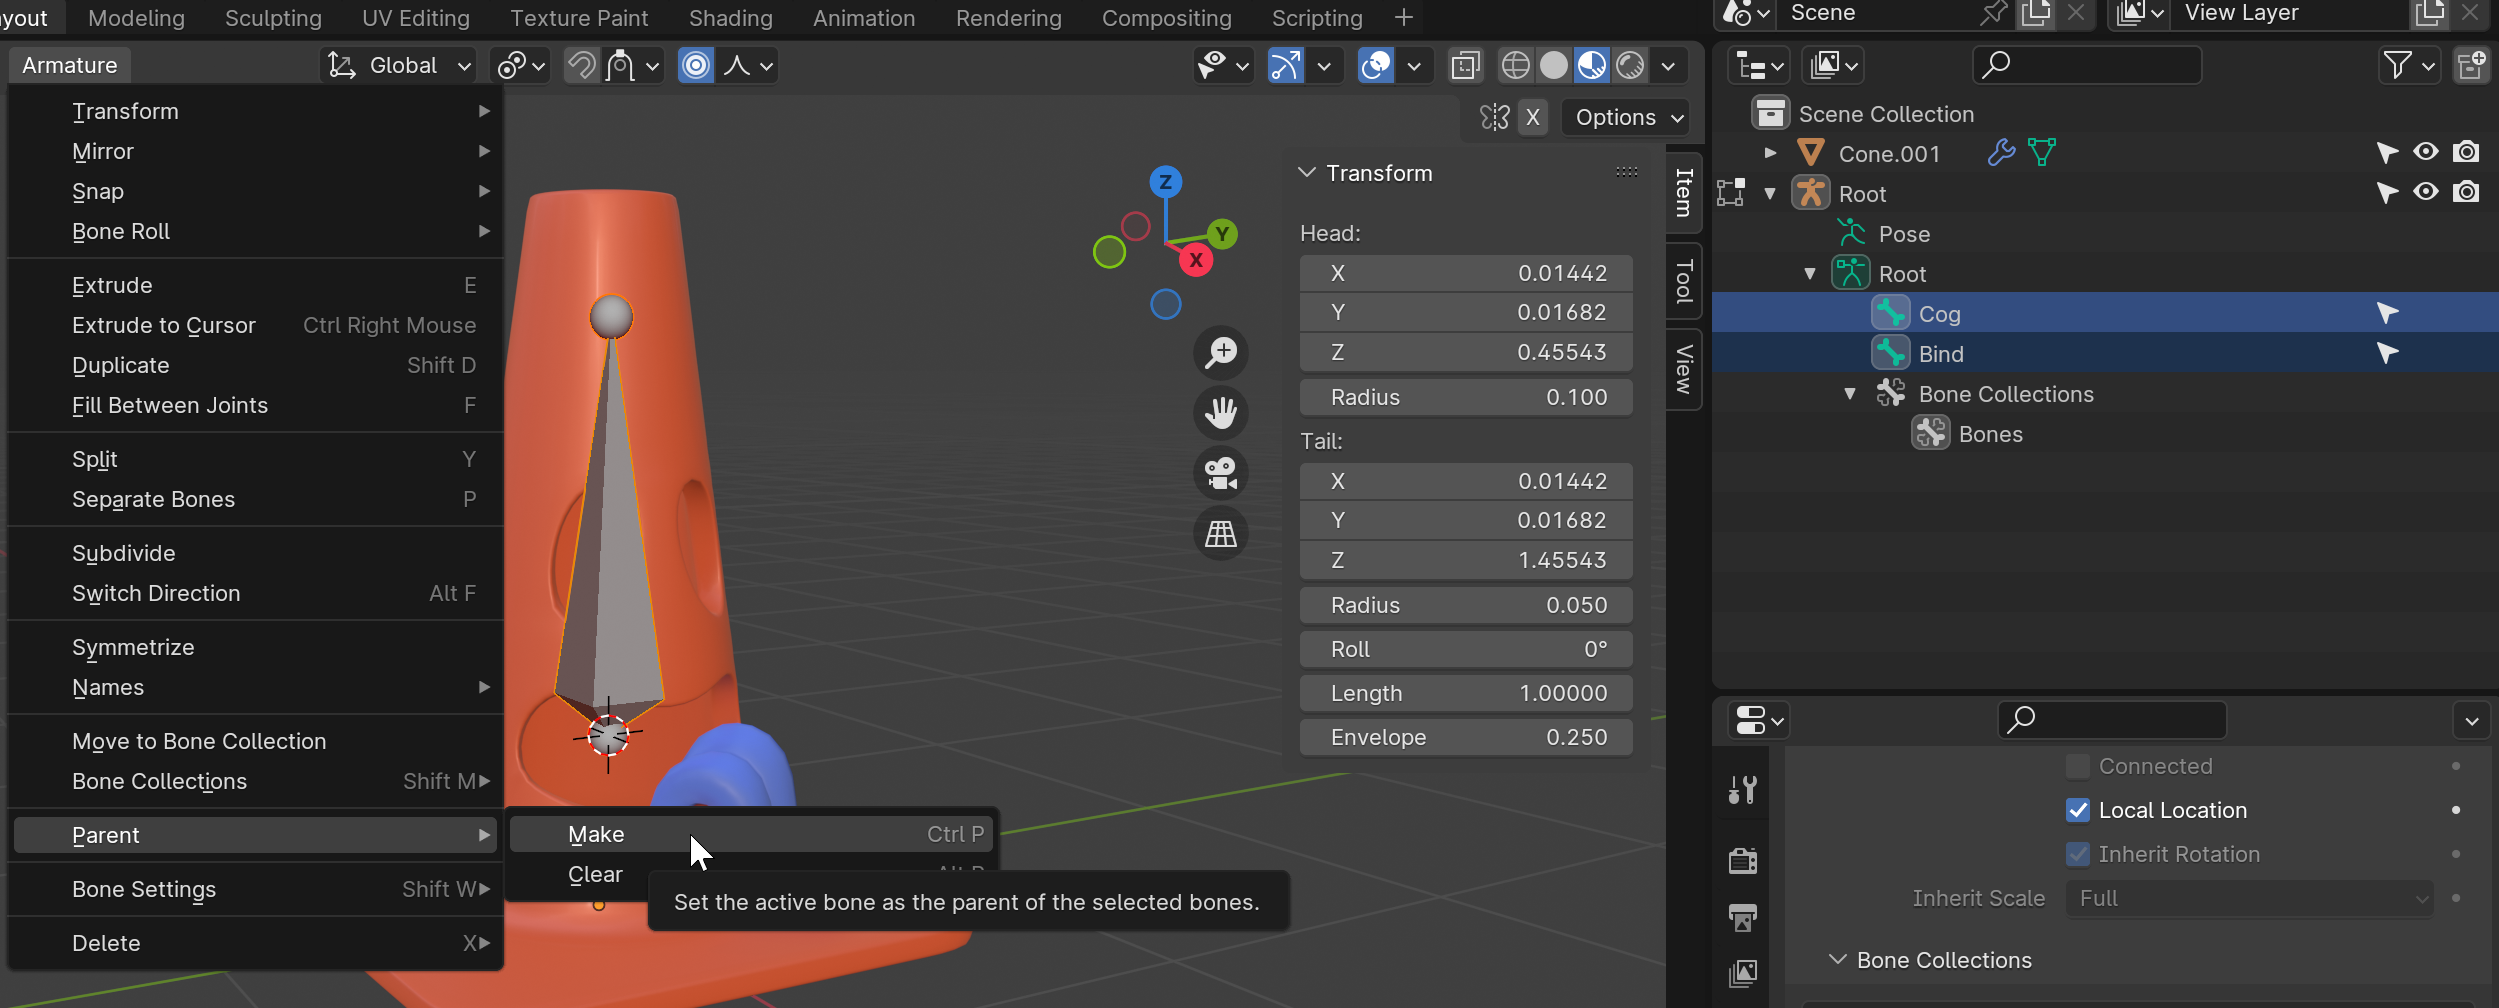
Parent the Bind to the Cog
The Bind transform needs to be parented to the Cog transform. Start by selecting the Bind object in the Outliner window. Then hold the Ctrl key and select the Cog object. The select the top menu dropdown Armature > Parent > Make. Select the Keep Offset option.
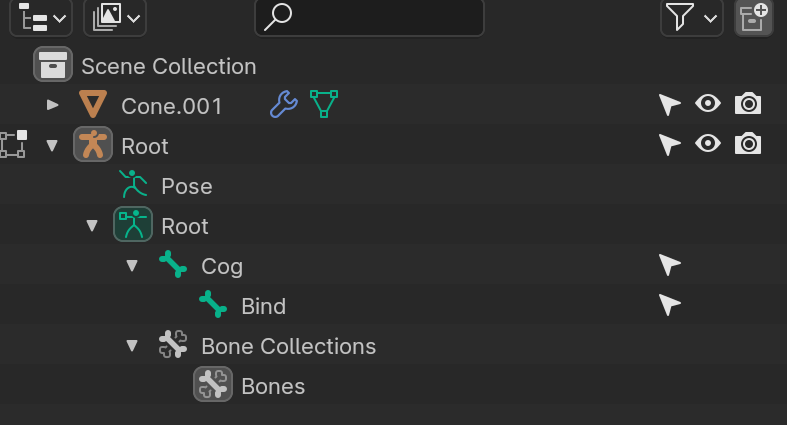
Confirm the Bone Hierarchy
The bone hierarchy in the Outliner window should look like so:
Skin the Mesh to the Bind
The last step is to skin the mesh to the Bind transform.
Disable Deform for the Cog
The Cog transform needs to avoid having vertex weights when the mesh is skinned. Switch to Object mode. In the Outliner window, select the Cog object. In the Properties window, open the side menu category Bone and deactivate the Deform option.
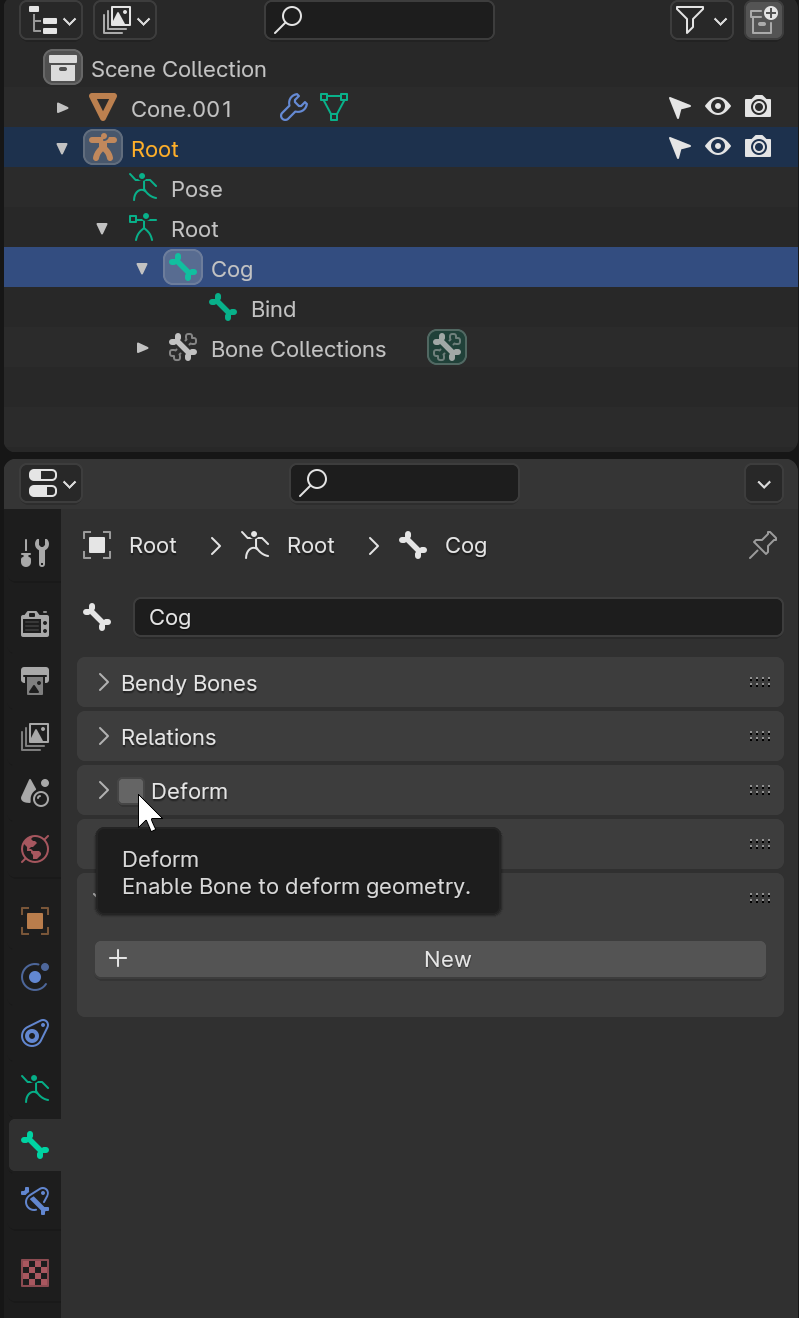
The Deform option should be activated for the Bind transform. This is the only bone in the armature that will have vertex weights.
Skin the Mesh to the Armature
In the Outliner window, select the 3D model object. Then hold Ctrl key and select the main parent Root object. Select from the top menu dropdown Object > Parent > Armature Deform > with Automatic Weights.

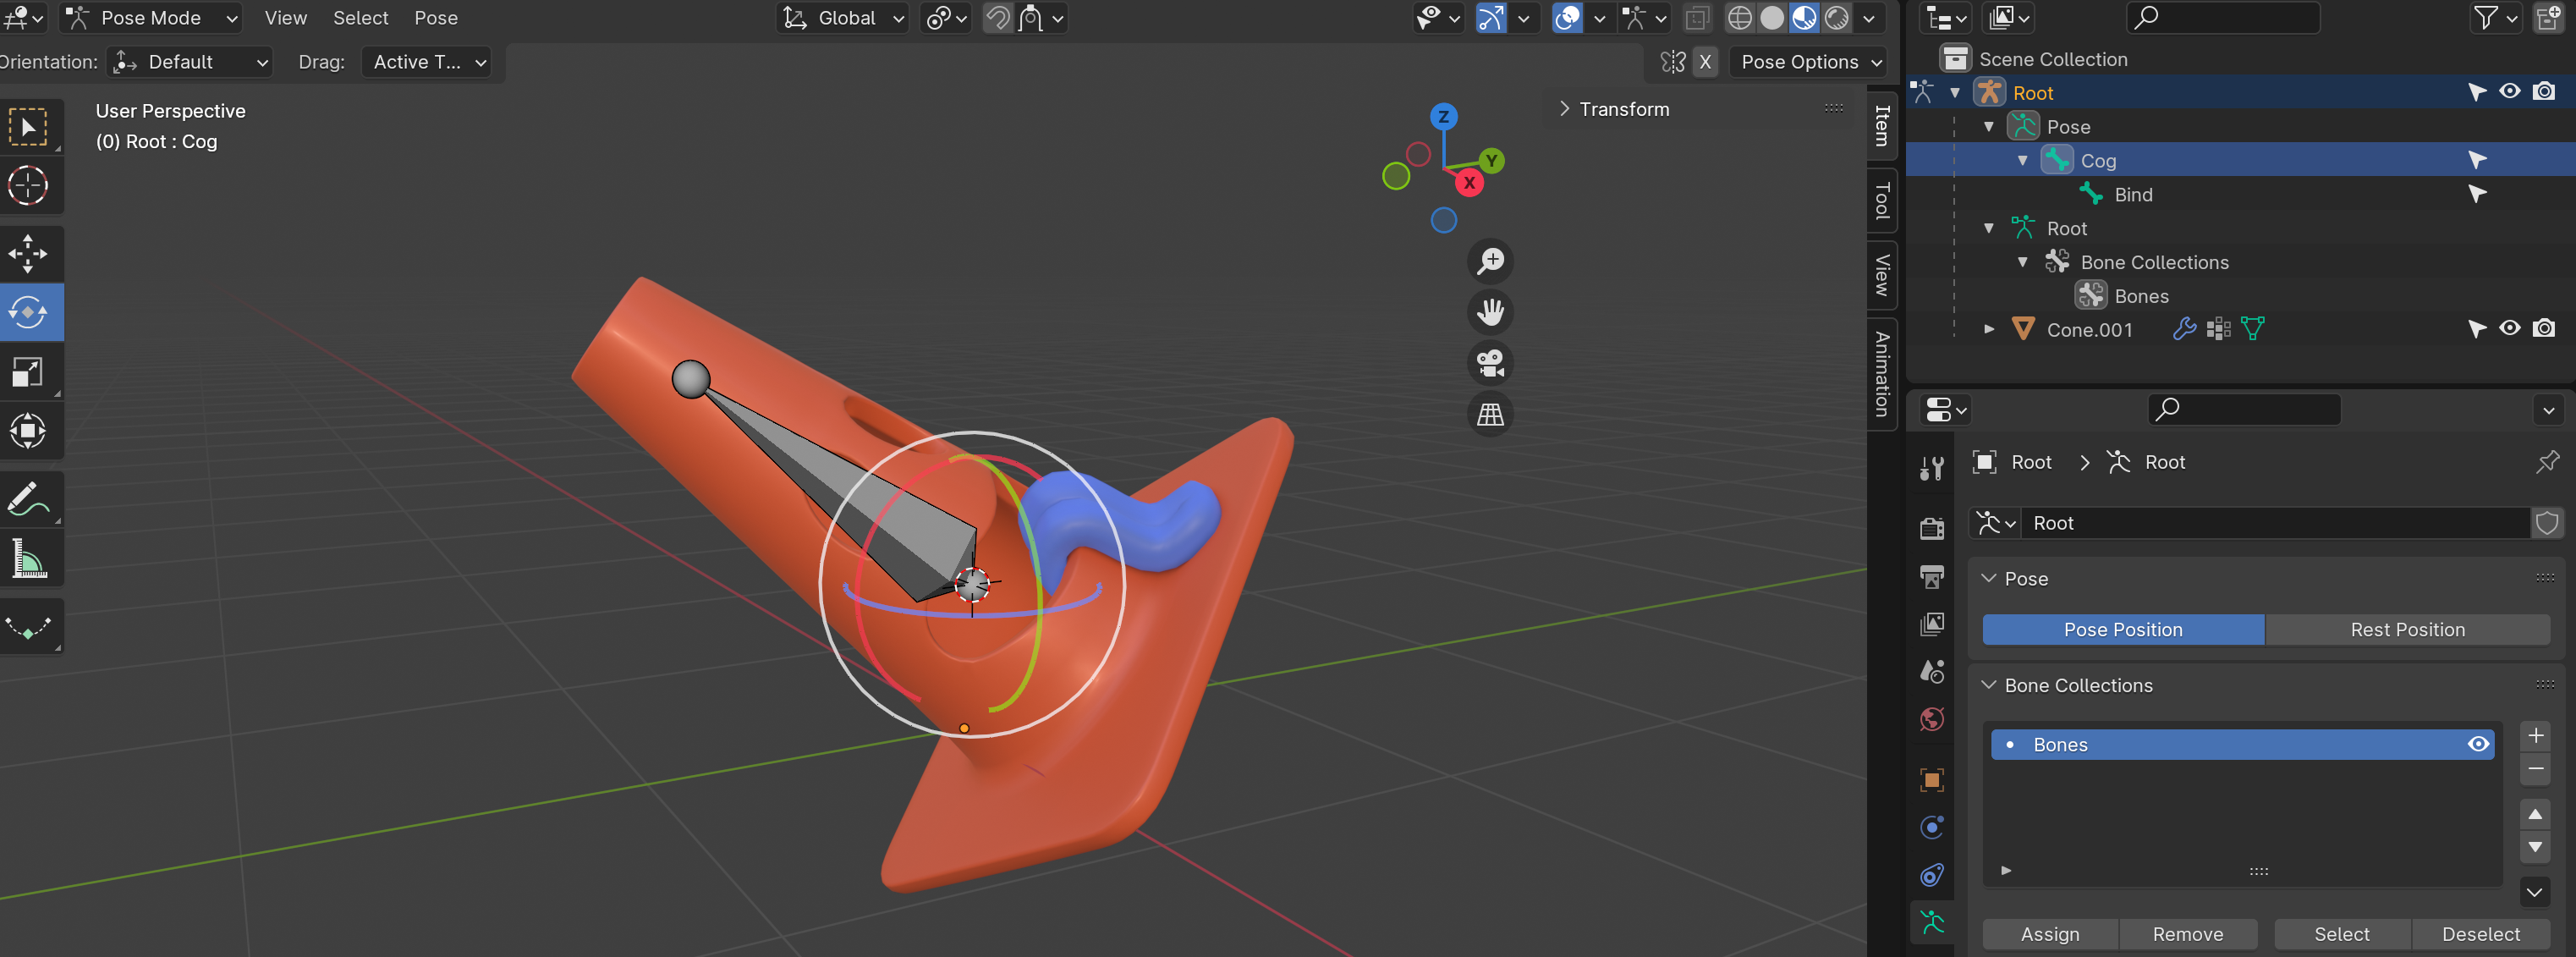
Confirm the Skinning
The 3D model object should now be a parent of the Root armature object. Switch to Pose mode using the top left dropdown. The 3D model should move, rotate, and scale according to any transforms done to the bone transforms.
Export the Model
The 3D model is ready to exported from Blender as an FBX file.
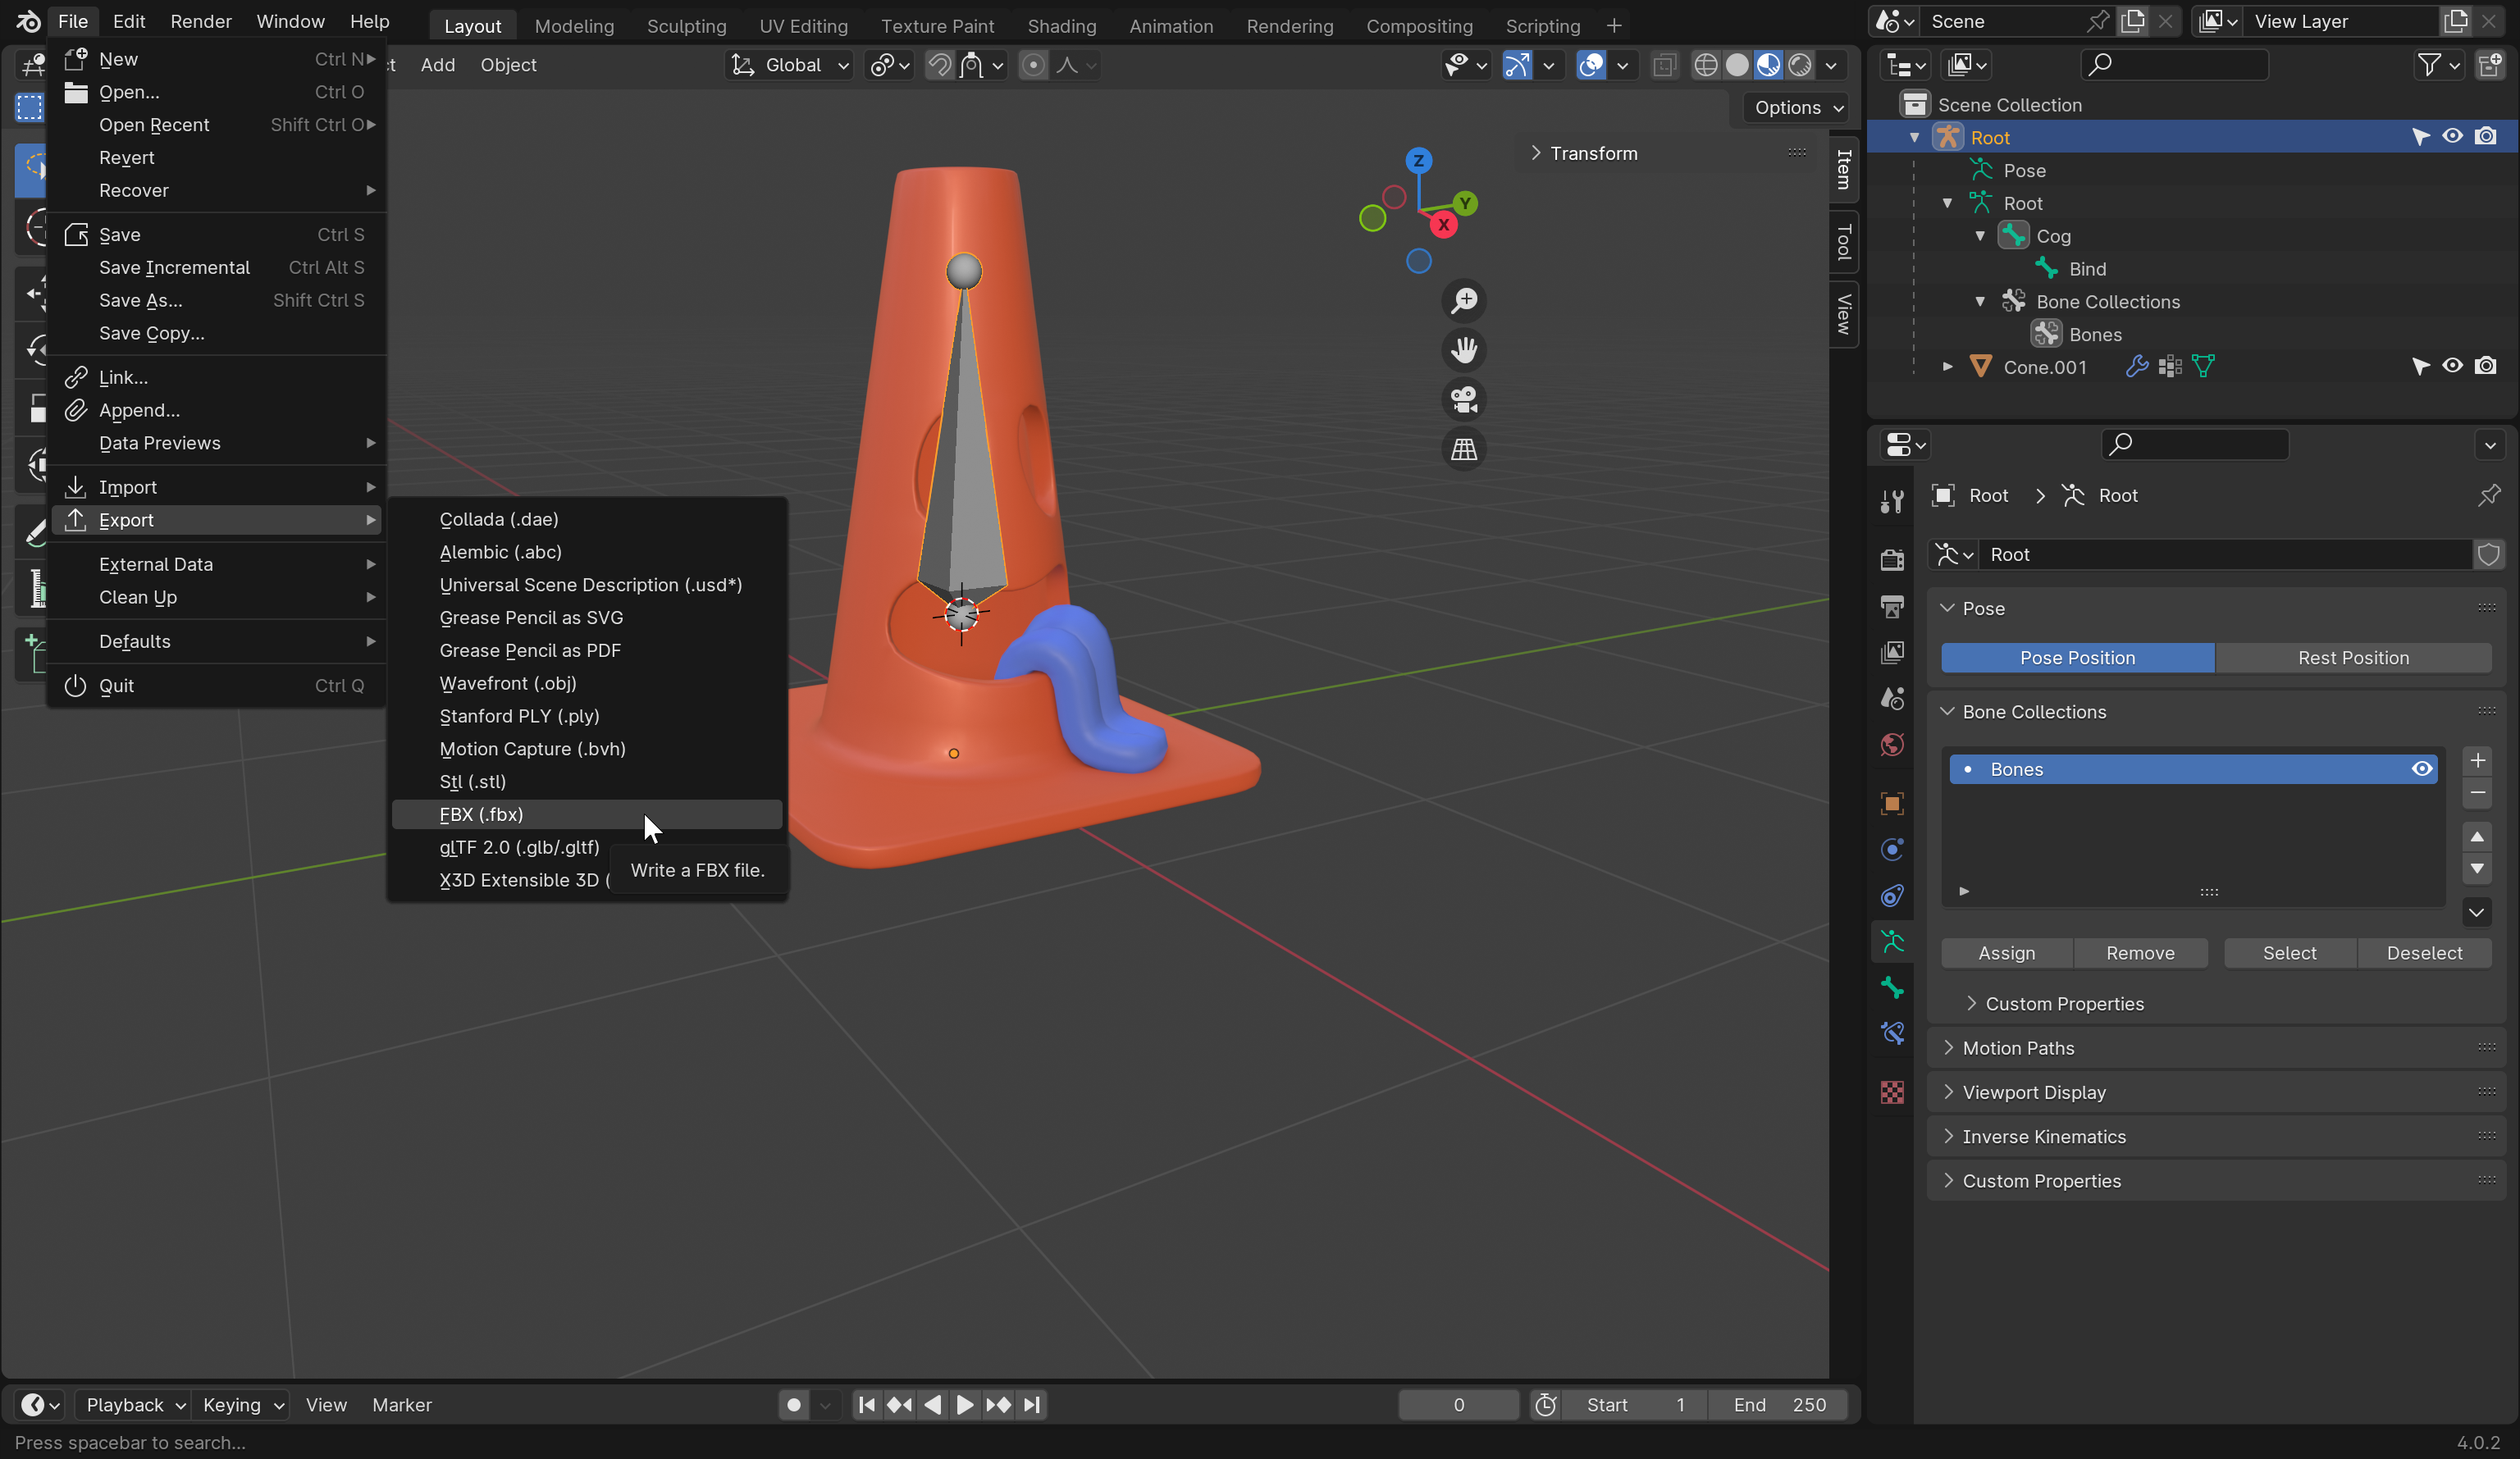
Export as a FBX
In the Outliner window, select the main parent Root object. Then select the top menu dropdown File > Export > FBX (.fbx).
Configure Operator Presets
There are several compatibility options when exporting an FBX file under the Operator Presets section.
Here are the recommended settings to use:
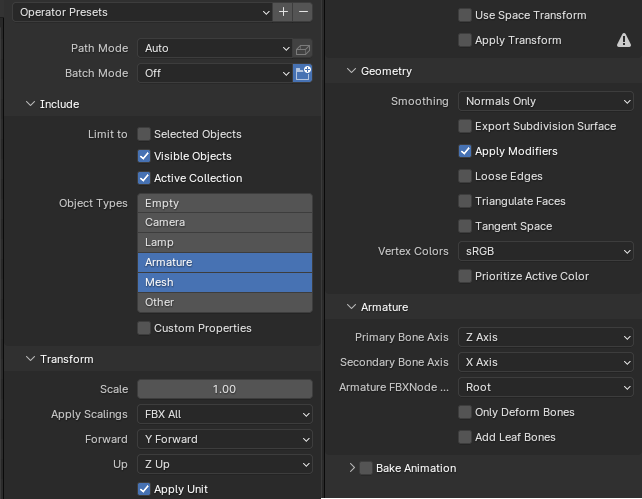
The Geometry category properties are the default values.
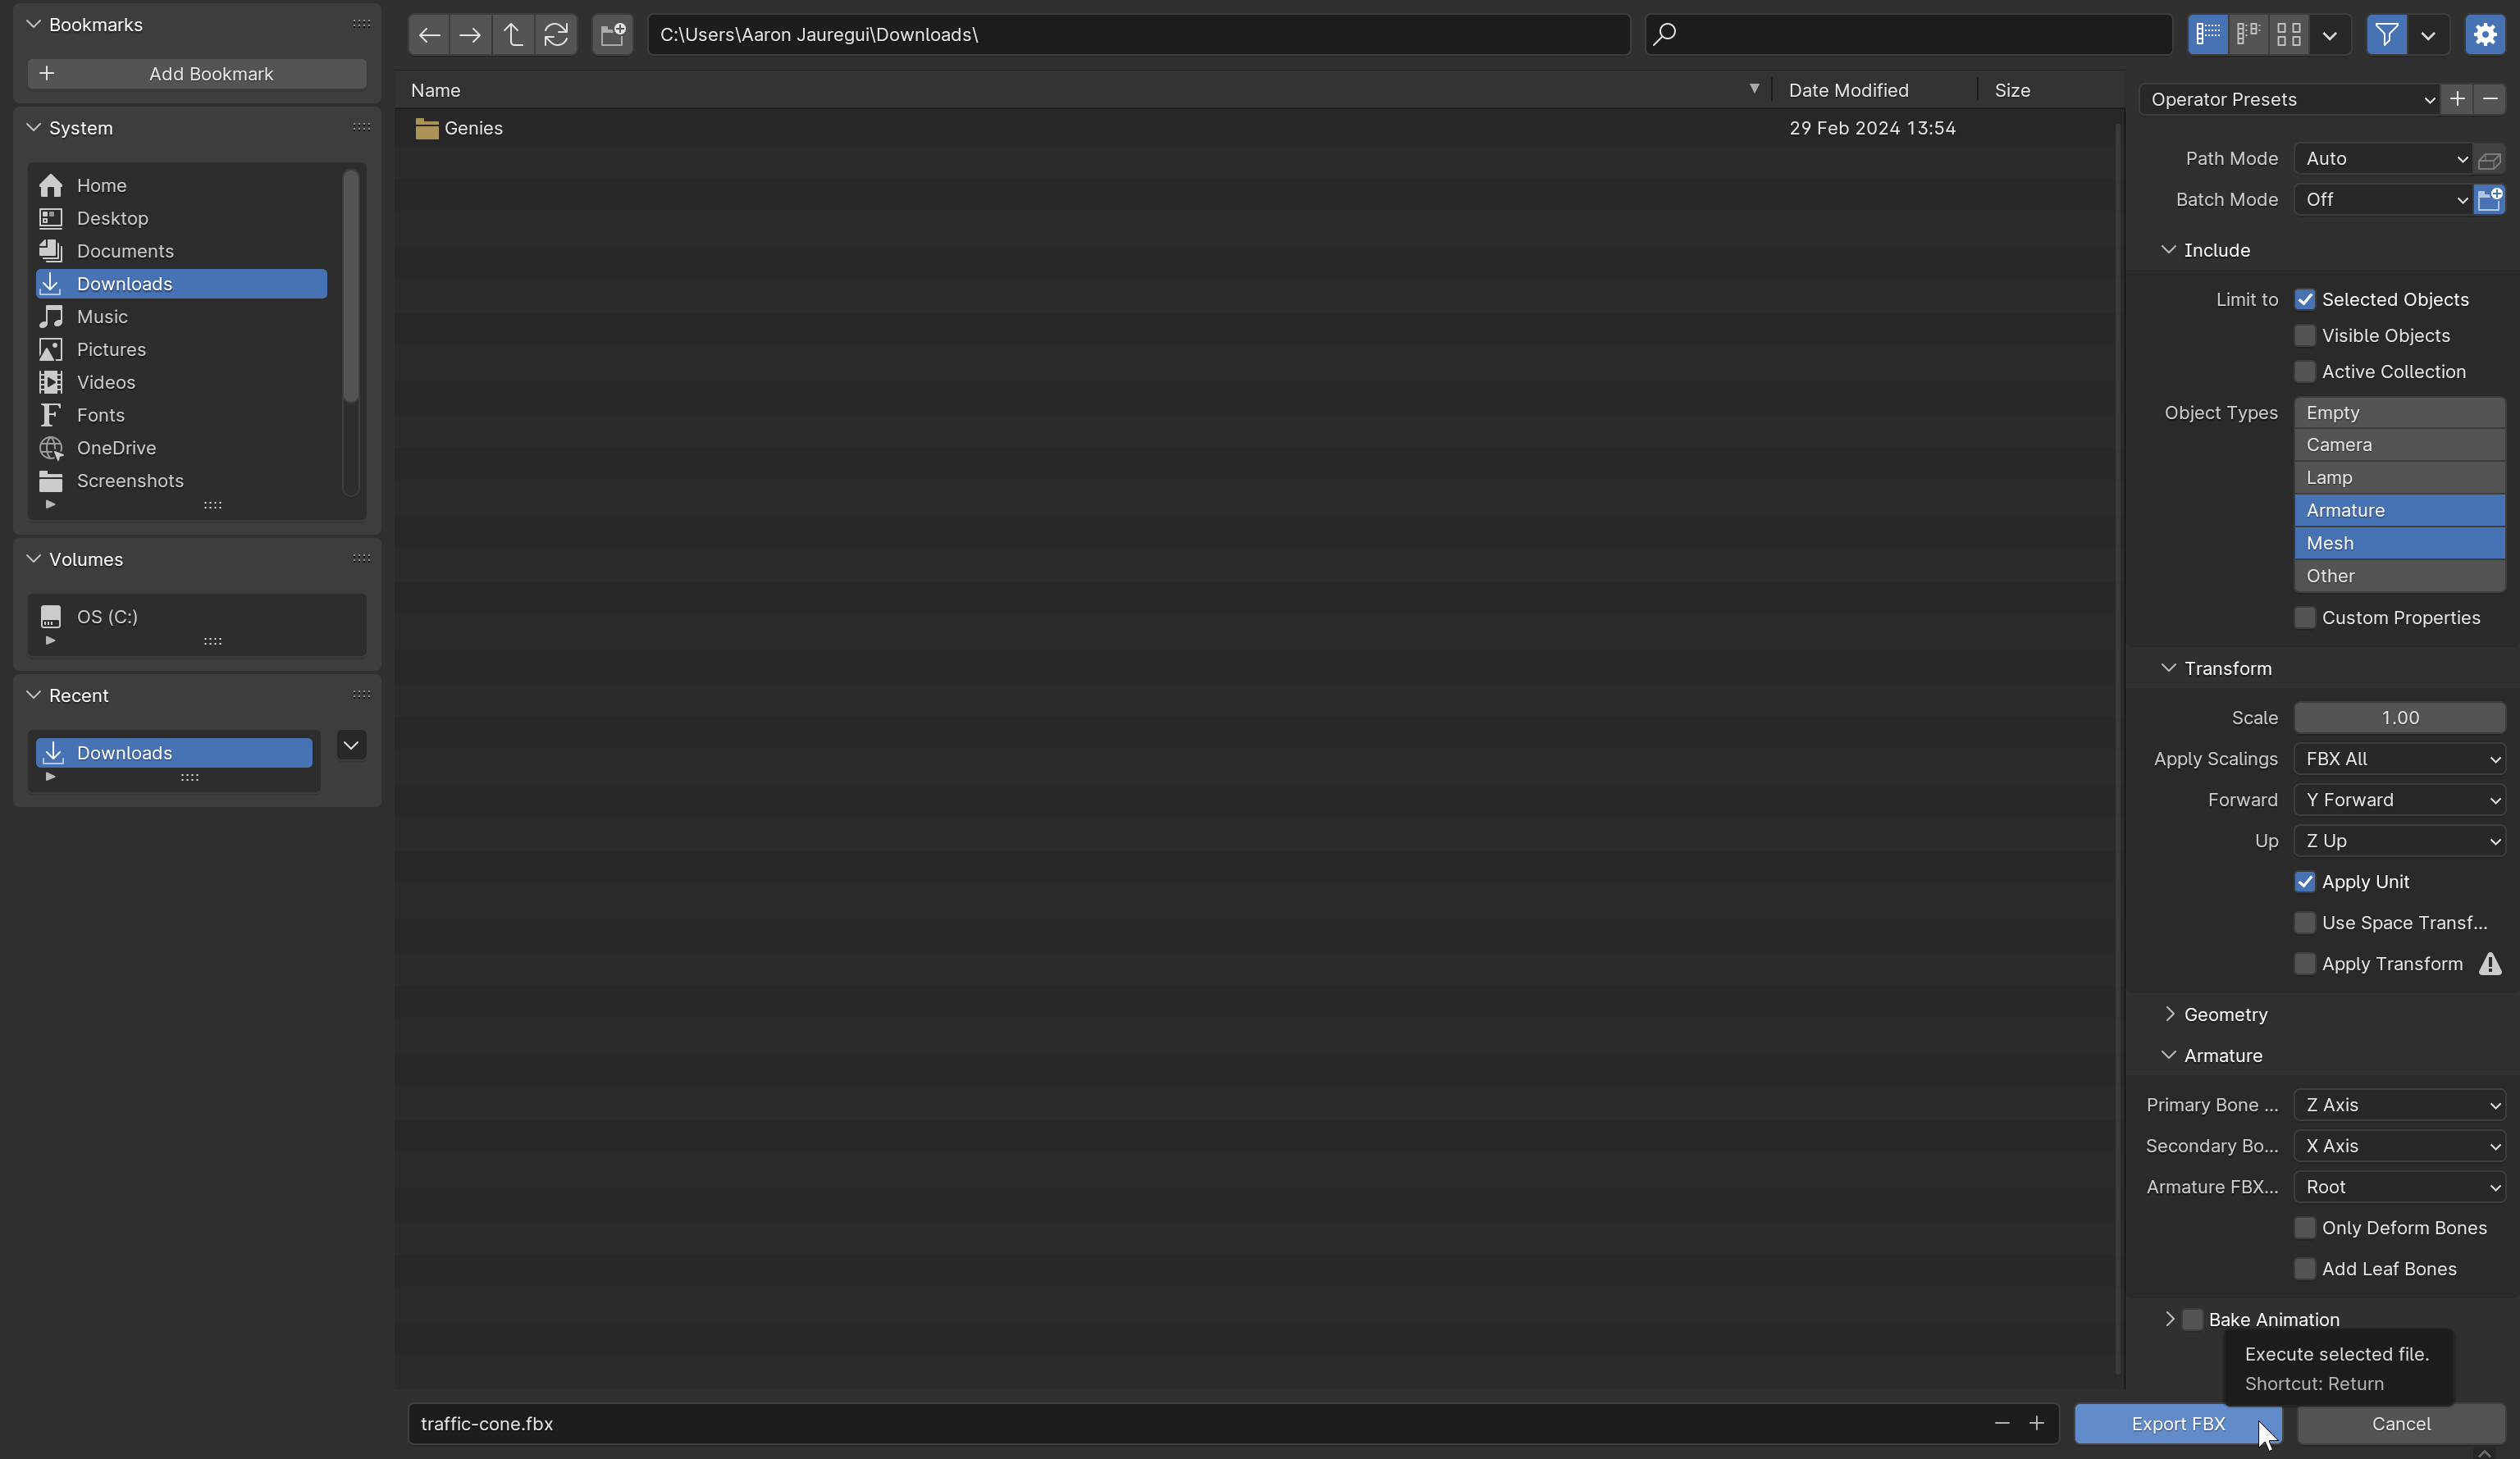
Click the Export Button
Choose a folder path where you can easily find the exported file. Give the file a name at the bottom and click the blue Export FBX button to the right of it.
Import into Unity
In Unity, right click in the Project window and select the Import New Asset... option. Find and select the exported FBX file.
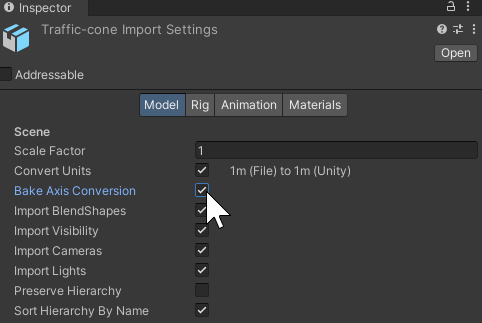
Enable Bake Axis Conversion
Then select the imported asset and open the Inspector window. In the Model section, enable the Bake Axis Conversion property. Then click the Apply button at the bottom. This will remove arbitrary rotations from the model.
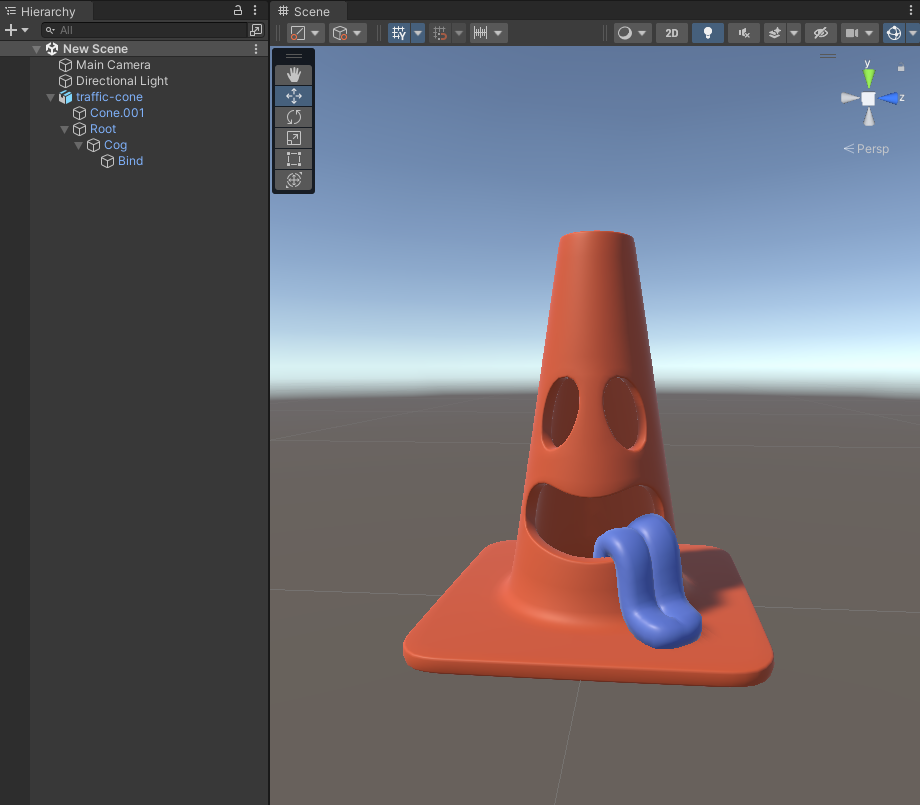
Confirm the Hierarchy
Drag the imported asset into the Hierarchy window. Expand the parent nodes to see if it contains the three bone joints: Root, Cog, and Bind.
Conclusion
The Thing model is now complete!
Check out the Thing-max tutorial for more information on how to turn this Thing model into a Thing-max.